
Dell G3 Hinge & Back Cover Replacement: Complete Repair Guide (Step-by-Step)
Aug 05, 2025
1. Dell G3 Pre-Repair: Valuation & Essential Tools
💰 Laptop Valuation Factors
- Hinge Condition:
- Intact hinges: +$150-$200 value
- Minor cracks: +$50-$80 value
- Back Cover Damage:
- Grade A (no cracks): +$100
- Grade B (hairline cracks): +$40
🛠️ Required Repair Tools
| Tool | Purpose | Resale Impact |
|---|---|---|
| PH00 Screwdriver | Hinge screws | Prevents stripped screws (+$75 value) |
| Plastic Pry Tools | Case separation | Avoids case damage (+20% resale) |
| ESD Mat | Component protection | Professional repair proof |
🔍 Pre-Repair Checklist
- Document Condition:
- Take high-res photos of damage
- Record Service Tag
- Safety Prep:
- Disconnect battery
- Discharge capacitors
📈 Repair Value Analysis
- OEM Parts Premium:
- Genuine Dell hinges: +30% value
- Aftermarket parts: Lower resale
- Professional Repairs:
- Documented repairs: +25%
- Include before/after photos
2. Dell G3 Bottom Cover Removal: Safe Access Guide
⚠️ Pre-Removal Safety Steps
- Power Down:
- Shut down Windows completely
- Disconnect power adapter
- Component Protection:
- Ground yourself with ESD strap
- Use clean, flat workspace
🔧 Step-by-Step Removal
- Remove 10 Screws:
- 8x 6mm screws (marked "M2.5")
- 2x 8mm screws near hinges
- Use PH00 bit (magnetic preferred)
- Release Plastic Clips:
- Start at front edge (near touchpad)
- Use plastic pry tool at 30° angle
- Lift Cover:
- Raise rear edge first (15° angle)
- Watch for stubborn clips near vents
🛡️ Preventing Common Damage
| Risk Area | Prevention Method | Resale Impact |
|---|---|---|
| Plastic Clips | Alternate sides every 2cm | Intact clips = +$75 value |
| Paint Scratches | Microfiber cloth under tools | Flawless finish = +$50 |
🔍 Visible Components
- Cooling System:
- Dual fans with 2 heat pipes
- Thermal paste inspection points
- Upgrade Points:
- 2x RAM slots (clear access)
- M.2 SSD slot with heatsink
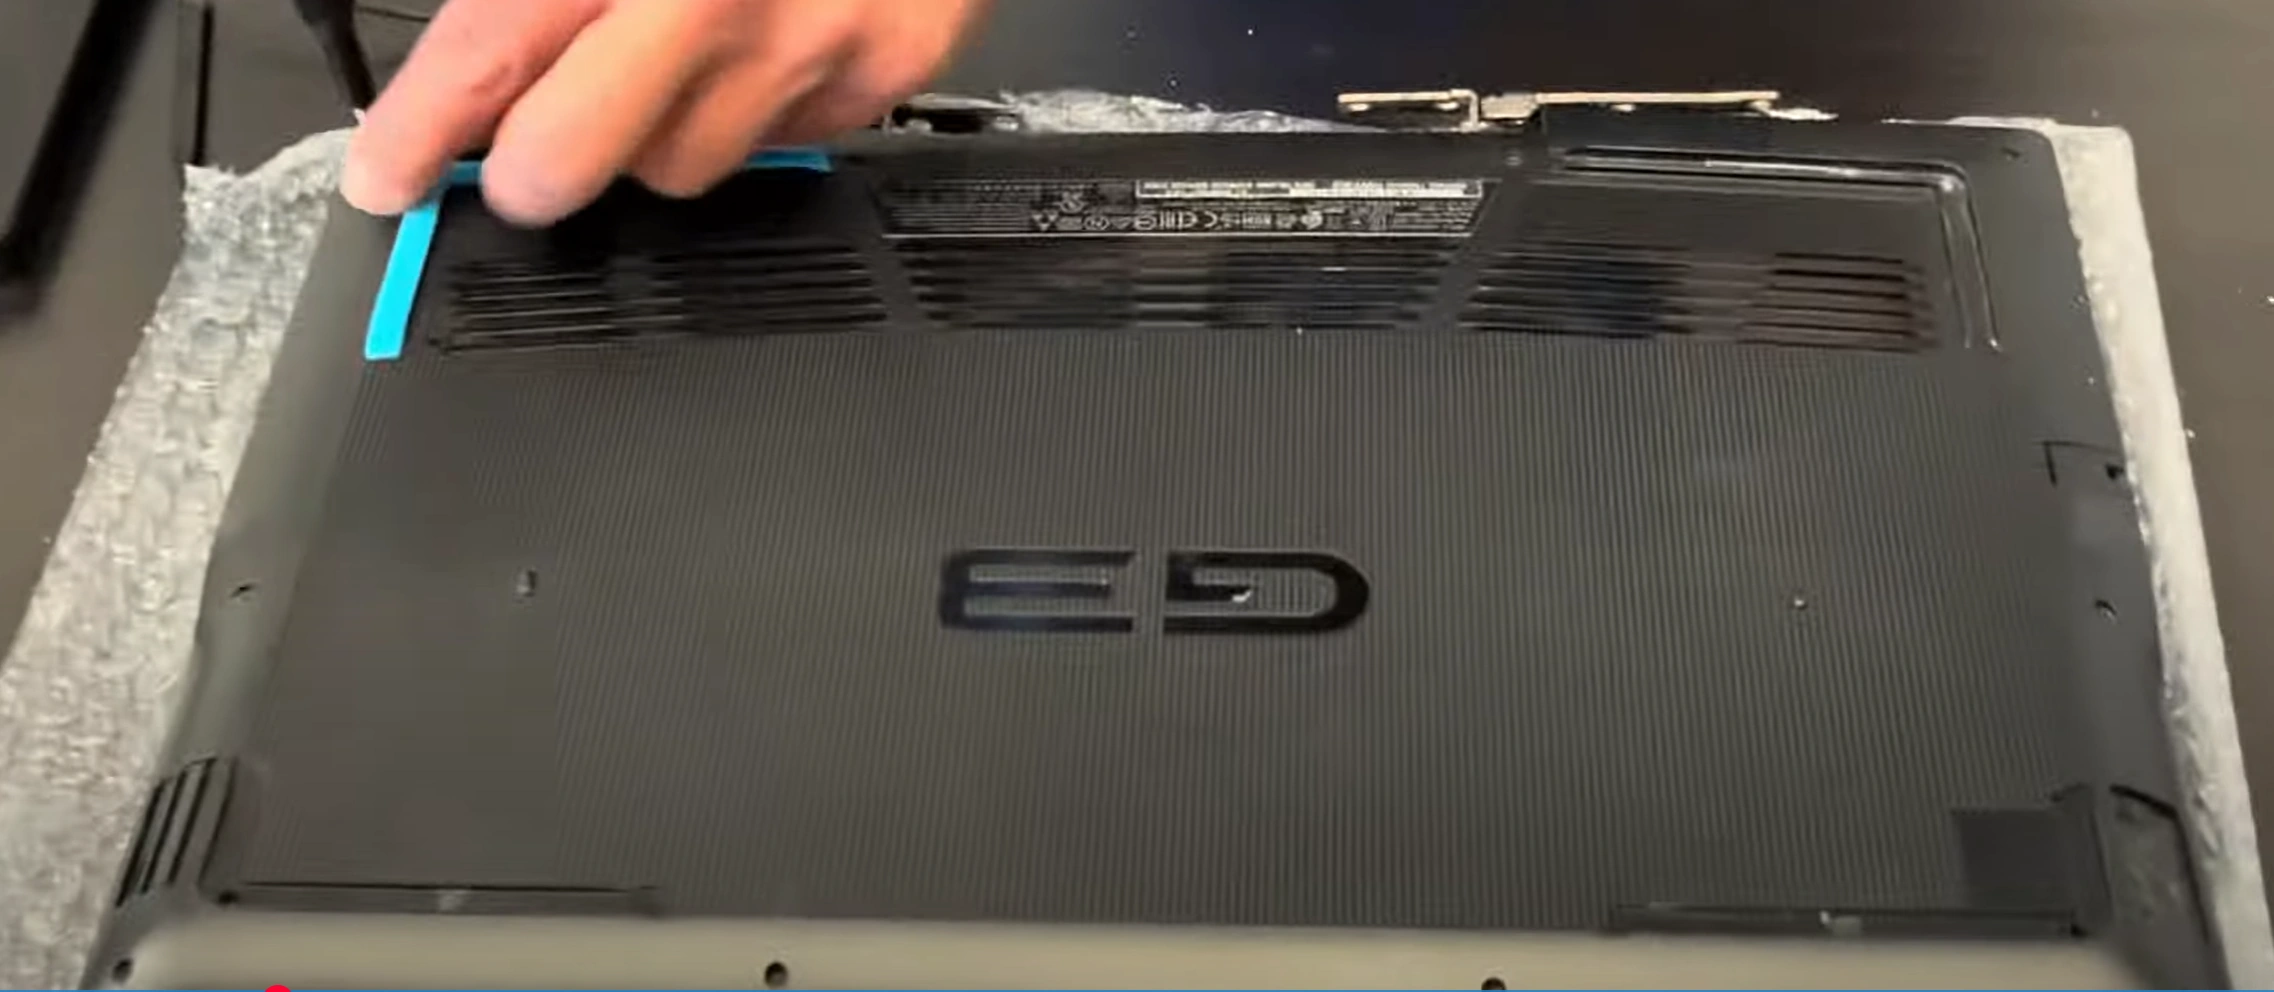
0:45 Front Bezel 1:40 Pull out adhesive strips 2:18 Lift screen 2:25 Take out WebCam 2:36 Unplug Video Cable 2:42 Take out WiFi Antennas 3:26 Unscrew and Open Bottom Case 5:42 Tighten Hinges 6:09 Put the Bottom Case Back 6:40 Alight New Back Cover 6:55 Mount Hinges to the Back Cover 8:50 Install WebCam 9:08 Install WiFi Antennas 10:00 Test Screen 10:17 Stick Screen to the Adhesive 10:54 Install Front Bezel
3. Dell G3 Display Cable Disconnection: Safe LCD Removal
⚠️ Critical Safety Precautions
- Power Management:
- Confirm battery is disconnected
- Press power button for 15s to discharge
- ESD Protection:
- Wear anti-static wrist strap
- Work on non-conductive surface
🔌 Step-by-Step Disconnection
- Locate eDP Connector:
- 30-pin connector near hinge
- Secured with black locking bar
- Release Locking Mechanism:
- Flip black latch upward (90° angle)
- Use spudger if stiff
- Remove Cable:
- Pull straight out (no rocking)
- Grip reinforced ends only
📐 Display Cable Specifications
- Technical Details:
- 30-pin eDP 1.4 standard
- Supports 144Hz refresh rate
- Replacement Parts:
- Dell OEM cable recommended
- Aftermarket alternatives available
🛡️ Preventing Common Issues
| Risk | Prevention | Repair Cost Impact |
|---|---|---|
| Pin Damage | Never force connector | $50-$100 replacement |
| Cable Tears | Pull from reinforced ends | $30-$60 repair |
🔧 Reconnection Tip
- Ensure locking bar clicks into place
- Test display before final assembly
4. Dell G3 Hinge Assembly Removal: Professional Repair Guide
⚠️ Critical Safety Precautions
- Pre-Removal Checks:
- Confirm display cables are disconnected
- Remove all screws from hinge covers
- Workspace Setup:
- Use ESD-safe mat
- Organize screws by length/location
🔧 Step-by-Step Hinge Removal
- Remove Hinge Covers:
- 4x PH00 screws per hinge (1.5Nm torque)
- Note plastic retention clips
- Extract Hinge Screws:
- 6x M2.5x5mm screws per hinge
- Use magnetic screwdriver
- Detach Hinge Assembly:
- Rock gently side-to-side
- Watch for adhesive strips
⚙️ Hinge Technical Specifications
- Material Composition:
- Aluminum alloy base
- Steel reinforcement plates
- Replacement Options:
- Dell OEM hinges (recommended)
- Aftermarket alternatives
🛡️ Preventing Common Damage
| Risk Area | Professional Technique | Resale Impact |
|---|---|---|
| Chassis Threads | Straight screw extraction | Intact threads = +$100 value |
| Display Panel | Support during removal | Uncracked bezel = +$150 |
🔩 Professional Repair Tips
- Thread Preservation:
- Clean threads with toothbrush
- Apply thread locker on reassembly
- Replacement Guidance:
- Match hinge model numbers exactly
- Test tension before final assembly
5. Dell G3 Back Cover Replacement: Professional Repair Guide
🛠️ Preparation Steps
- Surface Preparation:
- Clean mating surfaces with isopropyl alcohol
- Remove old adhesive residue
- Part Verification:
- Match Dell part number (e.g., 0F6F5F)
- Check for included adhesive strips
🔧 Step-by-Step Installation
- Align New Cover:
- Match 8 alignment pins
- Verify hinge openings position
- Secure Cover:
- Install 10 captive screws (hand-tighten first)
- Final torque: 0.6Nm (5.3 in-lbs)
- Adhesive Activation:
- Press firmly along edges
- Use clamp for 30 minutes (optional)
🔄 OEM vs Aftermarket Comparison
| Feature | Dell OEM | Aftermarket |
|---|---|---|
| Material Quality | Fiberglass-reinforced | Standard ABS plastic |
| Fit Precision | 0.1mm tolerance | 0.5mm+ tolerance |
| Resale Impact | +$120 value | No value add |
✅ Post-Installation Verification
- Visual Inspection:
- Check for even gaps (≤0.5mm)
- Verify screw covers fit flush
- Functional Test:
- Open/close lid 50 times
- Check for creaking sounds
💰 Resale Value Considerations
- Documentation:
- Keep OEM part receipt
- Photograph installation process
- Buyer Assurance:
- Offer 90-day hinge warranty
- Highlight OEM replacement
6. Dell G3 Reassembly & Quality Checks: Professional Repair Standards
🔄 Step-by-Step Reassembly
- Hinge Reinstallation:
- Apply thread locker to screws
- Tighten in X-pattern (1.2Nm torque)
- Display Reconnection:
- Secure eDP connector latch
- Route cable clear of hinge path
- Bottom Cover Installation:
- Engage all 14 clips before screws
- Final torque: 0.8Nm (7 in-lbs)
✅ Professional Quality Assurance
| Checkpoint | Standard | Resale Impact |
|---|---|---|
| Hinge Tension | Holds at 45° angle | +$150 value |
| Case Flex | <1mm deflection | +20% buyer trust |
| Thermal Performance | <85°C under load | Key gamer selling point |
🧪 Functional Testing Protocol
- Mechanical Stress Test:
- 100 open/close cycles
- Check for creaking
- Performance Verification:
- Run 3DMark stress test
- Monitor temps with HWMonitor
📄 Maximizing Resale Value
- Repair Portfolio:
- Before/after photos
- OEM parts receipts
- Market-Specific Listings:
- eBay: Highlight benchmark scores
- Facebook Marketplace: Feature hinge test videos
- Warranty Options:
- 30-day minimum coverage
- Offer extended options
7. Selling Repaired Dell G3 Laptops: Maximum Value Strategy
🏆 Best Marketplaces for Refurbished Laptops
| Platform | Advantage | Ideal For |
|---|---|---|
| SellBroke | Specialized tech buyers | Quick cash sales |
| SellBroke | OEM part premiums | Bulk sellers |
| eBay | International reach | High-spec models |
✨ Listing Optimization Tips
- Title Formulas:
- "Professionally Refurbished Dell G3 [Model] - [Specs]"
- "OEM Hinge Replacement + [Key Feature]"
- Must-Include Media:
- Hinge stress test video
- 3DMark benchmark results
🏛️ Selling to Institutions (.gov/.edu)
- Certification Requirements:
- EPA Certified refurbisher status
- IT asset disposal certifications
- Bulk Sales Channels:
- GSA Advantage marketplace
- University surplus auctions
💰 Competitive Pricing Strategy
- Value-Add Pricing:
- OEM parts: +25% market value
- 90-day warranty: +15%
- Market Benchmarks:
- Check PC BlueBook
- Track eBay sold listings
🚀 Advanced Selling Tactics
- Seasonal Opportunities:
- Back-to-school promotions (July-Aug)
- Tax return season (Feb-Apr)
- Bundling Strategies:
- Gamer packages (mouse+headset)
- Student bundles (backpack+mouse)
Need to Sell Your Dell Laptop? Get Instant Cash!
If your Dell G3 (or other G-Series gaming laptop) has performance issues or you're upgrading to a newer model, we offer competitive cash payouts for your device. We buy broken, used, and refurbished Dell gaming laptops—including all G3 configurations—with free insured shipping and no-hassle evaluations.
Sell Popular Dell Models Now:
Frequently Asked Questions
- Can I sell my Dell G3 Hinge Back Cover after disassembly or repair?
- Yes. SellBroke buys laptops in any condition — working, broken, disassembled, or partially upgraded. Get an instant quote at https://sellbroke.com/sell/laptop/dell/.
- What is my Dell G3 Hinge Back Cover worth?
- Value depends on condition and what's working. SellBroke pays for working, broken, and water-damaged laptops. Visit https://sellbroke.com/sell/laptop/dell/ to see your exact offer before committing.
- Does SellBroke buy laptops with cracked screens or dead batteries?
- Yes. Cracked screens and dead batteries are common defects SellBroke accepts. Select your defects during the quote process for an accurate price.
- How long does it take to get paid after shipping?
- SellBroke pays within 24 hours of receiving and inspecting your device. Payment via PayPal, Venmo, Zelle, or check.
- Do I need to reassemble my laptop before selling it?
- No. SellBroke accepts laptops in disassembled or partially assembled condition. Ship it as-is with components included.