Step-by-Step Guide: Upgrading the Lenovo 13W Yoga G2 (AMD Ryzen) SSD
1. Pre-Upgrade Assessment: Understanding Your Lenovo 13W Yoga G2 Configuration
Before beginning any SSD upgrade on your Lenovo 13W Yoga G2, a thorough assessment is crucial to understand your specific AMD Ryzen configuration, ensure compatibility, and maximize the value of your upgrade investment for this versatile 2-in-1 business laptop.
🔍 Identifying Your Specific Yoga G2 Model
The "13W Yoga G2" designation covers several variants. Precise identification ensures proper part compatibility.
- Official Model Names:
- Lenovo Yoga 6 13ALC7 (2022 model, AMD Ryzen)
- Lenovo Yoga 6 13ALC6 (earlier variant)
- Sometimes marketed as "IdeaPad Flex 5" in certain regions
- Finding Your Serial Number:
- Check bottom label or use
wmic bios get serialnumberin Command Prompt - Look up exact specs on Lenovo Support Site using serial number
- Identify manufacturing date for warranty status
- Check bottom label or use
- Key Configuration Indicators:
- Processor: AMD Ryzen 5 5500U, Ryzen 5 5625U, or Ryzen 7 5700U/5825U
- Original SSD: Typically 256GB or 512GB M.2 NVMe PCIe 3.0
- Memory: Soldered LPDDR4X (not upgradeable on most models)
- Display: 13.3" FHD (1920x1200) IPS touchscreen with 360° hinge
💾 Current SSD Assessment & Performance Baseline
Establish performance metrics to measure upgrade improvement.
📊 Essential Diagnostic Tools
- CrystalDiskInfo:
- Download from Official Site
- Check current SSD health (percentage remaining)
- Note interface type (PCIe 3.0 x4 or x2)
- Record temperature behavior
- CrystalDiskMark:
- Benchmark current read/write speeds
- Test both sequential and random 4K performance
- Document baseline scores for comparison
- Lenovo Vantage:
- Check warranty status and system information
- Update BIOS and drivers before upgrade
- Note any existing hardware issues
📈 Expected Baseline Performance
| Original SSD Type | Typical Sequential Read | Typical Sequential Write | Random 4K Read | Upgrade Potential |
|---|---|---|---|---|
| 256GB PCIe 3.0 x2 (Budget config) | 1,500-1,800 MB/s | 800-1,000 MB/s | 30-40 MB/s | High (2-3x improvement) |
| 512GB PCIe 3.0 x4 (Standard) | 2,200-2,800 MB/s | 1,200-1,700 MB/s | 40-50 MB/s | Moderate (1.5-2x improvement) |
| 1TB PCIe 3.0 x4 (Premium) | 3,000-3,500 MB/s | 2,500-3,000 MB/s | 50-60 MB/s | Capacity-focused |
📊 SSD Upgrade Decision Matrix
Evaluate whether an upgrade makes sense for your specific use case.
| User Profile | Current SSD | Recommended Upgrade | Expected Benefit | ROI Justification |
|---|---|---|---|---|
| Student/Basic User (Documents, browsing, light apps) |
256GB, 70%+ full | 512GB PCIe 3.0 | Storage space, moderate speed boost | Good - prevents slowdown from full drive |
| Business Professional (Office suite, multitasking, virtual meetings) |
256-512GB, moderate use | 1TB PCIe 3.0 or PCIe 4.0 | Application responsiveness, file access speed | Excellent - productivity gains justify cost |
| Content Creator (Photo editing, light video work) |
512GB, frequently full | 2TB PCIe 3.0/4.0 | Project file access, rendering speed | High - enables professional workflows |
| Power User/Gamer (Multiple large applications, game library) |
512GB-1TB | 2TB+ PCIe 4.0 | Game load times, system responsiveness | Moderate - luxury upgrade for enthusiasts |
⚖️ Warranty & Service Considerations
- Lenovo Warranty Status:
- Check via Lenovo Warranty Lookup
- Note: SSD upgrades typically don't void warranty, but damage during installation might
- Consider Lenovo's official upgrade service if under premium warranty
- Regional Variations:
- US: Right to Repair laws may protect upgrade rights
- EU: Similar consumer protection regulations
- Check local consumer protection laws
- Documentation Strategy:
- Take clear photos of original configuration
- Document serial numbers before disassembly
- Keep original SSD as backup/for warranty claims
💡 Smart Capacity Planning for Yoga G2
The 2-in-1 design and AMD Ryzen platform have specific considerations.
- Storage Needs Analysis:
- Windows 11: 20-30GB base installation
- Office Suite: 3-5GB for full installation
- Creative Software: 5-20GB per major application
- Personal Files: Estimate current usage + 50% growth
- Yoga-Specific Considerations:
- Tablet mode benefits from fast storage for instant resume
- Limited upgrade options (SSD is primary upgradable component)
- Consider future Windows updates and feature updates
- Cost per GB Analysis:
Capacity Typical Price Price per GB Value Rating 512GB $40-$60 $0.08-$0.12/GB Good 1TB $70-$100 $0.07-$0.10/GB Best Value 2TB $130-$180 $0.065-$0.09/GB Premium
⚡ AMD Ryzen Platform Specifics
Understanding the AMD platform optimizes your SSD choice.
- Platform Capabilities:
- PCIe Support: Ryzen 5000 series supports PCIe 3.0, some later models may support PCIe 4.0
- Power Management: Excellent low-power states benefit from efficient SSDs
- Platform Stability: Generally excellent SSD compatibility
- Performance Synergy:
- Fast SSDs complement Ryzen's strong multi-core performance
- Consider DRAM-less vs DRAM SSDs for power efficiency
- AMD StoreMI technology compatibility if using multiple drives
- Driver Considerations:
- Update AMD chipset drivers from AMD Website
- Ensure NVMe drivers are current
- Check for BIOS updates specifically addressing storage performance
💾 Comprehensive Backup Strategy
Critical: Complete backup before any upgrade procedure.
- Full System Image:
- Use Macrium Reflect Free or Windows Backup
- Create bootable recovery media
- Verify backup integrity before proceeding
- Cloud Synchronization:
- Sync important documents to OneDrive/Google Drive
- Export browser bookmarks and passwords
- Backup application settings and licenses
- Lenovo-Specific Backups:
- Export Lenovo Vantage settings and profiles
- Note display calibration settings if customized
- Backup pen/touch settings if extensively configured
💰 Economic Analysis: Upgrade vs. Replacement
Evaluate whether upgrading makes financial sense versus buying new.
| Scenario | Upgrade Cost | Expected Value Added | New Equivalent Cost | Recommendation |
|---|---|---|---|---|
| 256GB → 1TB SSD (Yoga G2 in excellent condition) |
$80-$120 | +$150-$200 resale value | $800-$1000 new | Highly Recommended |
| 512GB → 2TB SSD (For content creation needs) |
$140-$180 | +$180-$250 resale value | $900-$1200 new | Recommended for professionals |
| Any upgrade (Device with other issues: battery, cosmetic damage) |
$80-$180 | +$50-$100 only | N/A | Consider overall device condition first |
2. SSD Compatibility Research: Finding the Right Drive for Your Lenovo 13W Yoga G2 (AMD Ryzen)
Selecting the perfect SSD for your Yoga G2 requires understanding the unique compatibility requirements of this AMD Ryzen-based 2-in-1 laptop. This guide covers interface specifications, form factor constraints, and performance optimization for your specific configuration.
🔌 Yoga G2 SSD Interface Specifications
Understanding the exact interface capabilities of your Yoga G2 is crucial for optimal SSD selection.
- M.2 Slot Type:
- Interface: PCIe 3.0 x4 (NVMe protocol)
- Key Type: M-key (supports both PCIe and SATA, but SATA may be disabled in BIOS)
- Theoretical Bandwidth: Up to 4,000 MB/s (PCIe 3.0 x4)
- Real-World Limitations:
- AMD Platform: Ryzen 5000 series controllers typically deliver excellent PCIe 3.0 performance
- Thermal Constraints: Slim 2-in-1 design limits sustained high-speed operation
- Power Delivery: Optimized for efficiency over maximum performance
- Verification Methods:
- Check Lenovo Product Specifications Reference
- Use HWiNFO64 to detect exact PCIe generation and lanes
- Consult BIOS storage configuration options
📏 Physical Form Factor Requirements
The Yoga G2's slim chassis imposes specific physical constraints.
📐 Critical Dimension Specifications
| Dimension | Requirement | Why It Matters | How to Verify |
|---|---|---|---|
| Length | 2280 (80mm) standard | Most common size, ensures proper mounting | Measure existing SSD or check service manual |
| Width | 22mm standard | Standard M.2 width, compatibility assured | Visual inspection of M.2 slot |
| Thickness (Single/Double-sided) | Single-sided recommended | Slim chassis may not accommodate components on both sides | Check existing SSD or use known single-sided models |
| Height (with components) | < 3.5mm total | Clearance under bottom cover is limited | Measure from motherboard to bottom cover |
✅ Recommended Single-Sided SSDs for Yoga G2
- Best Performance:
- Samsung 970 EVO Plus (1TB/2TB versions are single-sided)
- WD Black SN770 (single-sided design)
- SK Hynix P31 Gold (excellent power efficiency)
- Best Value:
- Crucial P5 Plus (1TB is single-sided)
- Kingston KC3000 (check specific capacity)
- Teamgroup MP34 (often single-sided)
- Avoid These in Yoga G2:
- Samsung 980 Pro (2TB is double-sided)
- Any SSD with "heatsink" version (won't fit)
- Older thick controllers with large components
⚡ SSD Performance Tier Analysis for AMD Ryzen
Match SSD performance to your Yoga G2's capabilities and your usage patterns.
📊 Performance Tier Comparison Table
| Tier | Typical Sequential Speeds | 4K Random Performance | Power Efficiency | Best For Yoga G2 | Price Range (1TB) |
|---|---|---|---|---|---|
| Entry-Level PCIe 3.0 (DRAM-less) |
2,000-2,500 MB/s read 1,500-2,000 MB/s write |
40-60k IOPS | Good | Budget upgrades, basic use | $60-$80 |
| Mid-Range PCIe 3.0 (With DRAM) |
3,000-3,500 MB/s read 2,500-3,000 MB/s write |
60-90k IOPS | Very Good | General productivity, business use | $80-$110 |
| High-End PCIe 3.0 (Premium controller) |
3,400-3,800 MB/s read 3,000-3,400 MB/s write |
90-120k IOPS | Excellent | Content creation, power users | $100-$140 |
| PCIe 4.0 Compatible (Future-proof) |
5,000-7,000 MB/s read 4,000-6,000 MB/s write |
120-200k IOPS | Varies | Only if planning future laptop upgrade | $90-$130 |
⚡ AMD Ryzen Specific Optimization
- Power State Compatibility:
- Ryzen APUs benefit from SSDs with good low-power state management
- Look for SSDs with ASPM (Active State Power Management) support
- Check reviews for idle power consumption metrics
- Thermal Considerations:
- Yoga G2's compact design means limited cooling for SSD
- Prioritize SSDs with good thermal throttling behavior
- Avoid drives known for high operating temperatures
- Platform Stability:
- AMD platforms generally have excellent NVMe compatibility
- Still, check user reviews specifically mentioning AMD systems
- Update BIOS before installation for best compatibility
💾 Smart Capacity Recommendations
Choosing the right capacity balances cost, performance, and future needs.
📈 Capacity vs. Use Case Analysis
| Capacity | Ideal User Profile | Typical Fill Level | Performance Impact | Cost Efficiency |
|---|---|---|---|---|
| 512GB | Students, basic office users, light browsing | 60-80% with careful management | May slow when near full | Good |
| 1TB (Sweet Spot) | Business professionals, moderate multitaskers | 40-60% with comfortable headroom | Consistent performance | Best Value |
| 2TB | Content creators, developers, power users | 30-50% with project space | Often faster due to more NAND channels | Premium |
| 4TB (If compatible) | Professional media editors, extensive libraries | 25-40% maximum for optimal performance | Check single-sided availability | Luxury |
💡 Capacity Selection Tips
- Future-Proofing: SSDs slow down as they fill beyond 70-80%
- Windows 11 Considerations: Reserve 20% free space for updates and optimization
- Yoga-Specific: Tablet mode usage may involve more local storage for offline work
- Cost per GB: 1TB typically offers best $/GB, but 2TB is better for heavy users
🏆 SSD Brand Reliability & Warranty Comparison
🛡️ Major Brand Analysis for Laptop Use
| Brand/Model | Warranty Length | TBW Rating (1TB) | Yoga G2 Compatibility | Power Efficiency |
|---|---|---|---|---|
| Samsung 970 EVO Plus | 5 years | 600 TBW | Excellent (1TB single-sided) | Very Good |
| WD Black SN770 | 5 years | 600 TBW | Excellent (all capacities single-sided) | Excellent |
| SK Hynix P31 Gold | 5 years | 750 TBW | Excellent (single-sided, low power) | Best in Class |
| Crucial P5 Plus | 5 years | 600 TBW | Good (1TB single-sided) | Good |
| Kingston KC3000 | 5 years | 800 TBW | Check specific capacity | Good |
| Budget Options (Teamgroup, Silicon Power) |
3-5 years | 300-500 TBW | Variable | Average |
✅ Key Reliability Indicators
- TBW Rating: Terabytes Written - higher is better for longevity
- Controller Quality: Phison, Silicon Motion, and in-house controllers vary
- NAND Type: TLC generally better than QLC for sustained performance
- Firmware Updates: Brands with regular firmware updates fix issues
🚀 PCIe 4.0 Considerations for Yoga G2
Should you buy a PCIe 4.0 SSD for a PCIe 3.0 system?
- Technical Reality:
- Yoga G2 with AMD Ryzen 5000 series supports PCIe 3.0 only
- PCIe 4.0 SSDs will work but at PCIe 3.0 speeds
- No performance benefit in current system
- When to Consider PCIe 4.0:
- Planning to upgrade to a PCIe 4.0 laptop within 1-2 years
- PCIe 4.0 drives often similarly priced to PCIe 3.0
- Future-proofing if price difference is minimal
- Potential Drawbacks:
- May run hotter than PCIe 3.0 counterparts
- Could consume more power at idle
- Limited benefit for extra cost in current system
✅ Yoga G2 SSD Purchasing Checklist
- Interface Verification:
- ✓ PCIe 3.0 x4 NVMe compatible
- ✓ M-key connector type
- Physical Compatibility:
- ✓ 2280 length (80mm)
- ✓ Single-sided construction (critical!)
- ✓ Total thickness < 3.5mm
- Performance Requirements:
- ✓ Matches your use case (see tier analysis)
- ✓ Good 4K random performance for responsiveness
- ✓ Reasonable power consumption
- Reliability Factors:
- ✓ Good TBW rating for your usage
- ✓ Reputable brand with warranty
- ✓ Positive reviews with AMD systems
🛒 Where to Purchase: Source Recommendations
- Authorized Retailers (Best for Warranty):
- Amazon (sold by manufacturer or authorized seller)
- Newegg (sold by Newegg, not marketplace)
- Best Buy
- Micro Center (if local)
- Manufacturer Direct:
- Samsung, WD, Crucial online stores
- Often include cloning software
- Best warranty support
- What to Avoid:
- Marketplace sellers with unclear origins
- Extremely low prices (may be used/refurbished)
- International versions with different warranty
🔧 Compatibility Confirmation Tools & Resources
- Lenovo Resources:
- Lenovo Support Portal - Hardware Maintenance Manual
- Lenovo Community Forums - User experiences with specific SSDs
- PSREF Database - Official specifications
- Third-Party Resources:
- r/Lenovo Subreddit - Real user experiences
- Notebookcheck reviews - Detailed compatibility notes
- UserBenchmark database - Real-world performance data
- Verification Before Purchase:
- Search "[SSD Model] Yoga 6 13ALC7 compatibility"
- Check manufacturer forums for known issues
- Review return policy in case of incompatibility
0:18 Bottom Case 1:30 battery 2:42 WiFi Card 3:17 RAM Memory 3:35 Heatsink and Cooling Fan 4:30 SSD Storage 6:00 Motherboard 6:33 Processor 7:00 Speakers 7:15 Web Camera 7:34 Hinges 7:53 Palmrest Assembly 8:04 Touchpad 8:28 Display Assembly
3. Essential Tools & Workspace Preparation for Safe Lenovo Yoga G2 SSD Upgrades
Proper tool selection and workspace setup are critical for successful, damage-free SSD upgrades in the Yoga G2's precision-engineered 2-in-1 chassis. This comprehensive guide covers everything from basic tools to professional-grade equipment and workspace optimization.
🔧 Essential Tool Kit for Yoga G2 SSD Upgrade
These tools are mandatory for safe disassembly and reassembly of your Yoga G2.
🪛 Precision Screwdriver Requirements
| Screw Type | Driver Size | Quantity in Yoga G2 | Critical Notes |
|---|---|---|---|
| Bottom Cover Screws | Phillips #00 (PH00) | 6-8 screws (vary by model) | Captive screws - do not fully remove |
| SSD Mounting Screw | Phillips #000 (PH000) or M2x3mm | 1 screw | Tiny screw - magnetic tip essential |
| SSD Thermal Pad/Bracket | Phillips #00 (PH00) | 0-2 screws (if present) | May have thermal management hardware |
🏆 Professional Tool Kit Recommendations
Investing in quality tools pays dividends in preserving your Yoga G2's finish and functionality.
📊 Tool Kit Comparison Table
| Kit Level | Recommended Kit | Price Range | Includes | Best For |
|---|---|---|---|---|
| Premium Professional | iFixit Pro Tech Toolkit | $70-$85 | 64 precision bits, spudgers, tweezers, magnetic mat | Technicians, frequent repairs, multiple devices |
| Quality Entry-Level | iFixit Essential Electronics Toolkit | $30-$35 | Basic drivers, spudgers, opening tools | Home users, occasional repairs |
| Budget DIY | Generic precision screwdriver set + plastic cards | $10-$20 | Basic drivers, minimal prying tools | One-time upgrade, minimal budget |
⚙️ Specialized Tools Worth Considering
- Magnetic Project Mat:
- Keeps tiny screws organized by location
- Prevents loss during disassembly
- Available from iFixit and other suppliers
- ESD-Safe Tweezers:
- Essential for handling tiny SSD mounting screw
- Non-magnetic to avoid damaging components
- Fine point for precision work
- Compressed Air Duster:
- Clean dust from fan and vents during access
- ESD-safe version recommended
- Improves cooling after reassembly
🛋️ Professional Workspace Setup
Your workspace significantly impacts upgrade success and safety.
✅ Ideal Workspace Characteristics
| Requirement | Importance | Minimum Standard | Professional Standard |
|---|---|---|---|
| Clean Surface Area | High - prevents dust/debris intrusion | Clean table, dusted recently | ESD-safe mat, dedicated repair station |
| Adequate Lighting | Critical - tiny screws, delicate connectors | Room lighting + desk lamp | Adjustable LED magnifying lamp |
| Static Control | Critical - protects electronic components | Work on non-static surface | ESD wrist strap + grounded mat |
| Organization | High - prevents lost screws/components | Small containers for screws | Magnetic mat with labeled sections |
⚡ Static Electricity Protection Protocol
Warning: ESD (Electrostatic Discharge) can instantly damage laptop components.
- ESD Wrist Strap:
- Wear throughout the entire procedure
- Connect to grounded metal object or outlet ground
- Test continuity before starting
- Worksurface Grounding:
- Use ESD-safe mat if available
- Avoid working on plastic, vinyl, or carpeted surfaces
- Damp (not wet) cloth on surface can help dissipate static
- Personal Grounding:
- Touch grounded metal before handling components
- Avoid synthetic clothing that generates static
- Work in low-humidity environments with extra caution
🎯 Yoga G2 Specific Tool Notes & Techniques
This 2-in-1 laptop has unique design elements requiring specific approaches.
🖥️ Chassis Design Considerations
- Bottom Cover Clips:
- Yoga G2 uses numerous small plastic clips
- Require even pressure around perimeter
- Start prying from corners, not middle
- Aluminum Construction:
- More rigid than plastic but can dent
- Use plastic tools only - metal will scratch
- Avoid excessive force on corners
- SSD Location:
- Typically under a metal shield or thermal pad
- May require removing additional brackets
- Cable routing is tight - note positions before removing
🔩 Screw Management Strategy
The Yoga G2 uses screws of different lengths - organization is critical.
- Screw Identification:
- Bottom cover screws are captive (don't fully remove)
- SSD screw is tiny (M2x3mm) and easily lost
- Take photos of screw locations before removal
- Organization Methods:
- Magnetic Mat: Best method - holds screws in place
- Pill Organizer: Compartments for different screw types
- Paper Diagram: Tape screws to paper in their layout
- Ice Cube Tray: Low-cost organization solution
- Yoga G2 Screw Pattern:
- Typically 6-8 Phillips #00 screws around perimeter
- All similar length (captive design)
- One tiny Phillips #000 or M2 for SSD mounting
🛡️ Safety Equipment & Personal Protection
✅ Safety Equipment Checklist
| Equipment | Purpose | Priority | Alternatives |
|---|---|---|---|
| ESD Wrist Strap | Prevents static damage to components | Critical | Frequent grounding touches (less effective) |
| Safety Glasses | Protects eyes from spring clips, small debris | Recommended | Regular eyeglasses provide some protection |
| Magnifying Glass/Lamp | Better visibility for tiny components | Recommended | Phone camera zoom, reading glasses |
| Anti-Fatigue Mat | Comfort during extended work | Optional | Comfortable shoes, padded stool |
📋 Pre-Upgrade Preparation Steps
Complete these steps before any disassembly.
✅ Pre-Disassembly Checklist
- Power Down & Disconnect:
- Shut down Windows completely (not sleep/hibernate)
- Disconnect AC adapter and all peripherals
- Disable fast startup in power settings if enabled
- Component Documentation:
- Take clear photos of laptop from all angles
- Document serial numbers and model information
- Note any existing cosmetic damage
- Tool Verification:
- Test all screwdrivers for proper fit
- Check ESD strap continuity if using
- Organize workspace with all tools within reach
- Data Backup Verification:
- Confirm backup completed successfully
- Test backup restoration if possible
- Create Windows recovery media
🔧 DIY Tool Alternatives & Improvisation
If you lack professional tools, these alternatives can work with caution.
🛠️ Common Household Alternatives
| Professional Tool | Household Alternative | Effectiveness | Risk Level |
|---|---|---|---|
| Phillips #00 Screwdriver | Small eyeglass repair screwdriver | Good (if proper fit) | Low |
| Plastic Spudger | Old credit card, guitar pick | Good for prying | Medium (can break) |
| Tweezers | Regular tweezers (non-magnetic) | Fair (be careful of slipping) | High (can damage components) |
| Magnetic Mat | Ice cube tray, egg carton | Good for organization | Low |
| ESD Protection | Frequent grounding touches | Minimal protection | High (risk of damage) |
⚠️ Critical Improvisation Warnings
- NEVER use metal tools for prying: Screwdrivers, knives, or metal spudgers will damage the aluminum chassis
- Avoid excessive force: If something doesn't move easily, re-check for hidden screws or clips
- Magnet precautions: Keep magnets away from the SSD and other storage components
- Static awareness: Work in low-static environment if no ESD protection available
🔧 Tool Maintenance & Care
Proper tool care ensures longevity and effectiveness.
- Screwdriver Tips:
- Clean tips regularly to prevent slipping/stripping
- Replace worn tips - damaged tips damage screws
- Store in protective case to prevent damage
- Prying Tools:
- Inspect for cracks or damage before each use
- Clean with isopropyl alcohol after use
- Store flat to prevent warping
- Organization Systems:
- Clean magnetic mats after each project
- Inventory tools after each use
- Label containers clearly for future projects
🛒 Where to Purchase Quality Tools
🏪 Recommended Tool Sources
| Source | Tool Quality | Price Range | Best For | Recommendations |
|---|---|---|---|---|
| iFixit.com | Excellent (professional grade) | $30-$200+ | Serious DIYers, technicians | Pro Tech Toolkit, Essential Electronics Toolkit |
| Amazon | Variable (read reviews carefully) | $10-$100 | Budget-conscious, one-time projects | Look for brands with good reviews |
| Home Improvement Stores | Good for basics | $10-$50 | Basic screwdrivers, organization | Husky, Craftsman precision sets |
| Electronics Retailers | Specialized tools available | $15-$100 | ESD protection, specialized tools | Micro Center, Fry's (if available) |
🔍 Workspace Troubleshooting
Common workspace issues and solutions.
- Insufficient Lighting:
- Problem: Can't see tiny screws or connectors
- Solution: Use phone flashlight, desk lamp, or move to better-lit area
- Lost Screws:
- Problem: Tiny screws roll away or get lost
- Solution: Work over a tray, use magnetic mat, or contain workspace
- Static Issues:
- Problem: Dry environment generating static
- Solution: Use humidifier, anti-static spray, or work on grounded surface
- Cluttered Workspace:
- Problem: Components get mixed up or damaged
- Solution: Clear area, use separate containers for different components
4. Data Migration Strategies: Cloning vs. Fresh Windows Installation for Yoga G2 SSD Upgrade
Choosing the right data migration strategy is crucial for a successful Yoga G2 SSD upgrade. This comprehensive guide compares cloning versus fresh installation, provides step-by-step instructions for both methods, and offers expert recommendations for your specific AMD Ryzen system.
🔄 Cloning vs. Fresh Install: Comprehensive Comparison
Understanding the trade-offs between these two approaches ensures you choose the best method for your needs.
📊 Strategy Comparison Matrix
| Factor | Cloning (Disk Imaging) | Fresh Windows Installation | Best For Yoga G2 |
|---|---|---|---|
| Time Required | 1-3 hours (depends on data volume) | 2-4 hours (including driver installation) | Cloning for quick upgrades |
| Difficulty Level | Medium (requires careful setup) | Easy to Medium (more steps but straightforward) | Fresh install for beginners |
| Data Preservation | Complete (exact copy of old drive) | None (requires separate backup) | Cloning for seamless transition |
| Performance Outcome | Same as old system (may include accumulated issues) | Optimal (clean, bloatware-free) | Fresh install for maximum performance |
| Driver Management | Automatic (existing drivers carry over) | Manual (requires downloading/installing) | Cloning for AMD driver complexity |
| Storage Efficiency | Inefficient (copies unused space and files) | Efficient (only what you install) | Fresh install for smaller to larger SSD |
| Yoga-Specific Settings | Preserved (display calibration, pen settings) | Lost (must reconfigure) | Cloning for preserving customizations |
✅ When to Choose Each Method
- Choose CLONING if:
- Upgrading from smaller to larger SSD
- You have complex software configurations
- Preserving Yoga-specific calibrations is important
- You need minimal downtime
- AMD driver configuration is working perfectly
- Choose FRESH INSTALL if:
- Current system has performance issues or malware
- You want to remove bloatware and start clean
- Moving from HDD to SSD (different partition alignment)
- You have reliable backups and time for setup
- You want to optimize for new SSD performance
📋 Pre-Migration Preparation Checklist
Critical: Complete these steps regardless of chosen method.
✅ Essential Preparation Steps
- Complete System Backup:
- Use Macrium Reflect Free or Windows Backup
- Backup to external drive with at least 1.5x your used space
- Verify backup integrity before proceeding
- Document Critical Information:
- Record software licenses and product keys
- Export browser bookmarks and passwords
- Note network configurations and printer settings
- Document Yoga-specific settings (display, pen, hinge)
- Clean Up Current System (Optional but Recommended):
- Uninstall unused applications
- Run Disk Cleanup and remove temporary files
- Defragment HDD if upgrading from mechanical drive
- Update Windows and drivers before cloning
🎯 Yoga G2 Specific Backup Items
- Lenovo Vantage Settings:
- Power management profiles
- Display color calibration
- Pen and touch settings
- Keyboard backlight preferences
- AMD Software Settings:
- Radeon Software preferences
- Performance/power profiles
- Custom display configurations
- Windows Ink Workspace:
- Pen shortcuts and gestures
- Whiteboard templates and notes
- Touch keyboard customizations
📥 Method A: Professional Cloning Procedure
Step-by-step guide for creating an exact copy of your current drive.
🛠️ Cloning Tool Options
| Tool | Cost | Best For | Yoga G2 Compatibility |
|---|---|---|---|
| Macrium Reflect Free | Free (personal use) | Most users, reliable results | Excellent |
| Samsung Data Migration | Free (Samsung SSDs only) | Samsung SSD upgrades | Excellent (if using Samsung SSD) |
| Acronis True Image | Free with some SSDs | Advanced users, incremental backups | Good |
| Clonezilla | Free (open source) | Advanced users, Linux compatible | Good (requires technical knowledge) |
🔧 Step-by-Step Cloning Process
- Connect New SSD:
- Use USB to NVMe adapter enclosure (recommended)
- Or connect via secondary M.2 slot if available (unlikely in Yoga G2)
- Ensure connection is stable before starting
- Prepare Cloning Software:
- Install chosen cloning software on current system
- Launch and select "Clone Disk" or equivalent
- Select source (old SSD) and destination (new SSD)
- Configure Cloning Options:
- Partition Resizing: Enable if moving to larger drive
- Sector-by-Sector: Uncheck (slower, usually unnecessary)
- SSD Optimization: Check if available
- Verify After Clone: Highly recommended
- Execute Clone:
- Start process and allow to complete (1-3 hours typically)
- Do not use computer during cloning
- Monitor for errors and address immediately
- Post-Clone Verification:
- Verify clone completed successfully
- Optionally boot from USB enclosure to test new drive
- Safely disconnect new SSD
🔍 Common Cloning Issues & Solutions
- Clone Fails - Size Mismatch:
- Problem: New SSD is smaller than used space on old drive
- Solution: Clean up old drive or choose larger target drive
- Boot Issues After Clone:
- Problem: System won't boot from new drive
- Solution: Check BIOS boot order, ensure UEFI/Legacy settings match
- Slow Performance After Clone:
- Problem: New SSD performs like old one
- Solution: Run TRIM command, check partition alignment
🆕 Method B: Fresh Windows Installation Guide
Clean installation for optimal performance and a fresh start.
📦 Fresh Install Preparation
- Create Windows Installation Media:
- Download Windows 11 Media Creation Tool
- Use 8GB+ USB drive (USB 3.0 recommended)
- Create installation media (backs up USB contents)
- Gather Drivers:
- Download Lenovo drivers from Lenovo Support
- Essential drivers: Chipset, Audio, Wi-Fi, Bluetooth, Graphics
- Store on separate USB drive or cloud storage
- Document Current Configuration:
- Network passwords and configurations
- Application installation files or download links
- Custom settings and preferences
🖥️ Step-by-Step Windows Installation
- Boot from Installation Media:
- Insert USB drive, restart Yoga G2
- Press F12 repeatedly during boot for boot menu
- Select USB drive from UEFI boot options
- Windows Setup Process:
- Select language, time, keyboard preferences
- Click "Install Now" and enter product key (can skip if digital license)
- Accept license terms
- Partition Setup (Critical Step):
- Select "Custom: Install Windows only (advanced)"
- Delete all existing partitions on the new SSD
- Select unallocated space and click Next (Windows creates optimal partitions)
- Initial Setup:
- Follow on-screen prompts for region, keyboard, network
- Create or sign in with Microsoft account
- Configure privacy settings according to preference
⚙️ Post-Installation Optimization
- Windows Updates:
- Run Windows Update repeatedly until no updates remain
- This includes critical driver updates
- Lenovo Driver Installation:
- Install Lenovo Vantage from Microsoft Store
- Use Vantage to install remaining drivers
- Install AMD Radeon Software from AMD website
- Essential Software Installation:
- Web browser (Chrome, Firefox, Edge)
- Office suite or alternatives
- Security software (Windows Defender is sufficient for most)
- Yoga-Specific Configuration:
- Configure display rotation and tablet mode settings
- Calibrate pen and touch input if needed
- Set up power profiles in Lenovo Vantage
⚡ AMD Ryzen Specific Optimization
Special considerations for optimizing your Yoga G2's AMD platform.
🎯 AMD Driver Installation Order
- Chipset Drivers First:
- Download from AMD Support Site
- Install AMD Chipset Drivers for Ryzen 5000 series
- Restart when prompted
- Radeon Graphics Drivers:
- Install AMD Radeon Software Adrenalin Edition
- Choose "Driver Only" installation for stability
- Configure power saving features for battery life
- Platform Optimization:
- Enable AMD fTPM in BIOS if using Windows 11
- Configure power plans in Windows for Ryzen optimization
- Update BIOS to latest version from Lenovo
🔋 Ryzen Power Optimization Tips
- Windows Power Plans:
- Use "Balanced" for best Ryzen performance/power balance
- Avoid "High Performance" - prevents CPU from downclocking
- Consider "Power Saver" for maximum battery in tablet mode
- AMD Software Settings:
- Enable Radeon Chill for power saving during light use
- Configure display refresh rate based on usage
- Use AMD Link for efficient cross-device connectivity
📤 Data Transfer Techniques for Fresh Install
Moving your files and settings after a clean Windows installation.
🔄 Recommended Transfer Methods
| Method | Best For | Steps | Yoga G2 Efficiency |
|---|---|---|---|
| Cloud Sync (OneDrive, Google Drive) |
Documents, photos, basic files | 1. Sync old files to cloud 2. Install client on new system 3. Sync down files |
Excellent (minimal setup) |
| External Drive Transfer | Large files, complete backups | 1. Copy files to external drive 2. Install Windows 3. Copy files back |
Good (requires extra hardware) |
| Network Transfer | Between computers on same network | 1. Share folders on old system 2. Access from new system 3. Copy over network |
Fair (slower but convenient) |
| Old SSD in Enclosure | Direct file access, fastest method | 1. Put old SSD in USB enclosure 2. Plug into new system 3. Copy files directly |
Best (fastest, most direct) |
✅ Post-Migration Verification & Testing
Essential tests to ensure your migration was successful.
📋 Verification Checklist
- Boot Test:
- System boots reliably to Windows
- No error messages during startup
- Boot time is reasonable (under 30 seconds)
- Functionality Test:
- All Yoga features work (touch, pen, rotation)
- Wi-Fi, Bluetooth, and audio function
- All USB ports work correctly
- Performance Test:
- Run CrystalDiskMark to verify SSD speeds
- Test application launch times
- Verify system responsiveness
- Data Integrity Test:
- Verify critical files transferred correctly
- Test application functionality
- Check that licenses transferred properly
🔍 Troubleshooting Common Migration Issues
⚠️ Common Problems & Solutions
| Issue | Likely Cause | Solution | Prevention |
|---|---|---|---|
| Windows Activation Lost | Digital license tied to hardware changes | Use activation troubleshooter, sign in with Microsoft account | Link digital license to Microsoft account before upgrade |
| AMD Drivers Not Working | Incorrect driver version or installation order | Use DDU to clean install, install chipset drivers first | Download correct drivers before starting fresh install |
| Touch/Pen Not Working | Missing Yoga-specific drivers | Install Lenovo Vantage, update all drivers | Download Yoga drivers package before fresh install |
| Slow SSD Performance | Incorrect partition alignment, missing optimizations | Check partition alignment, enable TRIM, update NVMe drivers | Let Windows create partitions during fresh install |
💡 Expert Recommendation for Yoga G2 SSD Upgrades
Based on extensive experience with AMD Ryzen Yoga systems:
- For Most Users: CLONING is recommended because:
- Preserves complex AMD driver configurations
- Maintains Yoga-specific calibrations and settings
- Minimizes downtime and technical complexity
- AMD platforms can be finicky with fresh driver installations
- Exceptions for Fresh Install:
- Current system has performance or stability issues
- You're upgrading from HDD to SSD (different optimal alignment)
- You want to thoroughly clean the system and start fresh
- You have the time and technical confidence for driver installation
- Hybrid Approach Option:
- Clone to new SSD for immediate usability
- Later, perform reset/refresh within Windows for cleanup
- Best of both worlds: minimal downtime with eventual cleanup
5. Safe Disassembly: Accessing the SSD Bay in the Lenovo Yoga G2 Chassis
Gaining safe, damage-free access to the Yoga G2's SSD bay requires precision and understanding of this 2-in-1 laptop's unique construction. This comprehensive guide covers step-by-step disassembly techniques, critical precautions, and professional tips for navigating the aluminum chassis and delicate internal components.
⚠️ Pre-Disassembly Safety Protocol
Critical: Complete these steps before touching any tools.
✅ Mandatory Safety Checklist
- Complete Power Down & Discharge:
- Perform full Windows shutdown (not sleep/hibernate)
- Disconnect AC adapter and all peripherals
- Hold power button for 15 seconds to discharge capacitors
- Verify all indicator lights are completely off
- ESD Protection Setup:
- Connect anti-static wrist strap to grounded surface
- Work on ESD-safe mat if available
- Avoid working on carpet or synthetic surfaces
- Workspace Preparation:
- Clear, clean surface large enough for 13" laptop + tools
- Bright, direct lighting (adjustable lamp recommended)
- Organized tool layout within easy reach
- Documentation:
- Take clear photos of laptop from all angles
- Document any existing cosmetic damage
- Note screw locations and patterns
🎯 Yoga G2 Specific Safety Warnings
- Aluminum Chassis: Scratches easily - use plastic tools only
- 360° Hinge Mechanism: Handle carefully, don't force beyond normal range
- Touchscreen Display: Extremely delicate - work face down on soft surface
- Tight Tolerances: Components fit precisely - never force anything
🔩 Bottom Cover Removal Procedure
The Yoga G2's bottom cover is secured with captive screws and numerous plastic clips.
📍 Bottom Cover Screw Identification
| Location | Quantity | Screw Type | Important Notes |
|---|---|---|---|
| Perimeter Screws | 6-8 screws | Phillips #00 (PH00) | Captive screws - do NOT fully remove |
| Center Screw (if present) | 0-1 screw | Phillips #00 (PH00) | May be under warranty sticker |
| Rubber Foot Screws | 0-2 screws | Phillips #00 (PH00) | Hidden under front rubber feet |
Note: Captive screws will loosen but remain attached to the bottom cover.
🪛 Screw Removal Best Practices
- Use Correct Driver Size:
- Phillips #00 (PH00) for all bottom cover screws
- Magnetic tip highly recommended
- Apply firm downward pressure to prevent stripping
- Removal Pattern:
- Loosen all screws 2-3 turns initially
- Work in diagonal pattern (like loosening car lug nuts)
- Once all are loose, remove completely but screws will stay captive
- Check for Hidden Screws:
- Gently peel back front rubber feet to check for hidden screws
- Some models have screws under warranty stickers
- Never force cover - if resistance, re-check for missed screws
🔪 Clip Release Technique
The Yoga G2 uses numerous plastic clips around the perimeter.
- Initial Break Point:
- Start at rear corner near hinge
- Insert plastic spudger at 30-degree angle
- Apply gentle upward pressure while twisting slightly
- Listen/feel for soft click as first clip releases
- Working Around Perimeter:
- Work from released corner along edge
- Release clips every 1-2 inches
- Use plastic cards to maintain separation
- Never force - if resistance increases, reposition tool
- Yoga G2 Specific Clip Notes:
- Clips are smaller and more numerous than typical laptops
- Aluminum construction means less flex - be precise
- Work slowly and methodically around entire perimeter
📐 Bottom Cover Removal Sequence
Follow this precise sequence to avoid damage.
🔧 Step-by-Step Removal
- Position Laptop:
- Place Yoga G2 upside down on soft, clean surface
- Display should be protected (use microfiber cloth)
- Ensure workspace is static-free
- Remove Screws:
- Remove all visible perimeter screws
- Check under rubber feet for hidden screws
- Organize screws by location (though captive)
- Release Clips (Critical Sequence):
- Start at rear-left corner (near hinge)
- Work along left edge toward front
- Move to rear-right corner
- Work along right edge toward front
- Finally release front edge clips
- Lift Cover:
- Once all clips released, lift cover from rear edge
- Angle upward to clear ports and components
- Check for any cables attached to cover (unlikely but verify)
- Set cover aside on clean surface
👁️ Visual Reference Points
- Clip Locations: Approximately every 2-3 cm around perimeter
- Trouble Spots: Areas near ports may have tighter clips
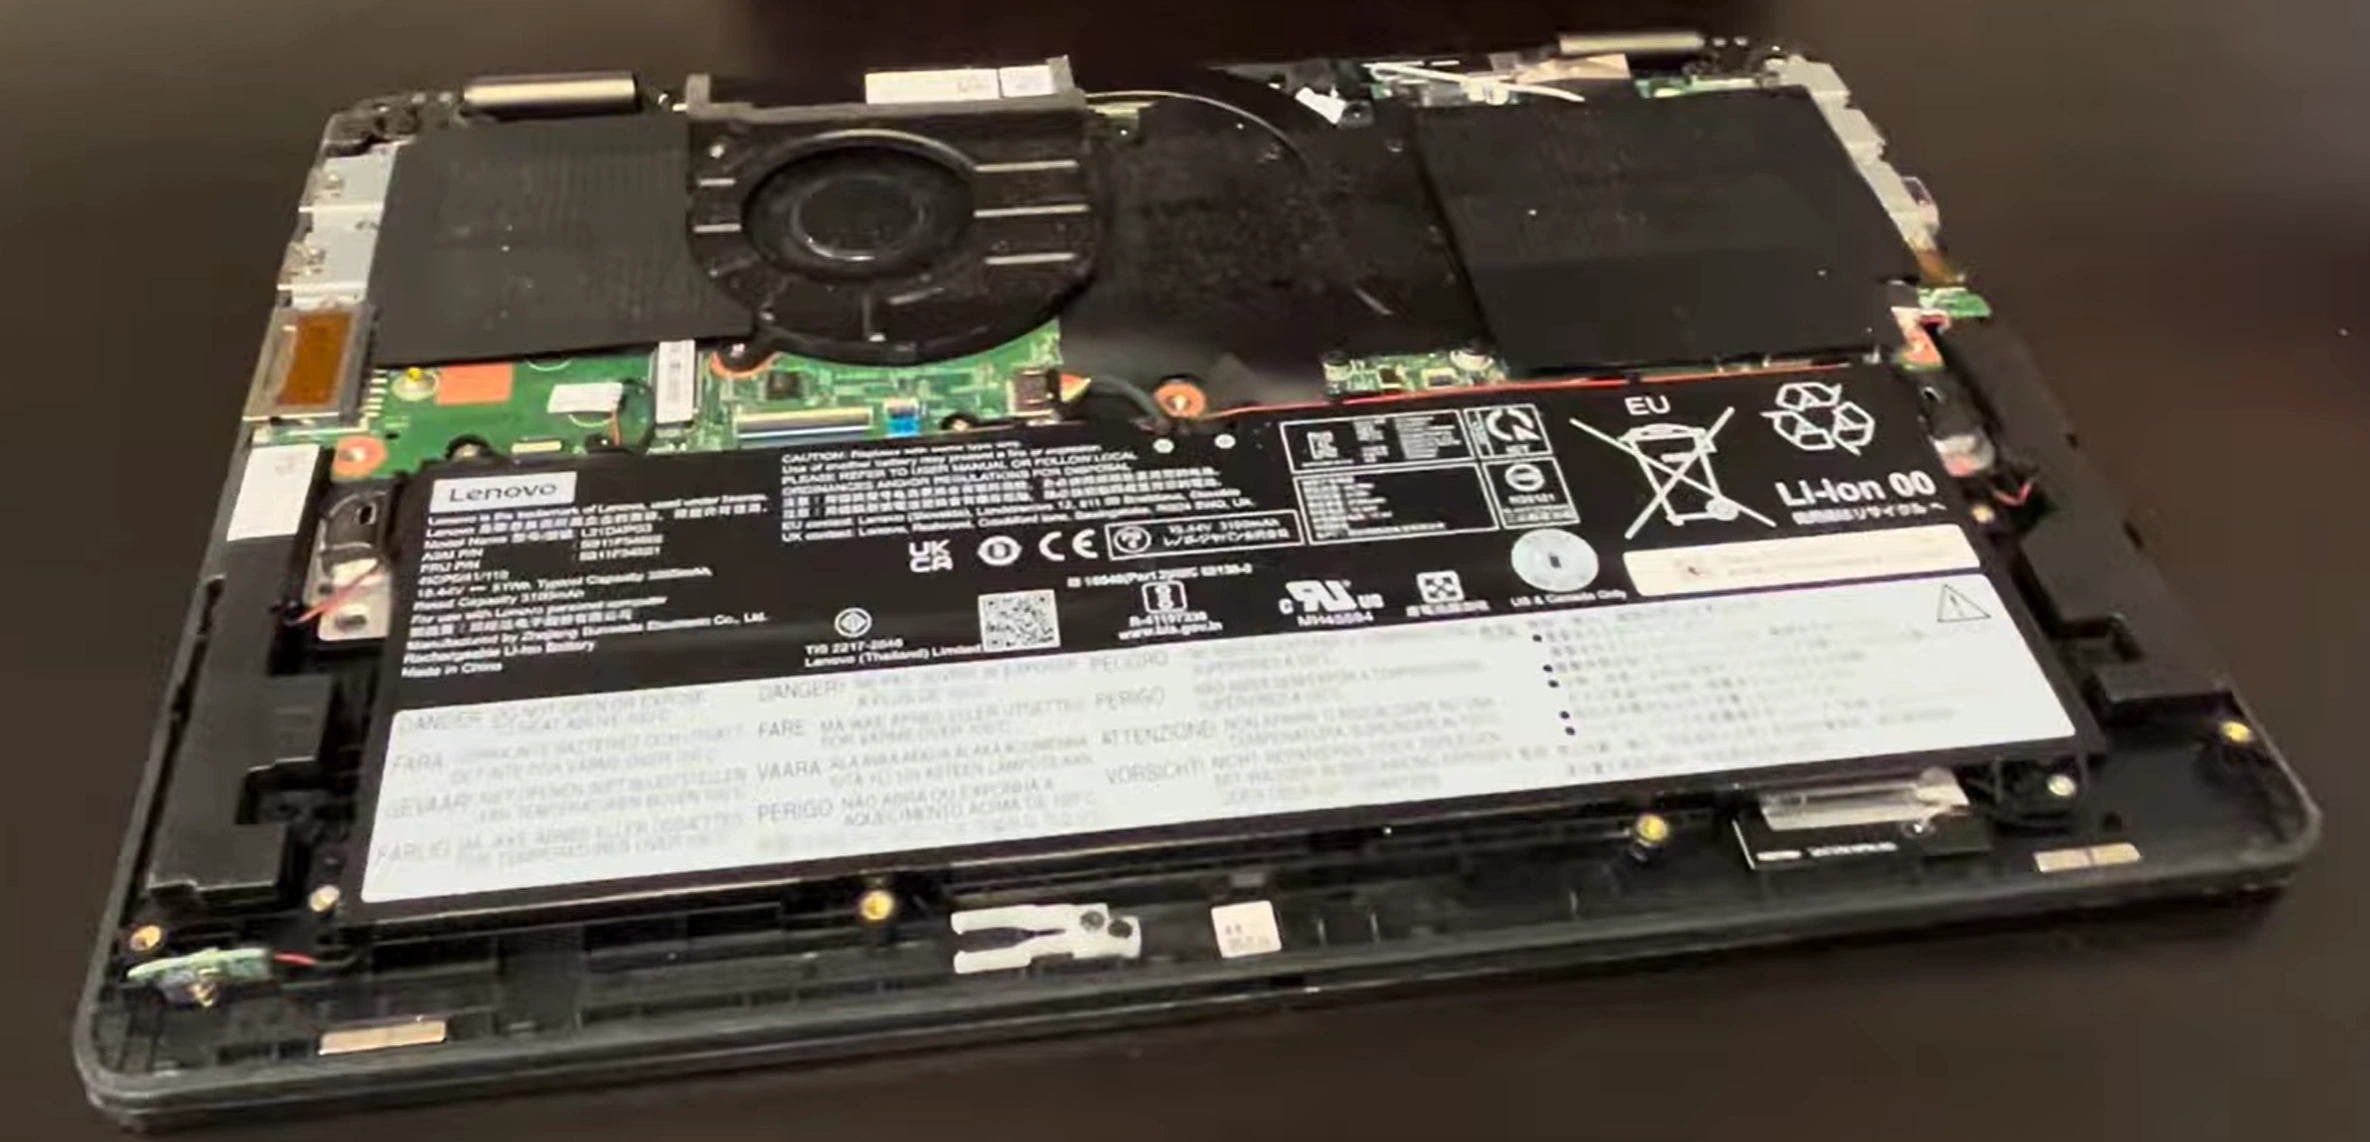
- Internal View: Upon removal, you'll see:
- Battery (large central component)
- Cooling fan and heatsink
- SSD location (varies by model)
- Wi-Fi card and speakers
🛡️ Internal Component Safety
Once inside, additional precautions are necessary.
✅ Internal Safety Checklist
- Battery Disconnection (MANDATORY):
- Locate battery connector on motherboard
- Gently disconnect by pulling connector straight out
- NEVER work on internals with battery connected
- Static Control:
- Maintain ESD protection throughout
- Avoid touching circuitry with tools
- Handle components by edges only
- Component Awareness:
- Note cable routing before disconnecting anything
- Avoid placing tools on or near delicate components
- Keep screws away from motherboard areas
🗺️ Yoga G2 Internal Layout Guide
| Component | Location | Identification | Precautions |
|---|---|---|---|
| SSD Bay | Typically center or upper area | M.2 slot with single mounting screw | May have thermal pad/cover - handle carefully |
| Battery Connector | Edge of battery, connects to motherboard | White or black plastic connector | Disconnect FIRST before any other work |
| Cooling System | Near hinge area | Fan with heatsink pipes | Don't bend heat pipes - permanent damage |
| Ribbon Cables | Various locations | Flat, flexible cables with ZIF connectors | Lift locking flaps before removing |
📍 SSD Location Identification
Finding the SSD in your specific Yoga G2 model.
🔍 Common SSD Locations in Yoga G2
- Most Common Location:
- Upper center of motherboard
- Near RAM slots (though RAM is soldered)
- May be under metal shield or thermal pad
- Alternative Locations:
- Some models: Right side near fan
- Others: Left side near battery
- Check your specific model's service manual
- Identification Features:
- M.2 slot (approximately 80mm long)
- Single tiny screw at far end
- May have "SSD" or "M.2" label on motherboard
🚧 Potential Access Obstacles
Your SSD might be under other components that need careful removal.
- Metal Shield/Heat Spreader:
- May be secured with 1-2 small screws
- Remove carefully to avoid bending
- Note any thermal pad orientation
- Battery Overhang:
- Some configurations have battery covering SSD area
- May require partial battery removal
- Only disconnect battery at connector, don't remove fully
- Cable Routing:
- Antenna cables may be routed over SSD area
- Gently move aside if necessary
- Note exact routing for reassembly
❌ Common Disassembly Mistakes to Avoid
⚠️ Critical Mistakes & Prevention
| Mistake | Consequence | Prevention | If It Happens |
|---|---|---|---|
| Forcing Bottom Cover | Broken clips, bent aluminum, damage to internal components | Check for missed screws, work slowly, use proper tools | Stop immediately, re-check for obstacles |
| Using Metal Tools for Prying | Permanent scratches on aluminum, damage to clips | Use only plastic/nylon tools for prying | Minor scratches can be polished, major damage permanent |
| Not Disconnecting Battery | Short circuits, component damage, personal injury risk | ALWAYS disconnect battery before touching internals | If short occurs, disconnect immediately, assess damage |
| Losing SSD Screw | Cannot secure new SSD, loose connection | Use magnetic screwdriver, work over contained area | Replacement screws available from electronics suppliers |
| Damaging Ribbon Cable Connectors | Non-functional components (keyboard, touchpad, etc.) | Lift locking flaps before removing cables, pull straight out | Careful repair possible if pins intact, otherwise replacement |
🔬 Professional Disassembly Techniques
Advanced methods for challenging situations.
⚡ Advanced Techniques for Stubborn Cases
- Stubborn Clips:
- Apply gentle heat with hairdryer (low setting, 10 seconds)
- Use plastic playing card to slide along seam
- Work from both sides toward stubborn clip
- Stripped Screws:
- Place rubber band between screw and driver
- Use slightly larger driver if available
- As last resort: small screw extractor kit
- Tight Clearances:
- Use thinner prying tools (guitar picks work well)
- Apply painter's tape around edges for protection
- Work in smaller increments
💡 Tool Pro Tips
- Magnetic Screwdriver Enhancement:
- If not magnetic enough, rub with strong magnet
- Keep magnet away from SSD and other components
- Test magnetism before starting
- Tool Organization:
- Use ice cube tray for screw organization
- Place tools in order of use
- Keep frequently used tools within easy reach
- Lighting Solutions:
- Headlamp for hands-free illumination
- Phone flashlight as backup
- Adjustable desk lamp positioned above work area
🔁 Reassembly Preparation
Prepare for reassembly before removing the SSD.
✅ Pre-SSD Removal Checklist
- Document Internal Layout:
- Take clear photos of internal components
- Note cable routing and connector orientations
- Document screw locations and types
- Clean Workspace:
- Remove any debris from internal area
- Clean dust from fan and vents with compressed air
- Ensure no tools or debris will interfere with reassembly
- Organize Components:
- Keep screws organized by location
- Place small components in labeled containers
- Keep original SSD nearby for reference
🔍 Troubleshooting Disassembly Issues
⚠️ Common Problems & Immediate Solutions
| Problem | Immediate Action | Prevent Future Occurrence |
|---|---|---|
| Bottom cover won't budge | Stop, check for missed screws or clips | Follow systematic removal sequence, use proper tools |
| Clip broke during removal | Note location, continue carefully | Use proper prying angle, don't force |
| Screw stripped | Try rubber band method, consider extraction kit | Use correct driver size, apply downward pressure |
| Can't locate SSD | Consult service manual, look for M.2 slot | Research specific model before starting |
6. Original SSD Removal: Step-by-Step Extraction Process for Yoga G2
Safe removal of the original SSD from your Lenovo Yoga G2 requires precision handling of delicate components in this tightly packed 2-in-1 chassis. This comprehensive guide covers every step from identification to safe extraction, with special attention to AMD Ryzen platform considerations.
🛡️ Pre-Removal Safety & Verification
Critical: Complete these steps before touching the SSD.
✅ Mandatory Safety Protocol
- Battery Disconnection Verification:
- Confirm battery connector is completely disconnected
- Press power button for 10 seconds to discharge residual power
- Verify no LED lights are illuminated anywhere on motherboard
- ESD Protection Confirmation:
- Anti-static wrist strap properly connected to ground
- Work surface is static-dissipative
- Handle all components by edges only
- Documentation:
- Take clear photos of SSD in its installed orientation
- Note any thermal pads or shields present
- Document screw locations and cable routing
🔍 Original SSD Identification
| SSD Characteristic | How to Identify | Yoga G2 Typical Configurations | Notes |
|---|---|---|---|
| Form Factor | Measure length (typically 80mm for 2280) | M.2 2280 (80mm) standard | Single-sided construction likely |
| Interface Type | Check motherboard label or use software beforehand | PCIe 3.0 x4 NVMe | Some may be PCIe 3.0 x2 for 256GB models |
| Brand & Model | Look for printed text on SSD label | SK Hynix, Samsung, WD, or Lenovo OEM | Document for compatibility reference |
| Thermal Management | Check for thermal pad, foil, or shield | Thermal pad common, sometimes metal shield | Preserve for reuse with new SSD |
📍 SSD Location & Visual Guide
Identifying the exact SSD location in your specific Yoga G2 configuration.
🗺️ Common Yoga G2 SSD Locations
- Primary Location (Most Common):
- Upper center of motherboard, near hinge area
- Adjacent to Wi-Fi card (smaller card with antenna wires)
- Typically oriented lengthwise along laptop's width
- Alternative Configuration:
- Some models: Right side near cooling fan
- Others: Under battery or other components
- Consult Lenovo Hardware Maintenance Manual for exact location
- Identification Markers:
- Look for "M.2" or "SSD" silkscreen on motherboard
- Single tiny screw at far end of SSD
- Rectangular slot approximately 22mm wide
👁️ Visual Reference Points
| Reference Point | What to Look For | Distance from Edge | Orientation Clue |
|---|---|---|---|
| M.2 Slot | Gold contacts visible on motherboard | 5-7cm from rear edge | Parallel to laptop width |
| Mounting Screw | Tiny Phillips or hex screw at far end | At end of SSD (80mm from connector) | SSD lifts at angle when screw removed |
| Thermal Management | Gray thermal pad or silver metal shield | Directly on top of SSD | May be stuck to SSD - separate carefully |
| Nearby Components | Wi-Fi card, battery connector, cooling fan | Within 2-3cm of SSD | Note positions before disturbing |
🌡️ Thermal Management Component Removal
Many Yoga G2 configurations include thermal pads or shields over the SSD.
🛡️ Common Thermal Management Types
| Component Type | Identification | Removal Technique | Reuse Considerations |
|---|---|---|---|
| Thermal Pad | Gray, soft, slightly sticky material | Peel slowly from SSD surface | Can often be reused if intact |
| Metal Heat Shield | Thin metal plate with screw(s) | Remove 1-2 small screws, lift straight up | Always reuse with new SSD |
| Thermal Foil/Tape | Silver foil with adhesive backing | Peel carefully from edges | May need replacement if adhesive fails |
| Combination Setup | Pad under shield, or multiple layers | Document layer order before removal | Reassemble in exact reverse order |
🔧 Step-by-Step Thermal Component Removal
- Inspect Before Touching:
- Identify all thermal management components
- Note screw locations and quantities
- Check for any adhesive attachments
- Remove Metal Shields (if present):
- Use Phillips #00 for shield screws
- Lift shield straight up to avoid bending
- Set aside with screws in dedicated container
- Handle Thermal Pads:
- If pad is stuck to SSD, warm slightly with hairdryer (low heat)
- Peel from one corner slowly
- If pad tears, note thickness for replacement
- Preserve Components:
- Place thermal pads on non-sticky surface (wax paper ideal)
- Keep screws with their respective components
- Avoid getting dust or debris on adhesive surfaces
🪛 SSD Mounting Screw Removal Technique
The tiny M.2 mounting screw requires special handling to avoid loss or damage.
🔩 Mounting Screw Specifications
| Specification | Details | Tools Required | Critical Notes |
|---|---|---|---|
| Size | M2 x 3mm (typically) | Phillips #000 (PH000) magnetic driver | Tiniest screw in the laptop |
| Thread Type | Standard metric fine thread | Precision driver with good fit | Stripping risk is high with wrong size |
| Location | Far end of SSD (opposite connector) | Good lighting essential | Screw may be under thermal material |
| Retention | Spring-loaded standoff (usually) | Magnetic tip MANDATORY | Screw remains in standoff when loosened |
🔧 Step-by-Step Screw Removal
- Tool Selection & Test:
- Select Phillips #000 driver with magnetic tip
- Test magnetism by picking up a similar small screw
- Ensure driver fits screw head perfectly
- Positioning & Approach:
- Position laptop for direct view of screw
- Approach screw straight on (not at angle)
- Apply gentle downward pressure to prevent slipping
- Removal Technique:
- Turn counter-clockwise (lefty loosey)
- Expect 4-6 turns to fully loosen
- Screw may stay in standoff - this is normal
- Screw Retrieval:
- Use magnetic driver to lift screw from standoff
- If screw falls, retrieve immediately with magnetic tool
- Place screw in labeled container immediately
🔍 Screw Removal Troubleshooting
- Stripped Screw Head:
- Prevention: Use correct size driver, apply downward pressure
- Solution: Small rubber band between screw and driver
- Last Resort: Tiny screw extractor kit (use with extreme caution)
- Lost Screw:
- Prevention: Work over magnetic mat or tray
- Retrieval: Use strong magnet wrapped in plastic bag
- Replacement: M2x3mm screws available from electronics suppliers
- Screw Won't Budge:
- Check: Are you turning correct direction? (left to loosen)
- Try: Small amount of penetrating oil (apply carefully)
- Caution: Never force - risk of damaging motherboard threads
📤 SSD Extraction Procedure
Safe removal of the SSD from the M.2 slot without damaging the connector.
🔧 Proper Extraction Techniques
| Method | Technique | Best For | Risk Level |
|---|---|---|---|
| 30-Degree Angle Method | Lift SSD at 30° angle, then slide out | Standard M.2 removal | Low (when done correctly) |
| Parallel Slide Method | Slide horizontally away from connector | Tight spaces, minimal clearance | Medium (risk of damaging pins) |
| Two-Point Lift Method | Lift both ends simultaneously | Stubborn SSDs, strong retention | Low-Medium (requires coordination) |
🔧 Step-by-Step Extraction
- Verify Screw Removal:
- Confirm mounting screw is completely removed
- SSD should lift freely at far end
- If still held down, check for missed screws or adhesive
- Initial Lift:
- Place fingernail or plastic tool under far end of SSD
- Gently lift until SSD is at approximately 30-degree angle
- Do not force - if resistance, re-check for obstacles
- Disconnect from Slot:
- While holding at angle, gently pull SSD away from connector
- Movement should be smooth with minimal resistance
- If stuck, wiggle slightly side-to-side while pulling
- Complete Removal:
- Once free from connector, lift SSD completely out
- Handle by edges only, avoid touching gold contacts
- Place on anti-static surface or in anti-static bag
🔍 M.2 Connector Inspection
After SSD removal, inspect the motherboard connector.
- Check for Damage:
- Bent or missing pins in connector
- Cracked or damaged plastic housing
- Debris or thermal paste in connector
- Cleaning (if needed):
- Use compressed air to remove dust
- For stubborn debris, use 99% isopropyl alcohol on Q-tip
- Allow to dry completely before installing new SSD
- Alignment Verification:
- Note key position (M-key for NVMe)
- Ensure no obstructions in slot
- Verify standoff is properly secured to motherboard
⚡ AMD Ryzen Platform Specifics
Special considerations for Yoga G2's AMD platform during SSD removal.
🎯 AMD-Specific Notes
- Platform Stability:
- AMD platforms generally have excellent M.2 compatibility
- No special BIOS settings typically needed for SSD removal
- Document any custom storage settings before removal
- Thermal Considerations:
- AMD Ryzen APUs may have shared cooling with chipset
- Note if SSD thermal pad connects to other components
- Some configurations use shared thermal solution
- Power Management:
- AMD platforms may have aggressive power states
- Ensure complete power discharge before working
- No additional precautions beyond standard safety
💾 Original SSD Handling & Storage
Proper handling of your removed SSD preserves it for backup or resale.
✅ SSD Handling Protocol
- Immediate Protection:
- Place in anti-static bag immediately after removal
- If no anti-static bag available, use non-conductive surface
- Avoid stacking or placing heavy objects on SSD
- Data Security:
- If selling or disposing, perform secure erase
- For backup purposes, verify data integrity
- Consider encryption if storing sensitive data
- Long-Term Storage:
- Store in cool, dry place away from magnets
- Label with date and original capacity
- Include any adapters or screws with storage
❌ Common SSD Removal Mistakes
⚠️ Critical Mistakes & Prevention
| Mistake | Consequence | Prevention | Recovery |
|---|---|---|---|
| Forcing SSD at Wrong Angle | Bent pins in connector, damaged SSD contacts | Lift to 30° before pulling, never force | Carefully straighten pins if possible |
| Touching Gold Contacts | Oil from skin causes corrosion, connection issues | Handle by edges only, use gloves if possible | Clean with isopropyl alcohol if touched |
| Losing Mounting Screw | Cannot secure new SSD properly | Work over magnetic mat, use magnetic driver | Purchase M2x3mm replacement screw |
| Damaging Thermal Pad | Poor heat transfer to new SSD | Warm slightly before removal, peel slowly | Replace with same thickness thermal pad |
| Static Discharge | Instant damage to SSD or motherboard | Always use ESD protection, ground yourself | Damage is usually permanent |
🔍 Post-Removal Inspection & Preparation
Critical checks before installing the new SSD.
✅ Post-Removal Checklist
- Motherboard Inspection:
- Check M.2 connector for damage or debris
- Verify standoff is secure and undamaged
- Look for any solder bridges or damage near connector
- Component Verification:
- All thermal components accounted for
- Mounting screw secured in container
- No tools or debris left inside laptop
- Workspace Preparation:
- Clear area for new SSD installation
- Have new SSD ready in anti-static packaging
- Ensure good lighting for precise installation
💡 Professional Removal Tips
- Photographic Documentation:
- Take photos at each step of removal
- Include close-ups of connector and thermal setup
- Helps with reassembly and future reference
- Tool Preparation:
- Have multiple sizes of Phillips drivers available
- Keep magnetic retrieval tool handy
- Use magnifying glass or phone camera zoom for tiny screws
- Time Management:
- Allocate sufficient time (30-60 minutes for removal)
- Don't rush - most damage occurs when hurried
- Take breaks if frustrated or fatigued
7. New SSD Installation: Proper Mounting and Connection for Yoga G2
Installing your new SSD in the Lenovo Yoga G2 requires precision alignment, proper thermal management, and careful handling to ensure optimal performance and reliability. This comprehensive guide covers every aspect of professional SSD installation in this AMD Ryzen-based 2-in-1 laptop.
🛡️ Pre-Installation Safety & Preparation
Critical: Complete these checks before handling your new SSD.
✅ Pre-Installation Checklist
- Workspace Verification:
- ESD protection active (wrist strap connected)
- Clean, static-free surface
- Adequate lighting for precise work
- Component Inspection:
- New SSD still in anti-static packaging
- Original mounting screw and thermal components ready
- Motherboard connector clean and undamaged
- New SSD Pre-Installation Check:
- Verify it's single-sided (critical for Yoga G2)
- Check for physical damage or defects
- Confirm capacity matches expectations
🎯 New SSD Handling Protocol
| Handling Step | Proper Technique | Why It Matters | Common Mistakes |
|---|---|---|---|
| Removal from Packaging | Ground yourself, open anti-static bag carefully | Prevents static damage to NAND chips | Touching before grounding, ripping bag |
| Component Inspection | Hold by edges, inspect under good light | Identifies defects before installation | Touching gold contacts, missing visual inspection |
| Contact Protection | Avoid touching gold contacts completely | Skin oils cause corrosion over time | Fingerprints on contacts, improper handling |
| Orientation Verification | Compare notch position with original SSD | Ensures proper M-key alignment | Forcing wrong orientation, damaging connector |
🔌 M.2 Connector Alignment & Orientation
Proper alignment is crucial to avoid damaging the SSD or motherboard connector.
🎯 Yoga G2 M.2 Alignment Specifications
| Alignment Feature | Specification | Visual Identification | Critical Check |
|---|---|---|---|
| Key Type | M-key (NVMe PCIe) | Single notch offset from center toward left side | Match notch position with connector key |
| Notch Position | Between pins 66-67 (M-key standard) | Approximately 1/3 from left edge of contacts | Do not confuse with B-key or B+M key |
| Contact Orientation | Gold contacts face downward | Components on SSD face upward | Opposite of some older M.2 configurations |
| Length Alignment | 2280 (80mm) - far screw aligns with standoff | Screw hole at far end aligns with standoff | SSD should sit flat when properly aligned |
🔧 Step-by-Step Alignment Procedure
- Visual Reference:
- Compare new SSD notch position with original
- Note which end has the screw hole
- Identify component side (faces up in Yoga G2)
- Test Fit (No Force):
- Hold SSD at 30-degree angle above slot
- Align notch with connector key
- Gently lower into position without pressing
- Should slide in smoothly with minimal resistance
- Common Alignment Issues:
- Won't go in: Check notch alignment, try rotating 180°
- Hits obstruction: Verify single-sided, check for debris
- Wrong angle: Must be 30° for initial insertion
🔧 Step-by-Step Installation Procedure
Follow this precise sequence for safe, professional installation.
✅ Installation Sequence
- Initial Insertion:
- Hold SSD at 30-degree angle to motherboard
- Align gold contacts with M.2 slot
- Gently insert SSD into slot at this angle
- Should slide in 1-2cm with gentle pressure
- Angle Transition:
- Once partially inserted, gently press down on far end
- SSD will rotate from 30° to flat position
- Movement should be smooth, not forced
- SSD should now lie flat against motherboard
- Screw Hole Alignment:
- Verify screw hole aligns perfectly with standoff
- SSD should not be crooked or angled
- If misaligned, lift and reposition - never force
- Final Seating Check:
- SSD should sit completely flat
- No rocking or unevenness
- Gold contacts should not be visible (fully inserted)
🔍 Installation Troubleshooting
| Problem | Likely Cause | Immediate Action | Prevention |
|---|---|---|---|
| SSD won't go flat | Not fully inserted at angle, obstruction | Remove, re-insert at proper 30° angle | Ensure proper initial insertion angle |
| Screw hole doesn't align | SSD not fully seated, wrong orientation | Check notch alignment, ensure full insertion | Verify orientation before applying pressure |
| SSD sits crooked | Uneven pressure during installation | Remove and reinstall with even pressure | Press evenly across SSD width during installation |
| Resistance during insertion | Debris in connector, bent pins | Stop immediately, inspect connector | Clean connector before installation |
🪛 Mounting Screw Installation Technique
The tiny M.2 screw requires precision handling for proper securing.
🔩 Step-by-Step Screw Installation
- Screw Preparation:
- Use magnetic Phillips #000 driver
- Pick up screw with magnetic tip
- Verify screw is M2x3mm (or original screw)
- Alignment & Placement:
- Position screw directly over standoff hole
- Lower screw straight down into hole
- Feel for threads engaging (gentle resistance)
- Tightening Technique:
- Turn clockwise (righty tighty) gently
- Stop when screw is snug - DO NOT overtighten
- Proper tightness: Screw is secure but not forced
- Final Check:
- SSD should not move or rock
- Screw head should be flush or slightly recessed
- No stripped threads or cross-threading
⚖️ Proper Torque Guidelines
| Tightness Level | Description | Visual/Feel Indicator | Risk of Incorrect Torque |
|---|---|---|---|
| Proper (Recommended) | Snug, no additional force needed | Screw stops turning with gentle pressure | None - ideal for M.2 installation |
| Under-tightened | Loose, SSD may have movement | Screw turns easily, may back out | Connection issues, potential data loss |
| Over-tightened | Forced, excessive tension | Requires significant force, may strip | Stripped threads, damaged motherboard |
Pro Tip: If you feel significant resistance suddenly increase, you've hit the stopping point. Never apply additional force beyond this point.
🌡️ Thermal Management Installation
Proper thermal interface installation ensures optimal SSD performance and longevity.
🔧 Thermal Component Installation Steps
- Surface Preparation:
- Clean SSD surface with isopropyl alcohol if needed
- Ensure no debris on chips or thermal materials
- Identify main controller and NAND chip locations
- Thermal Pad Application:
- Remove protective film from one side
- Apply to SSD chips, aligning with chip locations
- Remove second protective film
- Ensure no wrinkles or air bubbles
- Heat Shield Installation:
- Align shield with mounting holes
- Lower straight down onto thermal pad
- Secure with original screws (if present)
- Do not overtighten shield screws
- Pressure Test:
- Gentle pressure should show even compression
- Thermal material should make full contact
- No gaps between shield and SSD
⚡ AMD Ryzen Platform Optimization
Special considerations for optimizing SSD performance on Yoga G2's AMD platform.
🎯 AMD Platform Installation Tips
- BIOS Settings to Check After Installation:
- NVMe Configuration: Should detect automatically
- Boot Priority: May need adjustment
- Secure Boot: Ensure enabled for Windows 11
- Driver Considerations:
- AMD StoreMI compatibility if using multiple drives
- NVMe driver optimization in AMD chipset package
- Power management settings for SSD
- Performance Verification:
- Check PCIe link speed in Windows (should be 3.0 x4)
- Verify NVMe driver is Microsoft or AMD optimized
- Test temperatures under load with AMD monitoring tools
🔗 Cable Management & Component Routing
Proper cable routing prevents interference and maintains optimal airflow.
📏 Yoga G2 Internal Cable Routing
| Cable/Component | Routing Consideration | Interference Risk | Proper Position |
|---|---|---|---|
| Wi-Fi Antenna Cables | Often routed near SSD area | Medium - can get pinched under shield | Route around SSD, not over it |
| Speaker Cables | May pass near SSD mounting area | Low - but can obstruct shield installation | Ensure flat against motherboard |
| Fan Cable | Typically away from SSD area | Low | Should not contact SSD or shield |
| Battery Cable | May need repositioning during SSD access | High - can prevent proper SSD seating | Route according to original positioning |
✅ Post-Installation Verification
Critical checks before reassembling the laptop.
🔍 Installation Verification Checklist
- Physical Inspection:
- SSD sits completely flat
- Screw properly tightened (snug, not forced)
- Thermal components properly installed
- No cables pinched under SSD or shield
- Clearance Verification:
- SSD does not contact any other components
- Heat shield clears surrounding components
- Bottom cover will fit without pressure on SSD
- Electrical Safety Check:
- No exposed contacts touching metal
- Thermal pad only on non-conductive areas
- No debris or metal shavings in area
⚡ Pre-Reassembly Functional Test (Optional but Recommended)
Note: Only attempt if comfortable with partial reassembly.
- Reconnect battery connector
- Place bottom cover loosely (don't secure screws)
- Connect AC adapter and power on
- Enter BIOS (F2 during boot) to verify SSD detection
- Power down, disconnect battery before continuing reassembly
Benefit: Identifies installation issues before full reassembly.
❌ Common Installation Mistakes & Prevention
⚠️ Critical Installation Errors
| Mistake | Consequence | Prevention | Detection |
|---|---|---|---|
| Forcing Wrong Orientation | Bent pins, damaged SSD and motherboard | Verify notch alignment before any pressure | SSD won't sit flat, visible misalignment |
| Overtightening Screw | Stripped threads, damaged standoff | Stop when snug, never force | Excessive resistance, possible thread damage |
| Missing Thermal Interface | Overheating, thermal throttling | Always install thermal pad or equivalent | Gap between SSD and shield, high temps |
| Pinched Cables | Damaged cables, connection issues | Verify cable routing before securing shield | Visible cable under shield, resistance |
| Double-sided SSD in Single-sided Bay | Won't fit, potential component damage | Verify single-sided before purchase | SSD won't sit flat, components contact shield |
💡 Professional Installation Tips
- Lighting Optimization:
- Use adjustable lamp positioned directly over work area
- Consider headlamp for hands-free illumination
- Phone flashlight as backup for tight spaces
- Tool Preparation:
- Have multiple Phillips #000 drivers available
- Keep magnetic retrieval tool within reach
- Use tweezers for handling thermal pad films
- Workspace Management:
- Keep original SSD nearby for reference
- Organize screws and components by installation order
- Work systematically without rushing
🎯 Yoga G2 Specific Installation Notes
Unique considerations for this 2-in-1 laptop.
- Slim Chassis Constraints:
- Limited clearance between SSD and bottom cover
- Ensure thermal materials are appropriate thickness
- Verify no components protrude excessively
- AMD Platform Benefits:
- Excellent NVMe compatibility out of the box
- No special BIOS settings typically needed
- Good thermal management for sustained performance
- 2-in-1 Design Considerations:
- Tablet mode may position SSD at different orientation
- Ensure secure mounting for all usage angles
- Consider thermal performance in vertical orientations
8. BIOS Configuration: Optimizing Settings for Your New SSD in Yoga G2
Proper BIOS configuration is essential for maximizing your new SSD's performance, ensuring system stability, and unlocking the full potential of your Yoga G2's AMD Ryzen platform. This comprehensive guide covers BIOS navigation, optimization settings, and troubleshooting for SSD installations.
🔑 Accessing Yoga G2 BIOS/UEFI
Multiple methods exist for entering the BIOS setup utility on your Yoga G2.
🎯 BIOS Entry Methods
| Method | Procedure | Success Rate | Best For |
|---|---|---|---|
| Standard Boot Method | Restart laptop, repeatedly press F2 during Lenovo logo | High (primary method) | Most users, standard configuration |
| Novo Button Method | Power off completely, press small Novo button near power | Very High (direct access) | When F2 method fails, recovery situations |
| Windows Settings Method | Settings → Update & Security → Recovery → Advanced startup → Restart now → Troubleshoot → Advanced options → UEFI Firmware Settings | High (Windows must be functional) | When Windows is working properly |
| Fast Boot Disable Method | If Fast Boot is enabled, temporarily disable in Windows power settings to access BIOS | Medium | When Fast Boot prevents BIOS access |
🔍 SSD Detection & Verification in BIOS
First steps after installing your new SSD.
✅ SSD Detection Verification Steps
- Initial Boot Check:
- Enter BIOS immediately after SSD installation
- Navigate to Information or Configuration tab
- Look for "Storage" or "Drive Information" section
- Verify new SSD is listed with correct capacity
- Capacity Verification:
- Check that BIOS reports correct SSD capacity
- Example: 1TB SSD should show ~1024GB or 1000GB
- Half capacity may indicate interface issue (PCIe x2 vs x4)
- Interface Verification:
- Look for interface type (NVMe, PCIe, SATA)
- Check link speed if available (PCIe 3.0 x4 expected)
- Note any warnings or error messages
🔧 SSD Not Detected? Troubleshooting Steps
| Symptom | Possible Causes | Diagnostic Steps | Solutions |
|---|---|---|---|
| SSD not listed | Improper installation, incompatible SSD, BIOS setting | Re-seat SSD, check connections, verify compatibility | Secure installation, update BIOS, try different SSD |
| Wrong capacity shown | BIOS limitation, SSD firmware issue, interface limitation | Check BIOS version, SSD firmware, PCIe lanes | Update BIOS/SSD firmware, check PCIe configuration |
| SSD detected but not bootable | Boot mode mismatch, corrupted boot sector, secure boot | Check UEFI/Legacy settings, verify boot sector | Match boot mode, repair boot sector, disable secure boot temporarily |
⚙️ Storage Controller Configuration
Optimizing storage controller settings for NVMe SSD performance.
🎯 Storage Controller Optimization
| Setting | Location | Recommended Value | Performance Impact |
|---|---|---|---|
| SATA Controller Mode | Configuration → SATA Controller | AHCI (not RAID or IDE) | High - enables advanced SSD features |
| NVMe Configuration | Configuration → NVMe Configuration | Enabled/Auto | Critical - enables NVMe SSD functionality |
| PCIe Speed | Advanced → PCI Subsystem Settings | Auto or Gen3 | High - ensures full PCIe 3.0 x4 speed |
| AMD PBS (Platform Security) | Security → Platform Security | Enabled for Windows 11 | Required for Windows 11 Secure Boot |
⚡ AMD Ryzen Specific Storage Settings
- AMD fTPM (Firmware TPM):
- Location: Security → AMD fTPM configuration
- Setting: Enabled (required for Windows 11)
- Note: May be called "Platform Trust Technology"
- AMD CBS (Common BIOS Settings):
- Location: Advanced → AMD CBS
- NVMe-related settings typically auto-configured
- Advanced users may adjust power management here
- PCIe Power Management:
- Location: Power → PCI Express Power Management
- Setting: Moderate or Maximum Performance
- Affects SSD power states and wake times
🚀 Boot Configuration & Optimization
Critical settings for ensuring your system boots from the new SSD.
🎯 Essential Boot Settings
| Setting | Location | Recommended Value | Why It Matters |
|---|---|---|---|
| Boot Mode | Boot → Boot Mode | UEFI (not Legacy or CSM) | Required for Windows 11, faster boot times |
| Secure Boot | Security → Secure Boot | Enabled (for Windows 11) | Security feature, Windows 11 requirement |
| Fast Boot | Boot → Fast Boot | Enabled (after OS installed) | Reduces boot time significantly |
| Boot Order | Boot → Boot Priority | Windows Boot Manager first | Ensures boot from correct drive |
| CSM (Compatibility) | Boot → CSM Support | Disabled (if using UEFI) | Cleaner boot process, required for some features |
🔧 Boot Order Configuration Steps
- Access Boot Priority:
- Navigate to Boot → Boot Priority Order
- List shows available boot devices
- Your new SSD should appear as "Windows Boot Manager" or similar
- Set Correct Order:
- Use +/- keys to move "Windows Boot Manager" to top
- If cloning, original Windows entry may still appear
- Remove any unnecessary entries if possible
- UEFI Boot Sources:
- For fresh install: Ensure USB drive is bootable UEFI
- UEFI USB drives appear with "UEFI:" prefix
- Select UEFI version for Windows installation
⚡ Performance Optimization Settings
BIOS settings that impact SSD and system performance.
🎯 Performance-Related BIOS Settings
| Setting Category | Specific Settings | Optimal Configuration | Performance Impact |
|---|---|---|---|
| CPU & Power Management | AMD Cool'n'Quiet, PowerNow!, CPPC | Enabled for balanced performance | Moderate - affects responsiveness |
| Memory Settings | XMP/DOCP (if RAM supports), Memory Frequency | Auto or specific profile if stable | Low on SSD directly, affects system |
| PCIe Settings | PCIe Speed, ASPM (Active State Power Management) | Auto for speed, Enabled for ASPM | High - directly affects SSD performance |
| Power Settings | Platform Power Management, C-State Control | Balanced or Performance based on use | Moderate - affects SSD power states |
⚡ AMD Precision Boost & SSD Performance
- Precision Boost 2:
- AMD's automatic overclocking technology
- Fast SSD helps maintain boost clocks by reducing wait states
- Ensure CPPC (Collaborative Power Performance Control) is enabled
- Power Supply Idle Control:
- Location: AMD CBS → Power Supply Idle Control
- Setting: Low Current Idle (for desktop replacement mode)
- Affects how quickly CPU/SSD respond from idle
🖥️ Virtualization & Advanced Features
Settings for users running virtual machines or using advanced features.
🔧 Virtualization Settings for Yoga G2
| Feature | BIOS Location | Recommended Setting |
🔄 BIOS Update ProcedureUpdating BIOS can improve SSD compatibility and performance. 📈 BIOS Update Methods
⚠️ BIOS Update Precautions
🔄 BIOS Reset & Recovery ProceduresWhat to do if BIOS settings cause issues. 🔧 BIOS Reset Methods
💡 Recommended BIOS Profile for Yoga G2 SSDOptimal BIOS settings for most users after SSD installation. ✅ Recommended BIOS Configuration
🔍 Troubleshooting Common BIOS/SSD Issues⚠️ Common BIOS-Related Issues
🔬 Advanced BIOS Features for Power UsersAdditional settings for enthusiasts and advanced users.
10. Troubleshooting Common SSD Upgrade Issues for Yoga G2Even with careful preparation, SSD upgrades can present challenges. This comprehensive troubleshooting guide addresses common issues specific to the Lenovo Yoga G2 with AMD Ryzen, providing step-by-step solutions for hardware detection, performance, boot, and compatibility problems. 🔍 SSD Not Detected: Diagnosis & SolutionsThe most common issue after SSD installation is the drive not being recognized. 🔧 SSD Detection Troubleshooting Flowchart
✅ Specific Detection Issues & Solutions
🚀 Boot & Startup ProblemsIssues occurring during system startup or boot process. 🔧 Boot Issue Diagnostic Steps
⚠️ Specific Boot Problems & Solutions
⚡ Performance & Speed ProblemsWhen SSD is detected but not performing as expected. 📊 Performance Diagnostic Tools
🐌 Common Performance Issues
⚡ AMD Ryzen Specific Performance Fixes
🌡️ Thermal & Overheating ProblemsThe Yoga G2's compact design can lead to thermal challenges with high-performance SSDs. 📈 Thermal Monitoring & Thresholds
🔧 Thermal Issue Solutions
🔌 Compatibility & Recognition ProblemsIssues stemming from SSD compatibility with Yoga G2's AMD platform. ✅ Yoga G2 SSD Compatibility Checklist
🔧 Compatibility Issue Solutions
📂 Data Migration & Cloning ProblemsIssues specific to cloned installations or data transfer. 🔧 Cloning Issue Solutions
🪟 Windows Installation & Driver IssuesProblems occurring during or after Windows installation. 🔧 Windows Installation Problems
⚙️ Driver-Specific Solutions for Yoga G2
🔬 Advanced Troubleshooting TechniquesAdvanced methods for persistent or complex issues. ⚡ Advanced Diagnostic Methods
🔍 Component Isolation TestingWhen the issue source is unclear, isolate components systematically:
🆘 When to Seek Professional HelpRecognizing when an issue requires professional assistance. ⚠️ Signs You Need Professional Assistance
📞 Support Resources
🛡️ Preventive Measures for Future UpgradesLearn from troubleshooting to prevent future issues. ✅ Preventive Checklist for Future Upgrades
|
|---|