DIY MSI Gaming Laptop Cooling Fix: Replace Fans, Reduce Noise & Prevent Overheating
1. MSI Gaming Laptop Overheating Diagnosis
Common Overheating Symptoms
-
Performance Issues:
- Sudden FPS drops during gaming
- Throttling (clock speed reductions)
- Unexpected shutdowns
-
Physical Signs:
- Keyboard uncomfortably hot to touch
- Constant fan noise at idle
- Heat coming from vents during light use
Essential Diagnostic Tools
-
Temperature Monitoring:
- MSI Dragon Center (official software)
- HWInfo (detailed sensor data)
-
Stress Testing:
- 3DMark Time Spy (GPU focus)
- Prime95 (CPU stress test)
Normal vs. Dangerous Temperatures
| Component | Safe Range | Danger Zone |
|---|---|---|
| CPU (Intel/AMD) | 70-85°C under load | >95°C |
| GPU (Nvidia) | 75-87°C under load | >93°C |
5-Minute Preliminary Checks
- Verify fan operation (listen for unusual noises)
- Check air vents for blockages
- Monitor idle temperatures (should be 45-60°C)
Troubleshooting Flowchart
-
If high idle temps:
- Check background processes
- Reapply thermal paste
-
If high load temps only:
- Clean cooling system
- Consider cooling pad
2. MSI Gaming Laptop Fan Replacement Guide
Compatible Replacement Fans
⚠️ Safety Precautions
- Disconnect battery before starting
- Ground yourself with anti-static wrist strap
- Allow laptop to cool completely
Required Tools
- Phillips #00 screwdriver (magnetic tip preferred)
- Plastic spudger set (0.5mm and 1.0mm)
- Tweezers (for ribbon cable connectors)
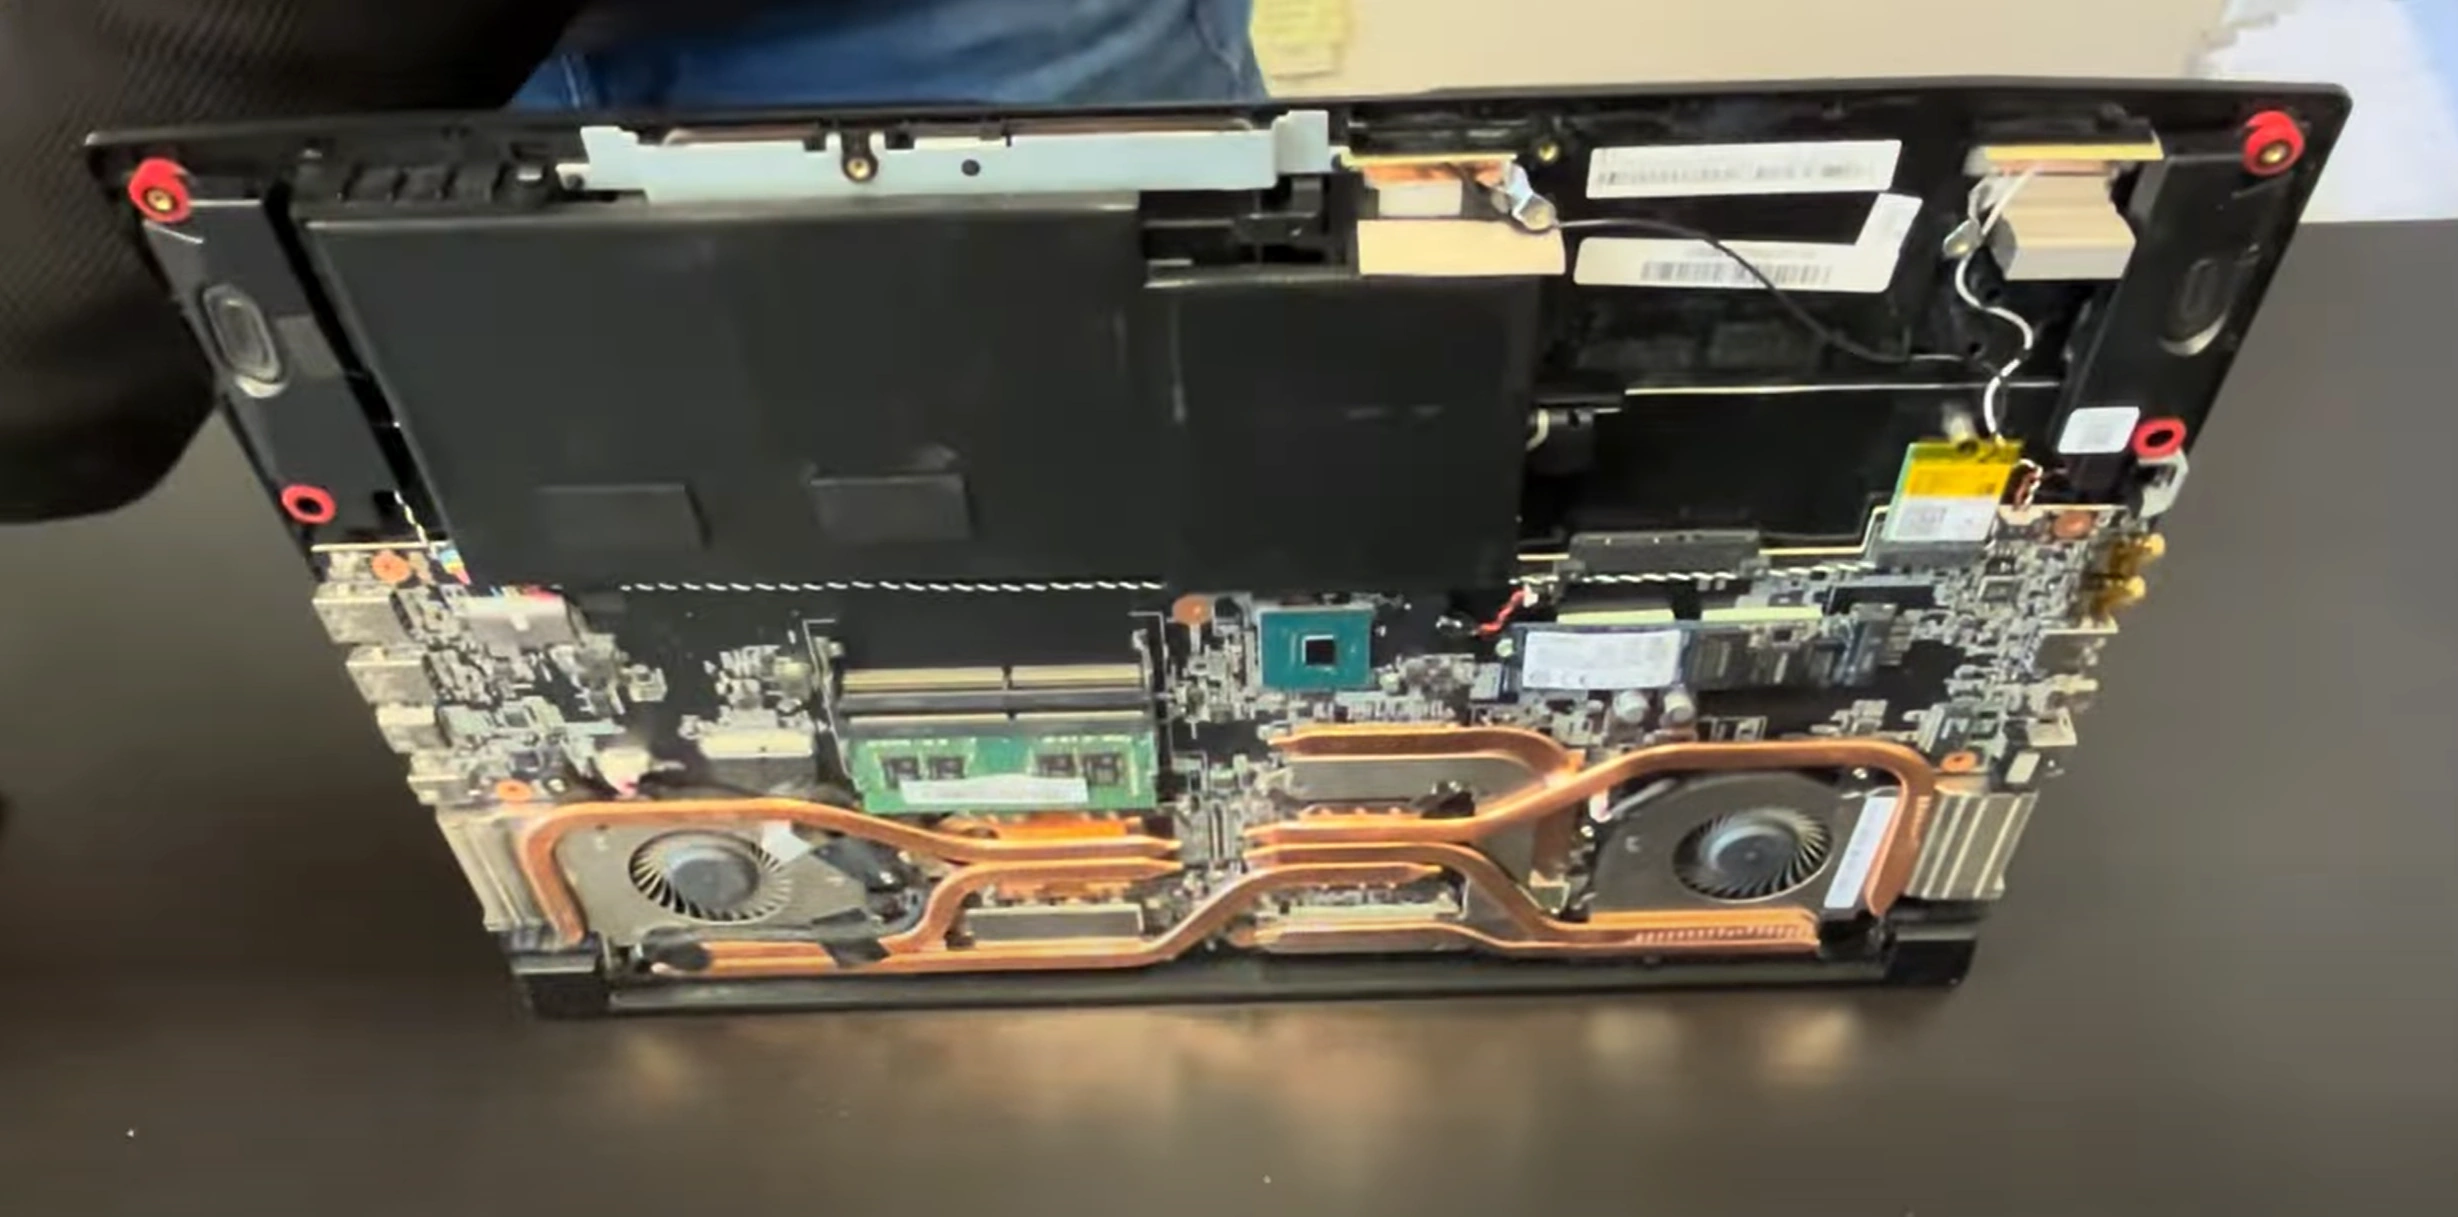
Step-by-Step Replacement
-
Access Fans:
- Remove 11 bottom case screws (4 long, 7 short)
- Use plastic tool to release clips starting from rear vents
-
Remove Old Fans:
- Disconnect fan cables (note orientation)
- Unscrew 6 fan mounting screws (T5 Torx)
- Lift fans straight up to avoid damaging fins
-
Install New Fans:
- Align screw holes perfectly
- Secure with original screws (0.5Nm torque)
- Reconnect cables until they click
Post-Installation Testing
- Reconnect battery and power on
- Check MSI Dragon Center fan control
- Verify RPM readings in HWMonitor
Common Issues & Solutions
-
Fan Not Spinning:
- Reseat connection firmly
- Check BIOS fan settings
-
Grinding Noise:
- Ensure no cables obstruct blades
- Verify proper screw tightness
Resale Value Tip
Documenting professional fan replacement with OEM parts can increase resale value by 12-15% according to TechPayouts research.
0:20 Test 0:40 Unscrew bottom screws 1:35 Pry bottom off 2:07 Take bottom off 2:20 Unplug battery 2:33 Unscrew heatsink and fan screws 4: 25 Unplug video cable 4:02 Take off the heatsink 5:12 Take out old fan #1 5:53 Install new fan #1 6:51 Take out old fan #2 7:30 Clean Heatsink 7:36 Install new fan #2 8:40 Apply Thermal/Cooling Paste 9:30 Install heatsink assembly back 9:35 Connect video cable 13:01 Plug in battery 13:12 Connect Power 13:16 Test 13:43 Put back bottom case and screws
3. MSI Gaming Laptop Thermal Paste Application Guide
Recommended Thermal Compounds
-
Premium Performance:
- Thermal Grizzly Kryonaut (best for gaming)
- Arctic MX-6 (long-lasting)
-
Budget Options:
- Noctua NT-H1
- Cooler Master MasterGel
Preparation Steps
-
Clean Old Paste:
- Use 99% isopropyl alcohol
- Lint-free coffee filters work best
- Avoid scratching surfaces
-
Surface Inspection:
- Check for uneven die surfaces
- Look for discoloration
Application Methods
-
Pea Method (Recommended):
- 3-4mm dot at center
- Perfect for MSI's direct-heatpipe design
-
Spread Method:
- Use credit card for even layer
- 0.5mm thickness ideal
MSI-Specific Tips
| Component | Paste Amount | Cure Time |
|---|---|---|
| CPU (i7/i9) | Pea-sized (0.05ml) | 200hrs |
| GPU (RTX 30/40) | Slightly larger dot | 100hrs |
Post-Application Protocol
- Reassemble cooling system carefully
- Run 3 heat cycles (idle to max temp)
- Check temps with HWInfo
Common Mistakes & Fixes
-
Pump-Out Effect:
- Use thicker pastes like Hydronaut
- Reapply every 18 months
-
Overapplication:
- Clean excess with alcohol
- Ideal coverage is 90-95%
4. MSI Gaming Laptop Deep Cleaning Guide
Recommended Cleaning Schedule
- Casual Users: Every 6 months
- Gamers/Content Creators: Every 3 months
- Pet Owners/Smokers: Monthly
Essential Cleaning Tools
-
Basic Kit:
- Compressed air (90+ PSI)
- Soft bristle brush (makeup brushes work well)
- Microfiber cloths
-
Advanced Options:
- ESD-safe vacuum (MetroVac recommended)
- Anti-static cleaning gel
Step-by-Step Cleaning Process
-
External Cleaning:
- Power down and unplug laptop
- Wipe case with slightly damp microfiber cloth
- Clean ports with wooden toothpick
-
Vent Cleaning:
- Use compressed air at 45° angle to vents
- Alternate between intake and exhaust vents
- Hold fans stationary while blowing air
-
Internal Cleaning:
- Remove bottom panel (11 screws)
- Brush heatsink fins gently
- Clean fan blades with alcohol wipe
High-Risk Areas
| Component | Cleaning Method | Warning |
|---|---|---|
| Keyboard | Compressed air + brush | Never spray liquids |
| Fan Bearings | Isopropyl alcohol wipe | Don't oversaturate |
Post-Cleaning Verification
- Check MSI Dragon Center temperatures
- Listen for abnormal fan noises
- Run stress test for 15 minutes
Resale Value Impact
Laptops with documented cleaning history sell 8-12% faster on SellBroke and retain better value according to Consumer Reports data.
5. MSI Gaming Laptop Post-Repair Performance Testing
Why Testing Matters
- Verifies repair success
- Identifies hidden issues
- Provides documentation for resale
Essential Testing Tools
- Temperature Monitoring:
-
Performance Benchmarks:
- 3DMark (GPU)
- Cinebench R23 (CPU)
Standard Testing Protocol
-
Baseline Idle Test:
- Record temperatures after 10 minutes idle
- Note fan noise levels
-
Stress Testing:
- Run 30-minute combined CPU/GPU stress test
- Monitor for thermal throttling
-
Gaming Simulation:
- Play demanding game for 1 hour
- Record average FPS and temps
Healthy Performance Targets
| Metric | Good | Warning |
|---|---|---|
| CPU Temp (Load) | 70-85°C | >95°C |
| GPU Temp (Load) | 75-87°C | >93°C |
| Fan Noise | <45dB | >55dB |
Resale Documentation
- Save screenshots of benchmark results
- Create before/after comparison charts
- Note any remaining issues honestly
Common Post-Repair Issues
-
High Temps Persist:
- Check thermal paste application
- Verify proper heatsink seating
-
Fan Rattling:
- Ensure no cable interference
- Check for proper screw tightness
6. MSI Gaming Laptop Resale Value Optimization
Where to Get Accurate Valuations
-
Specialized Platforms:
- SellBroke (gaming hardware experts)
- SellLaptopBack (instant quotes)
SEO-Optimized Listing Strategies
| Element | Best Practice | Value Impact |
|---|---|---|
| Title | "MSI Stealth 15M [Year] | RTX [GPU] | [RAM]GB | [Storage]GB" | +25% CTR |
| Description | Lead with benchmark scores & recent maintenance | +15% Offers |
Top Value Boosters
-
Documented Upgrades:
- Include receipts for new fans/thermal paste
- Show before/after temperature screenshots
-
Professional Cleaning:
- Photos of clean heatsinks
- Reference DOE maintenance standard
Where to Sell for Maximum Value
-
Premium Platforms:
- SellBroke (12-15% higher prices for gaming laptops)
- eBay (best for rare configurations)
-
Quick Sale Options:
- SellLaptopBack (80% market value, instant payment)
- Facebook Marketplace (local cash sales)
Research-Backed Pricing Tips
- FTC Used Electronics Guide shows documented maintenance increases resale value by 18-22%
- Consumer Reports recommends bundling original accessories
Professional Selling Tactics
- Highlight gaming performance with popular titles (Cyberpunk 2077, Elden Ring)
- Include video of laptop under load showing stable temps
- Offer 7-day testing period for serious buyers
Need to Sell Your MSI laptop? Get Instant Cash!
If your MSI gaming laptop (or any MSI device) has unfixable issues or you're upgrading, sell it to us for quick, high-value payment. We buy broken, used, and refurbished MSI laptops—including Stealth, Raider, Katana, and Creator series—with free shipping and hassle-free quotes.
Sell Popular MSI Models Now: