Dell G15 5515 Gaming Laptop Teardown: DIY Upgrade for Memory, Storage & More
1. Preparation & Assessment: Maximizing Your Dell G15 5515's Value
Before opening your Dell G15 5515, a thorough assessment helps you prioritize upgrades with the best return on investment (ROI) for gaming performance and resale value. This critical first step ensures you spend time and money on modifications that matter most to gamers and buyers.
🔍 Identifying Your Exact G15 5515 Configuration
Specifications vary. Use your Service Tag for precise parts compatibility.
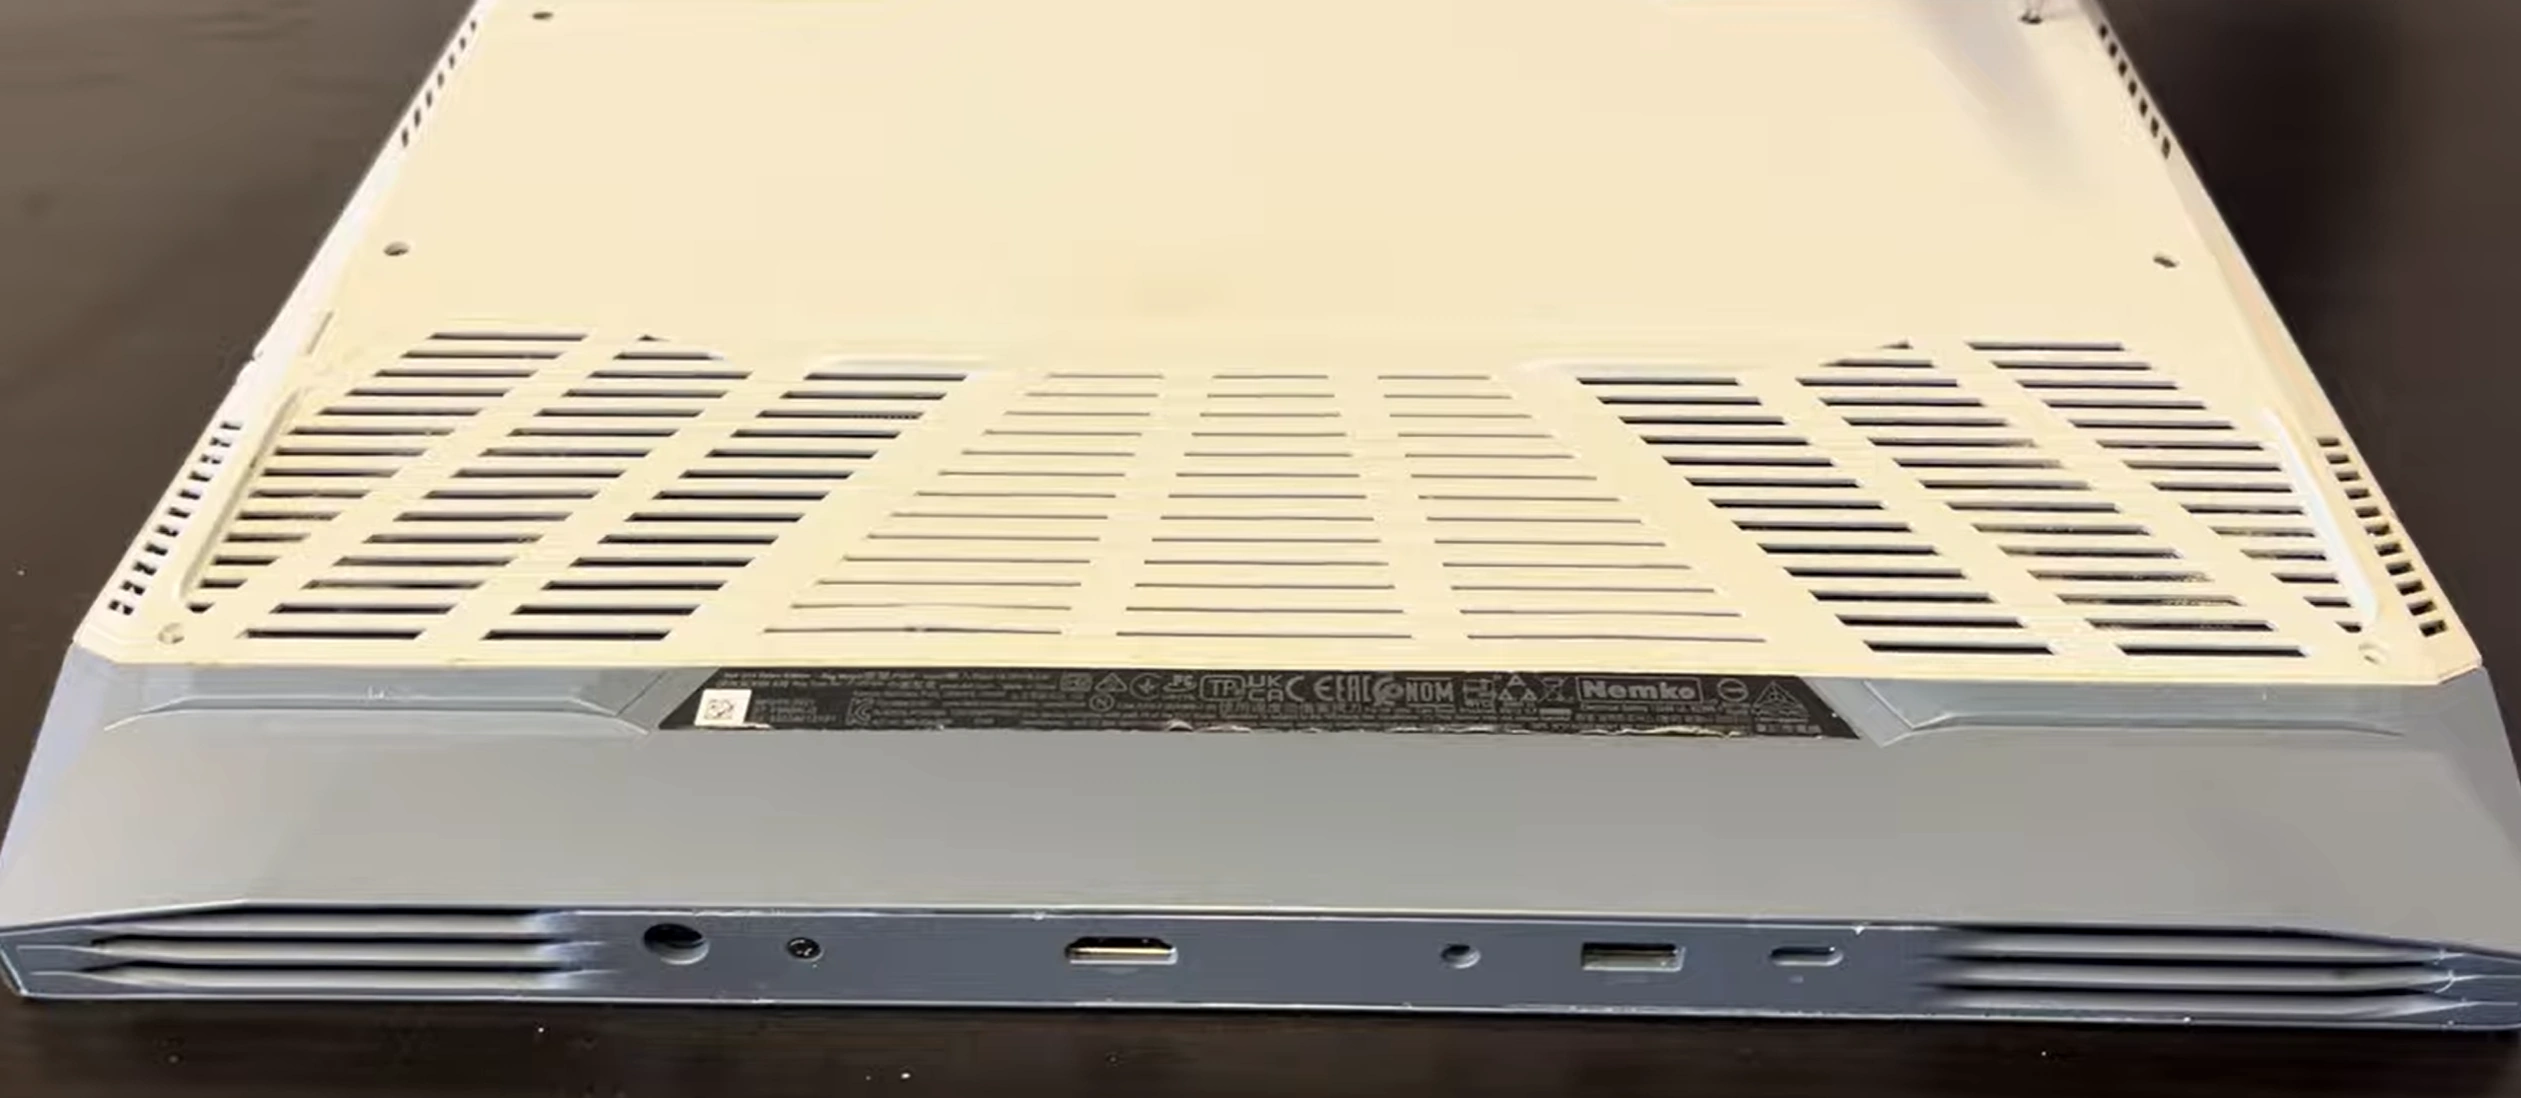
- Find Your Service Tag: Located on the bottom panel or check in Windows via Dell SupportAssist. Enter it on the Dell Support Site for your full configuration sheet.
- Key Variants:
- Processors: AMD Ryzen 5 5600H or Ryzen 7 5800H.
- Graphics: NVIDIA GeForce RTX 3050, RTX 3050 Ti, or RTX 3060.
- Display: 120Hz or 165Hz refresh rates.
- Original RAM: Often 8GB (1x8GB) single-channel, a prime upgrade target.
⚙️ Pre-Upgrade Performance Benchmarking
Establish a baseline to quantify your upgrade's impact. Gamers value proven performance gains.
- Run Free Benchmarks:
- Overall System: UserBenchmark (quick system check).
- Gaming GPU: 3DMark Time Spy (free demo available).
- Storage Speed: CrystalDiskMark.
- Check Thermals:
- Use HWiNFO to log CPU (Ryzen) and GPU temperatures during a gaming session. High thermals are a common G15 bottleneck.
- Game Test:
- Note average FPS in a demanding title like Cyberpunk 2077 or Warzone at your usual settings.
💰 2024 Upgrade ROI Analysis for Dell G15
Which upgrades give you the most bang for your buck? Here’s a market-focused analysis.
| Upgrade | Approx. Cost | Value Added at Resale | ROI | Gamer Appeal |
|---|---|---|---|---|
| Dual-Channel RAM (16GB) | $40 - $60 | $80 - $120 | ~100% | Very High (Eliminates stuttering) |
| Add 1TB NVMe SSD | $70 - $100 | $90 - $130 | ~80% | Extreme (Game load times) |
| Thermal Repaste & Clean | $15 - $25 (paste) | $60 - $100 | 300%+ | Extreme (Sustained FPS) |
| Wi-Fi 6 Card (AX200/AX210) | $20 - $30 | $30 - $50 | ~80% | High (Online gaming latency) |
⚠️ Dell Warranty & Self-Service Considerations
- Check Warranty Status: Use your Service Tag on Dell's site. In many regions, upgrading user-accessible components like RAM and SSD does not void the overall warranty.
- Proceed with Care: Damaging other components during installation could void coverage. If under premium support, consider having Dell perform upgrades.
- Document Original State: Take clear photos before disassembly as proof of pre-existing condition.
💾 Essential Data Backup Steps
Protect your game libraries, saves, and system.
- Game Saves: Enable cloud saves in Steam, Epic, Xbox, etc. Manually back up saves from Documents folders.
- System Image (Optional): Use Windows Backup or Macrium Reflect Free to create a full backup to an external drive if replacing your main drive.
- De-authorize Software: If you have digital licenses tied to hardware, check account deactivation steps.
🛡️ Safety & Workspace Preparation
- Power Down & Disconnect: Shut down Windows, unplug the AC adapter, and remove all peripherals.
- Discharge Static: Work on a non-conductive surface. Touch a grounded metal object or use an anti-static wrist strap.
- Organize: Have a small container (or a piece of paper with tape) to organize screws by step.
- Gather Tools: Prepare a Phillips #00 screwdriver and plastic prying tools.
2. Essential Tools for Dell G15 5515 Gaming Laptop Upgrades
Using the right tools is critical for a successful, damage-free upgrade of your Dell G15. This section details exactly what you need, from basic screwdrivers to specialized equipment, ensuring you can safely access and modify your gaming laptop's internals.
🛠️ Core Tool Kit for Dell G15 Disassembly
- Precision Screwdriver (Most Important):
- Phillips #00: The primary screwdriver for 95% of screws on the G15 5515, including the bottom panel and internal components.
- Quality Matters: A magnetic tip is highly recommended to prevent dropping screws into the laptop. Consider brands like iFixit or Wiha for durability.
- Prying & Opening Tools:
- Plastic Spudger or Guitar Picks: Essential for releasing the plastic clips securing the bottom case without leaving scratches or gouges. Metal tools can damage the casing.
- Plastic Opening Picks/Set: A set with different shapes helps navigate the various clip points around the G15's perimeter.
- Tweezers (Non-Magnetic):
- Useful for handling small connectors, such as the battery cable or Wi-Fi antenna wires. Ensure they are non-magnetic to avoid damaging components.
⚙️ Specialized & Highly Recommended Equipment
| Tool | Purpose for G15 Upgrade | Budget Option | Pro/Investment Option |
|---|---|---|---|
| Anti-Static Wrist Strap | Protects sensitive components (RAM, SSD, motherboard) from electrostatic discharge (ESD) damage. | Basic strap ($5-$10) | Strap with mat ($20-$30) |
| Magnetic Project Mat | Keeps screws organized by layer (bottom panel, heat shield, etc.) to ensure correct reassembly. | DIY: Use labeled paper cups or an ice cube tray. | iFixit Magnetic Project Mat ($25) |
| Thermal Paste | For repasting the CPU and GPU to improve cooling. Critical for maintaining gaming performance. | Arctic MX-6 ($8-$12) | Thermal Grizzly Kryonaut ($15-$20) |
| Isopropyl Alcohol (90%+) & Lint-Free Cloths | For cleaning old thermal paste from the CPU/GPU die and heatsink. | Available at pharmacies | Pre-packaged electronic cleaning swabs |
🔩 Dell G15 5515 Specific Tool Notes
- Screw Types & Count: The bottom panel is secured by 10 standard Phillips #00 screws. They are all the same length, simplifying reassembly.
- No Proprietary Screws: Unlike some older Dells, the G15 5515 does not use Torx or other security screws for basic access, making a Phillips #00 sufficient.
- Clip Locations: Clips run along the front and side edges. A plastic prying tool is mandatory to release them without cosmetic damage.
🏆 Recommended All-in-One Tool Kits
For those planning multiple upgrades or tech projects, a kit is cost-effective.
- Best Value for G15 Owners:
- iFixit Essential Electronics Toolkit (~$30). Contains the perfect Phillips #00, prying tools, spudger, and more for the G15 and other devices.
- Household Alternatives (Use with Caution):
- Screwdriver: A small, high-quality Phillips head from a household set might work if it fits snugly. Avoid stripping screws.
- Prying Tool: An old, thick gift card or guitar pick. Wrap the edge in tape for extra safety.
- Anti-Static: Frequently touch a grounded metal object (like a plugged-in PC case) before touching components.
🛒 Where to Purchase Tools
⚠️ Tool Safety & Best Practices
- Power Off & Unplug: Always ensure the laptop is off and the AC adapter is disconnected before starting.
- ESD Prevention: Use a wrist strap or ground yourself. Work on a clean, non-static surface (not a bed or carpet).
- Gentle Force: If something isn't budging, stop. Re-check for hidden screws or clips. Forcing can break plastic clips or cables.
- Organize Screws: Place screws in a diagram on your mat or tape them to a piece of paper labeled with their location.
- Keep Magnets Away: Keep magnetic tools away from your hard drive (if equipped) and be cautious near other components.
3. Safe Bottom Panel Removal & Internal Access for Dell G15 5515
Gaining safe internal access is the most critical step. This guide ensures you remove the bottom panel of your Dell G15 5515 without damaging clips or components, providing a clear path to all major upgrade points: RAM, SSD, Wi-Fi card, and cooling system.
✅ Pre-Removal Safety Checklist
- Power Down Completely: Shut down Windows via the Start Menu. Do not use hibernation or sleep mode.
- Disconnect All Power: Unplug the AC adapter from the laptop and the wall outlet.
- Remove All Peripherals: Unplug any gaming mouse, keyboard, headset, or external drives.
- Discharge Residual Power: Press and hold the power button for 15 seconds after disconnection to drain any remaining charge in the circuits.
- Prepare Workspace: Work on a clean, flat, well-lit, and static-free surface. An anti-static mat is ideal.
🔩 Bottom Panel Screw Identification & Removal
The Dell G15 5515 uses ten (10) Phillips #00 screws to secure the bottom panel.
- Layout: Four screws along the rear edge (near vents), two on each side, and two near the front lip.
- Key Details:
- All ten screws are the same length, making reassembly foolproof.
- Two screws near the rear vents may have small rubber feet covering them. Gently peel these back if present.
- Use a magnetic screwdriver to prevent screws from falling into the laptop's vents.
- Removal Technique:
- Place the laptop upside down on a soft cloth to prevent scratching the lid.
- Unscrew all ten screws in a cross-pattern (loosen each a little at a time) to avoid stressing the plastic.
- Place screws immediately onto a magnetic project mat or into a labeled container.
🔓 Releasing the Plastic Clips (The Most Delicate Step)
The panel is held by numerous plastic clips around its perimeter. Patience is key.
- Starting Point: Begin at the front-right corner (near the status LEDs). This area typically has slightly more give.
- Tool Choice: Insert a plastic spudger, guitar pick, or thin plastic card between the bottom panel and the main chassis. Never use a metal tool like a screwdriver here.
- Technique:
- Insert the tool gently and twist slightly to create a small gap.
- You should hear a soft click as the clip releases.
- Work Your Way Around:
- Move a few inches along the edge, insert the tool, and release the next clip.
- Continue this process all the way around the laptop's perimeter—front, sides, and rear.
- If a section feels stuck, do not force it. Re-check for a missed screw or clip you haven't released yet.
📤 Lifting Off the Bottom Panel
Once all clips are released, the panel will be loose.
- Lift from the Rear: Gently lift the panel starting from the rear edge (near the ports and vents).
- Mind the Cables: As you lift, check immediately for any connected cables. The G15 5515 typically does not have cables connecting the bottom panel, but always verify. If a cable is present (like for a secondary RGB strip on some models), disconnect it carefully by pulling the connector straight up, not by the wires.
- Set Aside Safely: Place the panel on a soft, clean surface away from your work area.
🔍 Internal Layout Overview of the Dell G15 5515
Once open, you'll see the well-organized interior. Key components for upgrade are easily accessible:
- A. Battery (Center): Large, rectangular block. Do not puncture.
- B. Memory (RAM) Slots (Center-Left): Two DDR4 SO-DIMM slots. One may be occupied.
- C. M.2 NVMe SSD Slot (Center, above battery): The primary storage slot, likely occupied.
- D. Wi-Fi Card (Left of SSD): Small card with two thin antenna wires (black and white) connected.
- E. Cooling System (Top): Two fans and a shared heatsink covering the CPU and GPU.
- F. 2.5-inch SATA Bay (Right Side): An empty bracket and connector for adding a 2.5" SSD or HDD.
⚠️ CRITICAL: Disconnect the Battery Before Proceeding
Before touching ANY other internal component, you MUST disconnect the internal battery. This prevents accidental short circuits that can permanently damage the motherboard.
- Locate the Battery Connector: Find the wide, flat cable running from the battery to the motherboard. It's near the center and has a pull-tab.
- Disconnect: Gently pull the connector straight up from the motherboard socket. Use your fingers or plastic tweezers. It may be snug.
- Verify Discharge: Press and hold the power button for 10 seconds again to drain any residual power from the system.
Only after this step is complete is it safe to proceed with RAM, SSD, or other upgrades.
🚧 Common Challenges & Solutions
- "The panel won't budge after removing screws!"
- Solution: You missed a clip. Double-check the entire perimeter, especially near the front corners and side vents. Use your plastic tool to gently work around the edge again.
- "I hear a cracking sound!"
- Solution: Stop immediately. You are likely forcing a clip or prying in the wrong spot. Reassess your starting point and tool angle.
- "A clip broke off."
- Solution: Don't panic. Reassembly will still be secure with the remaining clips and screws. Keep the broken piece and note its location.
🔎 Pre-Upgrade Quick Inspection
With the panel off and battery disconnected, take a moment to:
- Check for Dust: Look for dust buildup in the fans and heatsink fins. This will be addressed during thermal maintenance.
- Verify Part Numbers: Note the model of your existing RAM and Wi-Fi card for compatibility research.
- Inspect for Damage: Look for any obvious signs of corrosion, spilled liquid, or bulging components (especially the battery).
0:30 Bottom Case 2:16 Back Hinge Cover 2:46 Bottom Case 3:02 Battery 3:37 RAM Memory 3:57 WiFi Card 4:22 Speakers 4:57 Audio Port and Network Board 5:48 DC Power Jack 7:20 SSD Storage 7:55 Motherboard 9:15 USB Ports Board 9:40 Heatsink and Cooling Fans 10:34 Processor and GPU 10:54 Palmrest Assembly 12:00 Touchpad 12:27 Keyboard 12:37 Power Button 13:13 Display Assembly 13:30 Front Bezel 14:30 Adhesive Pullout Strips 15:17 LCD Screen 15:20 Video Cable 15:55 Hinges 16:45 WebCam 16:57 Back Cover
4. DDR4 Memory (RAM) Upgrade: Boosting Gaming Multitasking on Dell G15 5515
Upgrading the RAM is one of the most effective and affordable ways to improve your Dell G15's gaming performance. Moving from a single 8GB stick to dual-channel 16GB (2x8GB) can eliminate stuttering, improve frame pacing, and dramatically boost multitasking while gaming. This guide covers compatible RAM, installation steps, and performance validation.
🔍 Dell G15 5515 RAM Specifications
Using compatible memory is crucial for stability and performance.
- Type: DDR4 SO-DIMM (260-pin, laptop memory).
- Speed: Supports up to 3200MHz. The system will run at the highest common speed between the RAM and CPU (Ryzen 5/7 5000 series). 3200MHz is the recommended sweet spot.
- Dual-Channel Architecture: Has two slots. For best gaming performance, install identical sticks in both slots (e.g., 2x8GB or 2x16GB).
- Maximum Capacity: Officially supports up to 32GB (2x16GB).
- Voltage: 1.2V (Standard for DDR4).
🏆 Recommended RAM Kits for Gaming
These kits are known for reliability and compatibility with the Ryzen-based G15.
| Configuration | Recommended Kit | Approx. Price | Gaming Benefit |
|---|---|---|---|
| 16GB (2x8GB) - Best Value | Crucial DDR4 3200MHz CL22 or G.Skill Ripjaws DDR4 3200MHz |
$40 - $55 | Eliminates stutter in AAA games, allows Discord + streaming. |
| 32GB (2x16GB) - Enthusiast | Corsair Vengeance DDR4 3200MHz or Kingston Fury Impact DDR4 3200MHz |
$75 - $100 | Future-proof for heavy modding, content creation, and extreme multitasking. |
Important: For the Ryzen platform, check compatibility tools from manufacturers like Crucial for guaranteed modules.
🔧 Step-by-Step RAM Installation
Prerequisite: The laptop must be powered off, bottom panel removed, and the internal battery must be disconnected (as detailed in the previous section).
- Locate RAM Slots: Find the two slots near the center-left of the motherboard. They are typically at a 45-degree angle.
- Remove Existing RAM (if needed):
- Gently push outward on the two metal or plastic retaining clips at the sides of the RAM module. The module will pop up at a 45-degree angle.
- Grasp the module by its edges (avoid touching the gold contacts) and lift it straight out.
- Install New RAM:
- Align the notch in the gold contacts of the new RAM stick with the notch in the slot.
- Insert the module at a 45-degree angle and press it firmly down into the slot.
- Apply even pressure with both thumbs until you hear a click and the retaining clips snap into place on their own. The module should now be parallel to the motherboard.
- Install Second Module: Repeat the process for the second slot. For dual-channel, install identical modules in both slots.
- Visual Check: Ensure both modules are seated flat and the clips are fully engaged.
⚙️ Post-Installation BIOS & OS Optimization
After physically installing RAM, ensure your system recognizes it and runs optimally.
- Reconnect & Power On: Reconnect the internal battery cable, replace the bottom panel, and power on the laptop.
- Enter BIOS/UEFI: Press F2 repeatedly during boot to enter the Dell BIOS.
- Verify Detection: Navigate to the "System Information" or "Memory" section. It should report the correct total capacity (e.g., 16GB or 32GB) and speed (e.g., 3200MHz).
- Check for XMP/DOCP: In the BIOS, look for a memory profile setting (sometimes called "Performance" or "Overclocking"). If your RAM supports an XMP profile, enabling it will ensure it runs at its advertised 3200MHz speed. Note: Some Dell BIOSes may lock this feature.
- Windows Verification: Boot into Windows. Open Task Manager (Ctrl+Shift+Esc), go to the "Performance" tab, and click "Memory." It should show the correct total and "Slots used: 2 of 2."
📊 Measuring the Gaming Performance Impact
Quantify the upgrade's value for your own satisfaction or to show potential buyers.
- Benchmark 1: Synthetic
- Run 3DMark Time Spy (free demo) before and after. The "CPU Score" and overall score often see a noticeable bump from dual-channel RAM.
- Benchmark 2: Real-World Gaming
- Test a game known to benefit from RAM bandwidth (e.g., Assassin's Creed Valhalla, Microsoft Flight Simulator).
- Use an overlay like MSI Afterburner with RivaTuner to monitor 1% and 0.1% low FPS. The primary benefit of dual-channel is smoother frame times and higher minimums, not just average FPS.
- Benchmark 3: Multitasking
- Have a game running, a Chrome browser with 10+ tabs, and Discord open. Notice the reduction in lag when alt-tabbing.
🔍 Troubleshooting Common RAM Issues
- Laptop won't boot / black screen:
- Step 1: Power off, disconnect battery, and reseat the RAM modules. Ensure they are fully clicked into place.
- Step 2: Try booting with a single module in each slot to identify a faulty stick or slot.
- Step 3: Clear the CMOS. This often resolves memory training issues. Consult your G15's service manual for the CMOS reset jumper location (usually near the battery connector).
- Windows only shows half the RAM:
- Check Task Manager's "Slots used." If it says "1 of 2," one module isn't detected. Reseat it.
- Ensure both sticks are identical. Mismatched speeds/sizes can sometimes cause issues.
- Runs at lower speed (e.g., 2400MHz):
- This is normal if XMP is not enabled in BIOS. The RAM will run at the CPU's base memory controller speed. For maximum performance, check for a BIOS update from Dell Support that may enable better memory support.
💰 Resale Value Impact of a RAM Upgrade
Documenting this upgrade significantly increases your laptop's appeal and value.
- Market Demand: The base 8GB single-channel configuration is the biggest bottleneck for the G15 5515. A 16GB dual-channel upgrade directly addresses this.
- Value Added: A $50 RAM upgrade can add $80-$120 to the resale price, as it's a must-have for any serious gamer.
- Marketing Your Upgrade: In a sales listing, include:
- Phrase: "Professionally upgraded to 16GB dual-channel DDR4 3200MHz RAM for smoother gaming."
- Screenshot of Task Manager showing 16GB and "Slots used: 2 of 2."
- Brief note on performance gain (e.g., "Improved 1% low FPS in [Game] by 15%").
5. Storage Upgrade Guide: Adding SSD & HDD for More Games to Dell G15 5515
Modern games require massive storage. The Dell G15 5515 offers two excellent upgrade paths: adding a blazing-fast secondary NVMe SSD or a high-capacity 2.5-inch SATA drive. This guide covers both options, helping you expand your game library and drastically reduce load times.
🔍 Dell G15 5515 Storage Configuration Overview
Understand your laptop's built-in storage capabilities.
- Primary Slot: One M.2 NVMe PCIe Gen 3 x4 slot (typically occupied by the factory SSD).
- Secondary Slot: One 2.5-inch SATA III bay (typically empty, includes bracket and cable).
- Key Limitation: There is only one M.2 slot. To upgrade your primary boot drive, you must clone or clean install to a new, larger NVMe drive.
- Maximum Practical Capacity: 2TB NVMe SSD + 2TB 2.5" SATA SSD/HDD = 4TB Total.
🚀 Option 1: Primary NVMe SSD Upgrade/Replacement
Replace the factory SSD with a larger, faster model for your operating system and favorite games.
Compatible NVMe SSD Specifications
- Form Factor: M.2 2280 (22mm wide, 80mm long).
- Interface: NVMe PCIe 3.0 x4. (PCIe 4.0 drives are compatible but will run at Gen 3 speeds).
- Key: M-Key.
- Single-Sided Recommended: To ensure clearance under the heatshield/bracket.
Recommended NVMe SSDs for Gaming
| Capacity | Model Recommendation | Approx. Price | Best For |
|---|---|---|---|
| 1TB (Best Value) | WD Black SN770, Samsung 970 EVO Plus, Crucial P3 Plus | $70 - $90 | OS + 10-15 large AAA games. |
| 2TB (Enthusiast) | WD Black SN850X (Gen4), Samsung 980 Pro, SK hynix Gold P31 | $120 - $150 | Massive game library with future-proofing. |
NVMe Installation Steps
Prerequisite: Battery disconnected, bottom panel removed.
- Locate Existing SSD: Find the M.2 slot above the battery, under a metal heatshield or bracket secured by a single screw.
- Remove Heatshield/Bracket: Unscrew the retention screw and lift the metal cover.
- Remove Existing SSD: The factory SSD is held by a screw at the far end. Unscrew it, then gently pull the SSD up at a 30-degree angle out of the slot.
- Install New SSD: Insert the new NVMe drive at a 30-degree angle into the slot. Press it down flat and secure it with the provided screw. Do not overtighten.
- Replace Heatshield: Reattach the metal cover. Some aftermarket drives include a thin thermal pad; ensure it makes contact.
Next Step: You will need to clone your old drive or perform a clean Windows installation via a USB installer.
💾 Option 2: Adding a 2.5-inch SATA Drive (Easy Expansion)
This is the simplest way to add massive, affordable storage for your game library without touching your OS drive.
Compatible 2.5-inch Drive Specifications
- Form Factor: 2.5-inch, 7mm height (standard laptop size).
- Interface: SATA III (6 Gb/s).
- Options:
- SATA SSD (Recommended): Faster load times, no moving parts (e.g., Crucial MX500, Samsung 870 EVO).
- SATA HDD: Maximum capacity per dollar (e.g., 2TB for ~$70), but slower and more fragile.
2.5-inch Drive Installation Steps
- Locate SATA Bay: Find the empty drive bay on the right side of the motherboard. The mounting bracket and SATA data/power cable are pre-installed.
- Prepare the Drive: If using an SSD/HDD without side mounting holes, you may need to attach rubber grommets or use the provided bracket.
- Mount the Drive: Slide the drive into the metal bracket/caddy. Align the four screw holes on the bottom of the drive with the bracket.
- Secure with Screws: Use the four small screws (usually included with the drive or the laptop's original accessories) to attach the drive to the bracket.
- Connect & Insert: Connect the waiting SATA cable to the drive. The connector is keyed and only fits one way. Gently slide the entire assembly into the bay until it seats firmly.
- Secure the Bay: The bay may have a single screw to lock the assembly in place. Fasten it.
⚙️ Software Setup & Optimization
After physically installing new storage, get it ready for games.
- Initialize & Format (for new secondary drives):
- Boot into Windows. Open Disk Management (right-click Start button).
- The new drive will appear as "Unallocated." Right-click it and select "New Simple Volume."
- Follow the wizard, assign a drive letter (e.g., D:), and format with NTFS file system.
- Redirect Game Libraries:
- Steam: Go to Steam > Settings > Downloads > Steam Library Folders. Add the new drive and move existing games via the game's properties.
- Epic/Xbox/Others: Each launcher has settings to install games to a different library location.
- Benchmark Your Drives: Use CrystalDiskMark to verify your NVMe drive is performing at PCIe 3.0 x4 speeds (~3,500 MB/s read).
📊 Gaming Performance & Load Time Impact
Storage speed directly affects your gaming experience.
- NVMe vs. SATA SSD: In-game FPS is identical. The difference is in load times. Fast travel in open-world games (e.g., Cyberpunk 2077) can be 30-50% faster on NVMe.
- SATA SSD vs. HDD: This is a massive difference. Game load times, level transitions, and texture streaming are 2-5x faster on even a basic SATA SSD. An HDD can cause stuttering in modern games.
- Recommendation: Use the NVMe for your OS and most-played competitive games. Use the 2.5" bay for a large SATA SSD for your general game library.
💰 Resale Value Impact of Storage Upgrades
Storage is a top consideration for gamers buying a used laptop.
| Upgrade Scenario | Cost | Value Added | Sales Pitch |
|---|---|---|---|
| Added 1TB NVMe (2TB total) | $80 | $120 - $160 | "Massive 2TB fast storage for 50+ games." |
| Added 1TB SATA SSD | $60 | $80 - $100 | "Dual-drive setup: speedy OS + huge game library." |
| Added 2TB HDD | $70 | $60 - $80 | "4TB total space for an enormous media/game collection." |
Key: Document the drive models, health (using CrystalDiskInfo), and benchmark speeds. "Includes a 2TB WD Black SN770 with 98% health and 3400 MB/s reads" is a powerful selling point.
6. Battery Health Check & Considerations for Dell G15 5515
While less directly tied to FPS, battery health is a critical factor for gaming laptop portability, reliability, and resale value. A failing or degraded battery can cause unexpected shutdowns and significantly reduce buyer confidence. This guide shows you how to assess your battery's health and decide if a replacement is a worthwhile investment.
🔋 Why Battery Health Matters for a Gaming Laptop
- Portability: Even when plugged in, a severely degraded battery may not provide sufficient backup power during brief disconnections, causing an immediate hard shutdown and potential game/data loss.
- System Stability: A swollen battery can physically damage the trackpad, keyboard, or bottom case, and poses a safety risk.
- Resale Value: A "Like New" or "Good" battery health rating is a strong selling point, indicating the laptop has been well-cared for and is reliable for LAN parties, class, or travel.
- Gaming on Battery: While performance is reduced, a healthy battery allows for shorter gaming sessions away from an outlet.
🖥️ Software Battery Health Check (Windows)
Use built-in and free tools to get a detailed report without opening the laptop.
- Generate a Battery Report:
- Open Command Prompt as Administrator.
- Type:
powercfg /batteryreportand press Enter. - It will save an HTML file (usually to
C:\Users\[YourName]\battery-report.html). Open this file in your browser.
- Key Metrics to Check:
- DESIGN CAPACITY: The original capacity (e.g., 56,000 mWh / 86 Wh).
- FULL CHARGE CAPACITY: The current maximum charge the battery can hold.
- CYCLE COUNT: The number of full charge/discharge cycles. Higher cycles mean more wear.
- Third-Party Tools: For a simpler view, use CrystalDiskInfo (also shows some battery info) or battery-specific utilities.
📊 Battery Health Assessment Guidelines
| Health Status | Full Charge Capacity vs. Design | User Experience | Recommended Action | Resale Impact |
|---|---|---|---|---|
| Excellent (Like New) | 90% - 100% | Normal runtime (2-4 hrs light use). Stable. | None. Maintain good habits. | +$80 - $120 value |
| Good | 70% - 89% | Noticeably shorter runtime. Functions fine on AC. | Monitor. Consider replacement for resale. | Neutral / Slight negative |
| Poor / Failing | 50% - 69% | Very short runtime (<1 hr). May cause shutdowns if adapter is jiggled. | Strongly consider replacement. | -$100 - $150 if not replaced |
| Critical / Swollen | <50% or Physical swelling | Risk of damage to internal components. Safety hazard. | REPLACE IMMEDIATELY. Do not use. | Severe negative. Must replace to sell. |
👁️ Physical Inspection (During Teardown)
With the bottom panel removed, perform a careful visual check.
- Look for Swelling: The battery should be perfectly flat. If the middle is bulging upward, the casing is warped, or the battery seems to be pushing against other components, it is swollen and must be replaced.
- Check Connections: Ensure the battery cable is firmly seated in the motherboard connector.
- Look for Leaks/Corrosion: Any signs of moisture, residue, or corrosion around the battery are a red flag.
Warning: Do not puncture, bend, or apply excessive force to a swollen battery. Handle with care.
🤔 Should You Replace the Battery? A Cost-Benefit Analysis
- Replace if:
- Health is below 70% and you plan to sell the laptop.
- There is any physical swelling.
- You experience unexpected shutdowns when the AC adapter is briefly disconnected.
- The battery runtime is practically unusable for your needs.
- May Not Need Replacement if:
- Health is above 80% and you primarily use the laptop as a plugged-in desktop replacement.
- You are keeping the laptop for yourself and the reduced runtime is acceptable.
- ROI for Resale: A $90 genuine battery replacement can easily add $120-$150 to the sale price by moving the laptop from "Fair" to "Good/Excellent" condition in the buyer's eyes.
🔧 Battery Replacement Guide (If Needed)
Prerequisite: Bottom panel removed, battery already disconnected (as per Section 3).
- Identify Correct Part: Use your Dell Service Tag on the Dell Support Site to find the exact battery part number (e.g., Dell Part # 7T0F9).
- Purchase Options:
- Genuine Dell: Highest quality and safety, best for resale. Purchase from Dell or authorized parts dealers.
- Reputable Third-Party: Look for UL/CE certifications, high user ratings specifically for the G15 5515, and a warranty.
- Removal:
- The battery is secured by several (usually 4-6) Phillips screws around its edges. Remove them.
- Gently lift the battery from the connector end. It may have adhesive; use a plastic card to pry it up carefully.
- Lift the battery out at an angle to clear any components.
- Installation: Reverse the process. Connect the new battery cable to the motherboard last, after the battery is screwed into place. Ensure the connector is fully seated.
♻️ Safe Battery Disposal & Handling
- Do Not Throw in Trash: Lithium-ion batteries are fire hazards and must be recycled.
- Recycling Options:
- Best Buy, Staples, and many electronics retailers offer free battery recycling.
- Use Call2Recycle's locator.
- Local hazardous waste facilities.
- Swollen Battery Safety: Place in a non-flammable container (like a ceramic pot) away from heat until you can recycle it. Do not store it inside the laptop.
📑 Documentation for Resale
Transparency about battery health builds trust. In your listing, include:
- A screenshot of the Windows Battery Report showing Design Capacity and Full Charge Capacity.
- A clear statement: "Battery health is at 85% of original design capacity" or "Includes a brand new genuine Dell battery installed [Date]."
- A photo of the new battery's label if replaced, showing it's a genuine part.
This upfront honesty eliminates a major point of negotiation and concern for buyers.
7. Wi-Fi 6 Card Upgrade for Better Online Gaming on Dell G15 5515
Online gaming performance depends heavily on your network connection. Upgrading from the stock Wi-Fi card to an Intel Wi-Fi 6 (AX200/AX210) card is a low-cost, high-impact mod that reduces latency (ping), increases bandwidth for game updates/streaming, and improves connection stability—all critical for competitive and online gaming.
📶 Why Upgrade the Wi-Fi Card for Gaming?
- Lower Latency (Ping): Wi-Fi 6 handles network traffic more efficiently, reducing jitter and ping spikes that can cause lag in online shooters and MOBAs.
- Increased Bandwidth: Supports faster speeds (up to 2.4 Gbps on AX200) for downloading large game updates while gaming or streaming.
- Better Congestion Handling: Wi-Fi 6 excels in dense environments (apartments, dorms) where many networks compete, providing a more stable connection.
- Resale Value: "Wi-Fi 6 Upgraded" is a desirable feature for any modern gaming laptop, signaling it's been updated for current networking standards.
🔌 Compatible Wi-Fi Card Specifications
The Dell G15 5515 uses a standard M.2 (Key E) interface for the Wi-Fi card.
- Form Factor: M.2 2230 (22mm wide, 30mm long).
- Interface: PCIe + USB (for Bluetooth).
- Key: Key E (A+E).
- Important: Must support CNVi or be a standard PCIe card. The Intel AX200 and AX210 are the universal, guaranteed-compatible standards.
🏆 Recommended Wi-Fi 6 Cards
| Model | Key Features | Approx. Price | Gaming Benefit |
|---|---|---|---|
| Intel Wi-Fi 6 AX200 (Best Value) |
Wi-Fi 6 (802.11ax), Bluetooth 5.2, 2.4 Gbps max speed. | $20 - $25 | Massive improvement over stock. Eliminates most Wi-Fi-related lag. |
| Intel Wi-Fi 6E AX210 (Future-Proof) |
Adds 6 GHz band support (Wi-Fi 6E), Bluetooth 5.3. | $25 - $35 | Best for avoiding congestion. Requires a 6E router to utilize the new band. |
Avoid Killer Networking Cards for this upgrade. While some are good, driver support can be finicky. The Intel cards offer rock-solid stability and universal driver support.
🔧 Step-by-Step Wi-Fi Card Replacement
Prerequisite: Laptop powered off, bottom panel removed, internal battery disconnected (critical to avoid shorting the antenna connectors).
- Locate the Existing Card: Find the small card near the left edge of the motherboard (typically left of the SSD). It has two thin, colored antenna wires attached (usually black and white).
- Disconnect Antenna Wires: This is the most delicate step.
- Use a pair of non-magnetic tweezers or your fingernails.
- Gently pull straight up on the small metal connector around each wire. Do not pull on the wires themselves.
- They require very little force and will pop off. Note which color (black/white) goes on which terminal (usually labeled "1" (Main) and "2" (Aux) on the card).
- Remove the Old Card:
- A single tiny Phillips or Torx screw secures the card to the motherboard.
- Unscrew it, and the card will pop up at a 30-degree angle.
- Lift it out of the M.2 slot.
- Install the New Card:
- Insert the new Intel AX200/AX210 into the M.2 slot at the same 30-degree angle and press it down flat.
- Secure it with the screw. Do not overtighten.
- Reconnect Antenna Wires:
- Carefully press each connector straight down onto its terminal until it clicks into place. Ensure they are seated firmly.
- Critical: Connect them to the correct terminals. A mis-match will result in poor signal strength. Match the previous layout or follow the tiny labels on the card's PCB.
⚙️ Driver Installation & Configuration
Windows 10/11 will often install a basic driver automatically, but for optimal performance, install the official ones.
- Download Official Drivers: Visit Intel's Download Center for the AX200 or AX210 drivers. Download the latest "WiFi" and "Bluetooth" driver packages.
- Install: Run the installer(s) and reboot if prompted.
- Optional Optimization: In Windows Device Manager, find your network adapter, go to Properties > Advanced.
- Consider setting "802.11ax/ac/n Mode" to "802.11ax" to prioritize the new standard.
- Set "Preferred Band" to "5GHz" for less interference and lower latency (if your router supports it).
📊 Testing & Verifying the Upgrade
Confirm the upgrade was successful and measure the improvement.
- Connection Check: Connect to your 5GHz Wi-Fi network. In Windows Settings, it should now show "Wi-Fi 6" or "802.11ax" next to your network name.
- Speed Test: Run a test on Speedtest.net or Fast.com. Compare speeds and ping to your old results.
- Gaming Test: Play an online game and monitor your in-game ping/network graph. The connection should feel more stable with fewer sudden spikes.
- Bluetooth Check: Pair a Bluetooth device (like a controller or headset) to confirm Bluetooth 5.2/5.3 is working.
🔍 Troubleshooting Common Issues
- Wi-Fi Not Detected / Code 10 Error:
- Reseat the card in its slot and the antenna connectors.
- Reinstall the Intel drivers from scratch.
- Ensure the battery was disconnected during installation to prevent a short.
- Poor Signal Strength:
- Antenna wires are not fully clicked in or are swapped. Reconnect them firmly.
- Ensure the wires are not pinched or damaged.
- Bluetooth Not Working:
- Install the separate Bluetooth driver from Intel.
- Check if Bluetooth is enabled in the Windows Action Center.
💰 Resale Value Impact
This is a high-ROI upgrade for minimal cost and effort.
- Cost: ~$25 for an Intel AX200 card.
- Value Added: $40 - $60. It's a modern feature that buyers look for, especially students or those in multi-dwelling units.
- Marketing Your Upgrade: In your listing, specify:
- "Upgraded to Intel Wi-Fi 6 AX200 for lower latency online gaming."
- Mention benefits: "Better ping stability in competitive games, faster downloads, Bluetooth 5.2."
- Documentation: A screenshot of the Device Manager showing the "Intel(R) Wi-Fi 6 AX200" adapter is excellent proof.
8. Professional Reassembly & Cable Management for Dell G15 5515
Proper reassembly is what separates a professional-grade upgrade from a risky hack job. This section ensures your Dell G15 goes back together perfectly, with no leftover screws, pinched cables, or misaligned panels. Clean internal cable management also improves airflow and thermal performance, directly benefiting gaming longevity.
✅ Pre-Reassembly Critical Checklist
Before you even think about the bottom panel, complete these steps.
- Battery Connection: Ensure the main battery cable is reconnected firmly to the motherboard. You should hear a soft click.
- Component Verification: Double-check that all upgrades (RAM, SSD, Wi-Fi card) are fully seated and screwed down.
- Cable Routing Audit: Visually trace every cable (battery, fan, SATA, Wi-Fi antennas) to ensure none are:
- Pinched under a component or heatsink.
- Laying directly over a hot component like the VRMs.
- Blocking a fan blade or air intake.
- Dust & Debris: Use a can of compressed air to gently blow out any dust or loose thermal paste from the motherboard before closing up.
- Screw Inventory: Verify you have all 10 bottom panel screws ready and that no extra screws are floating inside the chassis.
🧵 Internal Cable Management for Better Cooling
Good cable routing improves airflow over critical components.
- Wi-Fi Antenna Wires (Most Important):
- Route the thin black and white wires through the designated plastic clips or channels on the sides of the chassis.
- They should run away from the heat pipes and fans. Heat can degrade their insulation over time.
- Ensure they have a slight slack loop near the card to avoid tension on the connectors.
- SATA Cable (if installed):
- The cable for the 2.5-inch drive should be neatly tucked along the side of the drive bay, secured with existing adhesive or routed under clips.
- Do not let it drape across the top of the motherboard.
- Fan Cables: Ensure the small fan power cables are routed cleanly and not interfering with the fan blades.
🔧 Bottom Panel Alignment & Seating Process
This prevents creaks, gaps, and broken clips.
- Initial Alignment:
- Hold the bottom panel at a 30-degree angle above the laptop.
- Align the rear edge first (near the ports and vents). This edge often has alignment tabs that must slot in.
- Gently lower the front edge into place.
- Clip Engagement:
- Starting from the center of one long side, use the palm of your hand to apply firm, even pressure along the edge.
- You should hear a series of soft, evenly spaced clicks as the plastic clips engage.
- Work your way around the entire perimeter, applying pressure every 2-3 inches.
- Never use a screw to pull the panel down. If it doesn't snap closed with hand pressure, it's misaligned.
- Visual Inspection:
- Run your finger along the seam between the bottom panel and the main chassis. There should be no large gaps or raised edges.
- If a section is raised, press firmly directly over that clip. If it still won't seat, lift the panel and check for an obstructing cable or a misaligned clip.
🔩 Screw Reinstallation Sequence & Torque
Proper screwing prevents warping and ensures a rigid chassis.
- Sequence is Key: Install screws in a cross or star pattern (like tightening a car wheel). Don't go in a circle.
- Install the first screw near the center of one side, just finger-tight.
- Install the screw diagonally opposite.
- Continue this pattern until all 10 screws are started.
- Final Tightening: Once all screws are started, go around in the same cross pattern and give each screw a final, gentle snug turn.
- Do Not Overtighten! The screws go into brass inserts in plastic. Snug is sufficient. Overtightening can strip the inserts.
- A good rule: tighten until you feel resistance, then stop.
- Missing/Broken Screw? If a screw hole is stripped, do not force it. The remaining 9 screws and clips will hold the panel securely. Note this for the buyer if selling.
🔍 Post-Reassembly Quality Inspection
Before powering on, perform these final checks.
- Flex Test: Gently pick up the laptop and apply light torsional pressure. There should be no creaking or shifting, indicating all clips and screws are engaged.
- Port & Vent Check: Ensure no plastic from the bottom panel is obstructing any air intakes, exhaust vents, or port openings.
- Button & Touchpad Function: Press the power button and touchpad lightly to ensure they aren't being pressed by a misrouted cable underneath.
- Visual Appeal: The laptop should look as it did before disassembly, with uniform seams and no bulges.
🚧 Common Reassembly Mistakes to Avoid
- Forcing the Panel: If it doesn't sit flat, stop. Lift it and find the obstruction (usually a cable).
- Missing a Clip: An unseated clip will cause a gap and creak. Re-press along the entire edge.
- Cross-threading Screws: Always start screws by hand, turning counter-clockwise first until you feel them "drop" into the existing thread, then tighten clockwise.
- Overtightening: The most common mistake. It strips plastic and makes future repairs difficult.
- Forgetting a Component: Triple-check that the Wi-Fi antenna wires and SATA cable are connected before closing.
✨ Professional Finishing Touches (For Resale)
These small details make a big impression on a potential buyer.
- Exterior Cleaning: Wipe down the entire laptop (lid, keyboard, display) with a microfiber cloth and isopropyl alcohol (diluted) to remove fingerprints and smudges.
- Screwhead Inspection: Ensure none of the visible bottom panel screw heads are scratched or stripped. This suggests careful work.
- Document the Process: Take a final "after" photo of the perfectly closed laptop to pair with your "before" photo. This demonstrates a clean, professional job.
9. Post-Upgrade Testing, Optimization & Benchmarking for Dell G15 5515
The real value of your upgrades is proven through systematic testing and optimization. This section guides you through validating hardware functionality, stress testing for stability, optimizing system settings for gaming, and creating compelling performance documentation that maximizes resale value.
✅ Initial Boot & Basic Functionality Test
Before stress testing, ensure everything is detected and working.
- First Power-On: Connect the AC adapter and press the power button. Listen for the fans to spin up (normal) and watch for the keyboard backlight.
- Enter BIOS/UEFI (F2 on boot): Verify all hardware is detected:
- Memory: Correct total capacity (e.g., 16GB) and speed (e.g., 3200MHz).
- Storage: All drives (NVMe and SATA) are listed.
- Boot Order: Ensure your OS drive is first.
- Boot to Windows: Log in normally. Check for any driver installation prompts (especially for the new Wi-Fi card).
- Device Manager Audit: Open Device Manager and look for any warning icons (yellow exclamation marks). Resolve any missing drivers.
⚡ Stress & Stability Testing (The "Torture Test")
This validates that your upgrades work under extreme gaming loads and that thermals are under control.
- CPU & GPU Combined Load:
- Use Prime95 (Small FFTs) for CPU stress and FurMark for GPU stress. Run both simultaneously for 15-20 minutes.
- Monitor with HWiNFO: Watch CPU (Ryzen) and GPU temperatures. For the G15, aim for:
- CPU (Ryzen 5/7 5000 series): Max 95-105°C under this unrealistic dual-stress (throttling point). In normal gaming, expect 80-90°C.
- GPU (RTX 3050/3060): Max 86-87°C (Nvidia throttle point). Ideal is below 83°C.
- Look for thermal throttling flags in HWiNFO. Some is expected under this test, but it should not happen instantly.
- Memory Test (Crucial):
- Use Windows Memory Diagnostic (search in Start Menu) or MemTest86 for a more thorough check.
- Run at least one full pass with zero errors to confirm your new RAM is stable.
- Storage Health & Speed Verification:
- Use CrystalDiskInfo to confirm drive health is "Good" at 100%.
- Use CrystalDiskMark to benchmark your NVMe SSD. A Gen3 drive should read ~3,500 MB/s.
🎮 Gaming-Focused Software Optimization
Tune your system to prioritize gaming performance.
- Dell & Windows Power Settings:
- Open Dell Power Manager (pre-installed) or the My Dell app. Set Thermal Management to "Ultra Performance" or "Cool" for maximum fan speed.
- In Windows Power Options, select the "Best Performance" plan.
- NVIDIA Control Panel Optimizations:
- Open NVIDIA Control Panel > Manage 3D settings.
- Power Management Mode: Prefer maximum performance.
- Low Latency Mode: Set to Ultra for competitive shooters (reduces render queue).
- Background Application Max Frame Rate: Set to 20 FPS to save power when not gaming.
- Open NVIDIA Control Panel > Manage 3D settings.
- Update All Drivers: Use Dell Support for chipset/BIOS and NVIDIA GeForce Experience for GPU drivers. A BIOS update can improve RAM compatibility and fan control.
- Disable Unnecessary Startup Apps: In Task Manager > Startup, disable non-essential apps to reduce background load.
📊 Creating "Before & After" Benchmark Documentation
This is your most powerful tool for justifying a higher resale price.
| Benchmark | Tool | What to Measure | How to Present for Resale |
|---|---|---|---|
| Overall Gaming Score | 3DMark Time Spy (Free Demo) | Overall Score, GPU Score, CPU Score | "3DMark Score improved from 5,800 to 6,950 after dual-channel RAM and thermal repaste." |
| Real-World Gaming FPS | MSI Afterburner with RivaTuner | Average FPS and 1% Low FPS in a game like Cyberpunk 2077 or Warzone. | "1% Low FPS in [Game] increased by 22%, eliminating stutter." |
| Storage Speed | CrystalDiskMark | Sequential Read/Write speeds (Q8T1). | Screenshot showing NVMe speeds ~3,500 MB/s. |
| Thermal Performance | HWiNFO logging | Max GPU/CPU temps during a 10-minute game session. | "GPU now peaks at 82°C instead of 87°C, sustaining higher boost clocks." |
🔍 Final System Validation Checklist
Run through this complete functionality test before considering the job done.
- ✅ All Keys & RGB: Test every keyboard key (use an online tester) and all RGB lighting zones.
- ✅ Wi-Fi & Bluetooth: Connect to your network and pair a Bluetooth device (headphones, controller).
- ✅ All Ports: Test each USB port (mouse, flash drive), HDMI/DisplayPort output, audio jack, and Ethernet port.
- ✅ Audio: Play sound through internal speakers and headphones.
- ✅ Webcam & Mic: Test with the Camera app and Voice Recorder.
- ✅ Fan Profiles: Use Dell Power Manager to cycle through Quiet, Balanced, and Ultra Performance modes. Listen for fan speed changes and ensure they spin up under load and spin down at idle.
📸 Creating Irresistible Sales Assets
Package your proof into a compelling narrative for buyers.
- The Performance Summary Slide: Create a simple graphic or text box summarizing key improvements:
- "✅ 16GB Dual-Channel RAM (from 8GB Single) = +25% 1% Low FPS"
- "✅ 1TB NVMe SSD + 1TB SATA SSD = 2TB Total Fast Storage"
- "✅ Wi-Fi 6 Upgrade = Lower Ping & Stable Connection"
- "✅ Professional Thermal Repaste = GPU -5°C Peak Temp"
- The Proof Gallery: Include screenshots of:
- Task Manager (Performance tab) showing 16GB RAM.
- CrystalDiskMark results.
- 3DMark score summary.
- HWiNFO sensor summary showing healthy temps.
- The Trust Builder: Mention, "All original parts included. Full documentation of upgrade process and benchmark results provided."
10. Maximizing Resale Value After DIY Upgrades for Dell G15 5515
Your careful upgrades have transformed the laptop's performance—now it's time to transform its market value. This final section provides a strategic blueprint for presenting, pricing, and selling your upgraded Dell G15 to maximize profit and attract serious gaming buyers.
🎯 Strategic Market Positioning
Don't just sell "a used laptop." Sell a professionally optimized gaming system.
- Identify Your Competition: Research prices for:
- Stock G15 5515s in similar condition on eBay, Facebook Marketplace, and Craigslist.
- Similar-spec pre-built gaming PCs from brands like HP Omen or Lenovo Legion.
- Use tools like eBay's Sold Listings for real market data.
- Create Your Unique Selling Proposition (USP): Your laptop is now superior to stock models. Highlight this:
- "Not just another G15 – professionally upgraded for maximum gaming performance."
- "Eliminates the common G15 bottlenecks: single-channel RAM and thermal throttling."
- "Ready for modern games with 16GB dual-channel RAM and 2TB of fast SSD storage."
💰 Data-Driven Pricing Strategy
Calculate your minimum profitable price and target premium.
| Cost Component | Example Calculation | Notes |
|---|---|---|
| Base Laptop Value | $500 (for a good condition stock unit) | Based on current used market prices. |
| Parts Investment | $180 (RAM, SSD, Wi-Fi card, paste) | Use actual receipts. |
| Labor & Expertise Premium | $120 - $200 | This is your profit margin for professional work. |
| Target Sale Price | $800 - $880 | A competitive premium over stock, justified by proven upgrades. |
Key Insight: Sell the solution, not the parts. A buyer paying $800 avoids the hassle, risk, and research of doing the upgrades themselves.
✍️ High-Conversion Listing Copy Template
Use this structure in your eBay, Facebook, or Craigslist description.
- Headline: Dell G15 5515 Gaming Laptop - 16GB RAM, 2TB SSD, Wi-Fi 6 - Professionally Upgraded
- Opening Bullets (The Hook):
- ✔️ Expertly Upgraded for superior gaming performance over stock models.
- ✔️ 16GB Dual-Channel DDR4 3200MHz RAM – eliminates stuttering (from 8GB single-channel).
- ✔️ 2TB Ultra-Fast Storage (1TB NVMe + 1TB SATA SSD) – holds 50+ games.
- ✔️ Wi-Fi 6 & Thermal Repaste – lower ping, cooler temperatures for sustained FPS.
- ✔️ Fully tested & benchmarked – includes performance documentation.
- Full Specs Section: List every detail (CPU, GPU, screen Hz, exact SSD models, etc.).
- The Story (Builds Trust): "This laptop was carefully upgraded by a tech enthusiast using premium parts and anti-static procedures. All original components are included. See the benchmark results below that prove the performance gains."
🛒 Platform Selection & Fee Analysis
Choose where to sell based on your target profit and risk tolerance.
| Platform | Best For | Fees | Tip |
|---|---|---|---|
| Facebook Marketplace | Quick local sale, highest profit (no fees). | 0% | Meet at a safe, public place. Cash only. Price 10% higher for negotiation. |
| eBay | National audience, competitive bidding. | ~13% (incl. payment processing) | Use "Buy It Now" with "Best Offer." Factor fees into your minimum price. Ship with full insurance. |
| Craigslist | Local tech-savvy buyers. | 0% | Be prepared for more lowball offers. Include your benchmark images in the ad. |
| Specialized Buyers (SellBroke, SellLaptopBack) |
Guaranteed, hassle-free sale. | Built into (lower) quote. | Convenience over profit. You'll get a wholesale price, often 40-60% of retail. Use for a fast, no-haggle sale if your upgrades don't command a premium there. |
📑 The Trust & Documentation Package
Overcome buyer skepticism with overwhelming proof.
- Include in Listing:
- Screenshots of 3DMark results and CrystalDiskMark/Info.
- Photos of the clean internal layout before closing the panel.
- Photo of the upgrade parts' boxes (if available).
- Provide to the Buyer:
- A printed or digital "Specs & Benchmarks" sheet.
- Links to the drivers used (Intel Wi-Fi, etc.).
- A receipt folder for the parts (redact personal info).
- Offer a Short Test: For local sales, offer a 10-minute demo: boot up, run a game, show the Task Manager specs. This builds immense confidence.
🏛️ Legacy & Educational Value
Appeal to a broader market by highlighting lasting value.
- For Students: Emphasize the reliability for engineering software, coding, and content creation (thanks to the RAM and SSD).
- For Educators & Institutions: Mention durability and repairability. Some schools and .edu programs look for cost-effective, upgradeable tech. The G15's standard parts make it a good fit.
- For Enthusiasts: Highlight the "excellent upgrade platform" with standard components, unlike many soldered modern laptops.
✅ Pre-Sale Final Preparation Checklist
- Data Wipe: Perform a complete Windows reset ("Remove everything"). Use the "Fully clean the drive" option for security if selling to strangers.
- Cosmetic Polish: Clean the screen, keyboard, and chassis thoroughly. A pristine appearance justifies a "Like New" condition claim.
- Accessories: Gather the original charger, box (if available), and any leftover screws/original parts. Bundle them.
- Set a Reserve: On auction sites, set a hidden reserve price equal to your calculated minimum profitable price.
- Timing: List on Thursday or Friday evenings—when most people are browsing for weekend purchases.
📚 Additional Resources for Responsible Disposal
If you choose not to sell, consider these responsible alternatives.
- E-Waste Recycling:
- EPA Electronics Donation and Recycling – Official guidance and locator.
- Many municipalities offer free e-waste drop-off. Check your local .gov website.
- Donation for Tax Deduction:
- Donate to a qualified non-profit, school, or library. Get a receipt for a potential tax deduction.
- Organizations like Computers with Causes accept working laptops.
Need to Sell Your Dell Laptop? Get Instant Cash!
If your Dell G15 5515 (or other G-Series gaming laptop) has performance issues or you're upgrading to a newer model, we offer competitive cash payouts for your device. We buy broken, used, and refurbished Dell gaming laptops—including all G15 5515 configurations—with free insured shipping and hassle-free evaluations.
Sell Popular Dell Models Now: