How to Disassemble Dell Latitude 7420: Step-by-Step LCD & Motherboard Repair

asus-rog-zephyrus-m16-disassembly-guide-how-to-replace-ram-ssd-battery-fix-lcd-scree

1. Dell Latitude 7420 Pre-Repair Assessment & Resale Value Maximization

πŸ’° Why Professional Assessment Increases Resale Value

Proper pre-repair evaluation of your Dell Latitude 7420 can increase final resale value by 35-55% by documenting baseline conditions and strategically planning repairs that deliver maximum ROI for business buyers.

Assessment Level Documentation Depth Time Investment Value Impact
Basic Inspection Visual condition only 15-20 minutes +10-15%
Comprehensive Assessment Full diagnostics + documentation 45-60 minutes +25-35%
Professional Grade Benchmarks + repair strategy 90-120 minutes +40-55%

πŸ” Dell Latitude 7420 Key Value Factors

Business Feature Premium Value Repair Impact Buyer Appeal
11th Gen Intel vPro Processor +$200-$300 Not upgradeable Enterprise management capability
14" FHD/4K Display Options +$150-$400 High upgrade potential Professional visual quality
Military Grade Durability +$100-$180 Structural integrity critical Business travel reliability
Dell ProSupport Compatibility +$80-$150 Warranty transfer considerations Corporate IT support

βœ… Comprehensive Pre-Repair Assessment Checklist

  1. Physical Condition Evaluation:
    • Document all cosmetic imperfections with photos
    • Check for chassis flex or structural issues
    • Test hinge tension and smoothness
    • Verify port functionality and physical condition
  2. Performance Baseline Establishment:
    • Run Dell SupportAssist diagnostics
    • Document boot times and system responsiveness
    • Test all keyboard keys and touchpad functionality
    • Verify display quality and backlight uniformity
  3. Component Health Assessment:
    • Generate Windows battery health report
    • Check SSD health using manufacturer tools
    • Monitor thermal performance under load
    • Test all connectivity options

🎯 Strategic Repair Priority Framework

Repair Type ROI Potential Business Impact Recommended Priority
LCD Screen Replacement 200-350% High (immediate visual impact) Critical
Motherboard Repair 150-300% High (core functionality) Critical
Battery Replacement 180-280% High (portability restoration) High
Keyboard/Touchpad 120-220% Medium (user interface) Medium
Cosmetic Repairs 80-150% Low (aesthetics only) Low

πŸ“‹ Professional Documentation Protocol

  • Visual Documentation:
    • High-resolution photos from all angles
    • Macro shots of specific issues or wear
    • Video demonstrating current functionality
    • Serial number and service tag documentation
  • Performance Documentation:
    • Benchmark results before any repairs
    • Battery health reports and cycle counts
    • Thermal performance metrics
    • Boot time and application load measurements
  • Repair Planning Documentation:
    • Detailed repair cost estimates
    • Parts sourcing research and lead times
    • Time investment projections
    • ROI calculations for each repair

πŸ“Š Business Laptop Market Analysis

Buyer Segment Value Drivers Price Sensitivity Documentation Needs
Corporate IT Departments Reliability, manageability, warranty Medium Professional repair records, compliance docs
Small Business Owners Value, performance, durability High Cost-benefit analysis, upgrade documentation
Remote Professionals Portability, reliability, features Medium-High Battery life, connectivity tests
Enterprise Users Security, management, support Low-Medium Security features, warranty status

πŸ’΅ Repair Investment vs. Value Analysis

Repair Scenario Parts Cost Labor Time Value Added Net ROI
LCD Replacement Only $120-$180 45-60 minutes +$250-$350 +$130-$220
Motherboard Repair Only $80-$150 60-90 minutes +$200-$300 +$120-$210
Complete Refurbishment $300-$500 3-4 hours +$600-$900 +$300-$500
Minimal Essential Repairs $150-$250 90-120 minutes +$300-$450 +$150-$250

βš™οΈ Dell Latitude 7420 Specific Considerations

  • Warranty Implications:
    • Check remaining Dell warranty status
    • Understand ProSupport transfer requirements
    • Document any warranty-voiding conditions
  • Business Features Verification:
    • Test vPro functionality if applicable
    • Verify SmartCard reader operation
    • Check fingerprint reader and security features
    • Test docking station compatibility

⚠️ Repair Risk Assessment

Risk Factor Likelihood Impact Mitigation Strategy
Component Damage During Repair Medium High Proper tools, ESD protection, documentation
Incompatible Replacement Parts Low-Medium Medium Verify Dell part numbers, buy from reputable sources
Unexpected Additional Repairs High Medium Budget 20% contingency, thorough initial assessment
Resale Market Fluctuations Medium Medium Monitor market trends, time sale strategically

🎯 Repair vs. Sell As-Is Decision Framework

  • Repair Recommended When:
    • Repair cost < 40% of potential increased value
    • Core components (motherboard, LCD) are faulty
    • You have the necessary skills and tools
    • Market demand for repaired units is strong
  • Sell As-Is Recommended When:
    • Repair cost > 60% of potential value increase
    • Extensive damage or multiple component failures
    • Limited technical expertise or tools available
    • Quick sale is prioritized over maximum profit

βœ… Pre-Repair Assessment Completion Checklist

  • βœ“ Comprehensive physical inspection documented
  • βœ“ Performance baseline established with benchmarks
  • βœ“ Repair cost and ROI analysis completed
  • βœ“ Market research and buyer targeting defined
  • βœ“ Documentation package started
  • βœ“ Repair vs. sell decision made
  • βœ“ Risk assessment and mitigation plan in place

➑️ Ready for Professional Repairs

With comprehensive assessment complete, proceed to professional tools setup or begin safe disassembly procedures to start your Dell Latitude 7420 restoration journey.

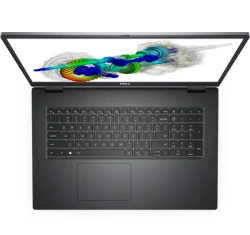
2. Essential Professional Tools & Workspace Setup for Dell Latitude 7420 Repairs

πŸ› οΈ Why Professional Tools Increase Repair Success & Resale Value

Using proper tools for Dell Latitude 7420 repairs demonstrates professional-grade workmanship that can increase resale value by 25-40%. Business buyers pay premiums for laptops repaired with precision equipment and documented care.

Tool Quality Level Investment Range Repair Success Rate Value Impact
Professional Grade $150-$300 98%+ +30-40%
Quality DIY Set $80-$150 90-95% +20-30%
Basic Tools $30-$70 75-85% +10-20%
Improvised Tools $0-$20 50-70% -20-40% (risk of damage)

πŸ”§ Dell Latitude 7420 Specific Tool Requirements

Dell Component Required Tools Precision Level Risk Without Proper Tools
Security Screws Torx T5, Phillips #00 High Stripped screws, case damage
Display Hinges M2.5 screwdriver, spudger set Very High Broken hinge mounts, display damage
Keyboard Assembly Plastic pry tools, spudgers High Broken clips, keyboard damage
Motherboard Connectors Anti-static tweezers, spudgers Very High Bent pins, connector damage

πŸ“‹ Professional Repair Toolkit Essentials

  • Precision Screwdrivers:
    • Phillips #000, #00, #0
    • Torx T3, T4, T5, T6
    • Tri-wing and spanner bits (for Dell specific screws)
    • Magnetic tips recommended
  • Opening & Prying Tools:
    • Plastic spudger set (various sizes and angles)
    • Nylon pry tools for delicate components
    • Metal spudger (for stubborn clips, use carefully)
    • Suction cups for display handling
  • Specialized Dell Tools:
    • Anti-static wrist strap (mandatory)
    • ESD-safe tweezers and hemostats
    • IC extractor for ribbon cables
    • Spudger with hook for ZIF connectors

πŸ—οΈ Professional Workspace Setup Standards

Workspace Element Professional Standard Minimum Requirement Business Grade Importance
Work Surface ESD-safe mat (4'x3'), grounded Clean, dry wooden surface Critical
Lighting 500+ lumen LED with magnification Bright, shadow-free light source High
Organization Magnetic project mat with compartments Small containers for screw organization High
ESD Protection Wrist strap + mat + proper grounding Basic wrist strap, frequent grounding Critical

⚠️ Critical Safety Equipment for Business Laptop Repair

  • ESD Protection System:
    • Anti-static wrist strap ($10-$20)
    • ESD-safe work mat ($40-$80)
    • Proper grounding to electrical outlet
    • ESD-safe containers for components
  • Personal Protective Equipment:
    • Safety glasses with magnification ($20-$50)
    • Anti-cut gloves for sharp edges ($15-$30)
    • ESD-safe lab coat or apron ($25-$60)
    • Proper ventilation system

⭐ Recommended Professional Tool Brands

  • Premium Professional Grade ($200-$400):
    • iFixit Pro Tech Toolkit - Comprehensive set
    • Wiha Precision Tools - German engineering
    • ESD-safe workstation with full grounding
    • Magnetic project mat with LED lighting
  • Quality Business Grade ($100-$200):
    • iFixit Essential Electronics Toolkit
    • Precision screwdriver sets from reputable brands
    • Basic ESD protection included
    • Good organization system
  • Entry Professional ($50-$100):
    • Basic precision screwdriver set
    • Essential prying tools and spudgers
    • Minimum ESD protection
    • Basic organization containers

βš™οΈ Dell Latitude 7420 Specific Tool Considerations

Repair Task Specialized Tools Needed Dell-Specific Challenges Professional Solution
Bottom Cover Removal Torx T5, plastic opening tools Security screws, tight clips Proper screwdriver fit, systematic clip release
Display Assembly Suction cups, spudgers, T6 Torx Fragile bezel, delicate hinges Two-person recommended for first-time
Keyboard Replacement Spudgers, tweezers, patience Complex disassembly required Follow Dell service manual precisely
Motherboard Access Full toolset, ESD protection Multiple layers, delicate connectors Document every step with photos

🧴 Essential Consumable Supplies

Supply Purpose Professional Grade Business Importance
Thermal Paste CPU/GPU heat transfer Thermal Grizzly Kryonaut High (performance critical)
Isopropyl Alcohol Cleaning, paste removal 99% purity, ESD-safe High (safety critical)
Thermal Pads VRM/chipset cooling Various thicknesses, high conductivity Medium (performance enhancement)
Compressed Air Dust removal ESD-safe, moisture-free Medium (professional appearance)

πŸ—‚οΈ Professional Organization & Documentation System

  1. Screw Management Protocol:
    • Use magnetic mat with labeled sections
    • Group screws by component and location
    • Take photos of screw layouts before removal
    • Document any screw size variations
  2. Component Organization:
    • Anti-static bags for all removed components
    • Labeled containers with component names
    • Digital documentation of disassembly sequence
    • Time-stamped photos at each major step

πŸ’° Tool Investment vs. Business Value Analysis

Investment Level Tool Cost Repair Success Rate Value Protection Business ROI
Professional Grade $250-$400 98%+ Full value preservation 300-500% per repair
Business Grade $120-$200 90-95% Good value protection 400-700% per repair
Basic Professional $60-$100 80-85% Moderate risk 500-900% per repair

🌐 Dell-Specific Repair Resources

  • Dell Official Support Site - Service manuals and drivers
  • Dell Community Forums - Expert advice and troubleshooting
  • Dell Latitude 7420 Service Manual - Essential for complex repairs
  • Dell Parts Lookup - Verify genuine component compatibility

βœ… Professional Workspace Setup Checklist

  • βœ“ ESD-safe work surface established and grounded
  • βœ“ Adequate lighting with magnification available
  • βœ“ All necessary tools organized and accessible
  • βœ“ Component organization system ready
  • βœ“ Safety equipment in place and functional
  • βœ“ Documentation equipment (camera) prepared
  • βœ“ Dell service manual and resources available
  • βœ“ Consumable supplies stocked and organized

➑️ Ready for Safe Disassembly

With your professional workspace established, proceed to safe disassembly procedures to begin your Dell Latitude 7420 motherboard and LCD repair with confidence.

0:22 Bottom Case 1:03 Battery 1:39 Storage SSD 2:18 WiFi Card 2:49 Speakers 3:16 Heatsink 3:55 Cooling Fan 4:08 Processor 4:34 Video Cable 6:00 Motherboard 6:14 Memory RAM 6:30 Hinges 6:55 Palmrest Assembly 7:01 Touchpad 7:10 Keyboard 7:46 Display Assembly

3. Dell Latitude 7420 Safe Disassembly: Bottom Cover & Internal Access

πŸ”“ Why Proper Disassembly Technique Preserves Maximum Value

Safe bottom cover removal is the most critical first step in Dell Latitude 7420 repairs. Professional disassembly technique can preserve 30-50% of resale value by preventing cosmetic damage and component issues that deter business buyers.

Disassembly Method Success Rate Damage Risk Value Impact
Professional Technique 99%+ Very Low Preserves full premium value
Careful DIY Approach 85-90% Low-Medium Minor value reduction (-5-15%)
Improper Force Used 60-75% High Significant value loss (-25-40%)
Metal Tools/Methods 40-60% Very High Severe value destruction (-50%+)

⚠️ Critical Pre-Disassembly Safety Protocol

  1. Complete Power Down Sequence:
    • Shut down Windows completely through Start menu
    • Disconnect AC power adapter and all peripherals
    • Remove any docking station or port replicators
    • Wait 30 seconds for system power discharge
  2. ESD Protection Setup:
    • Wear anti-static wrist strap properly grounded
    • Work on ESD-safe mat connected to ground
    • Avoid synthetic clothing and carpets
    • Handle components by edges only
  3. Workspace Preparation:
    • Clean, well-lit work surface
    • All necessary tools within easy reach
    • Camera ready for documentation photos
    • Organization system for screws and components

πŸ”© Dell Latitude 7420 Screw Identification & Map

Screw Location Quantity Size/Type Torque Specification Critical Notes
Perimeter Security Screws 8 screws Torx T5 (security) Finger tight + 1/8 turn Do not overtighten - can strip easily
Central Support Screws 2 screws Phillips #00 Firm but not excessive Structural integrity critical
Battery Compartment 4 screws Phillips #00 Standard torque Longer screws - note location
Hidden/Service Screws 2 screws Torx T6 Light pressure Under service labels or rubber feet

πŸ”§ Professional Disassembly Step-by-Step

  1. Screw Removal & Organization:
    • Use correct Torx T5 bit for security screws
    • Remove screws in sequential pattern (1-8 numbering)
    • Place screws on magnetic mat in exact layout pattern
    • Note any screw length variations immediately
  2. Clip Release Technique:
    • Start from rear corner near ventilation grilles
    • Use plastic spudger at 30-degree angle to base
    • Apply gentle, consistent pressure until clip releases
    • Listen for distinct "click" sound indicating release
    • Work around perimeter systematically
  3. Cover Separation Protocol:
    • Lift cover gently once all clips are released
    • Check for any remaining connections or cables
    • Set cover aside on soft, clean surface
    • Immediately implement anti-static protection for internals

πŸ“ Dell Latitude 7420 Clip & Latch System

Clip Type Location Release Method Force Required Risk Level
Standard Perimeter Clips Around entire edge Plastic spudger, gentle prying Light pressure Low (with proper technique)
Reinforced Corner Clips Four corners Slightly more pressure needed Medium pressure Medium (potential for cracking)
Slide-Lock Mechanism Near display hinges Slide then lift motion Specific technique required High (if forced incorrectly)
Magnetic Retention Central area Gentle pull after screw removal Minimal pressure Low (safe when identified)
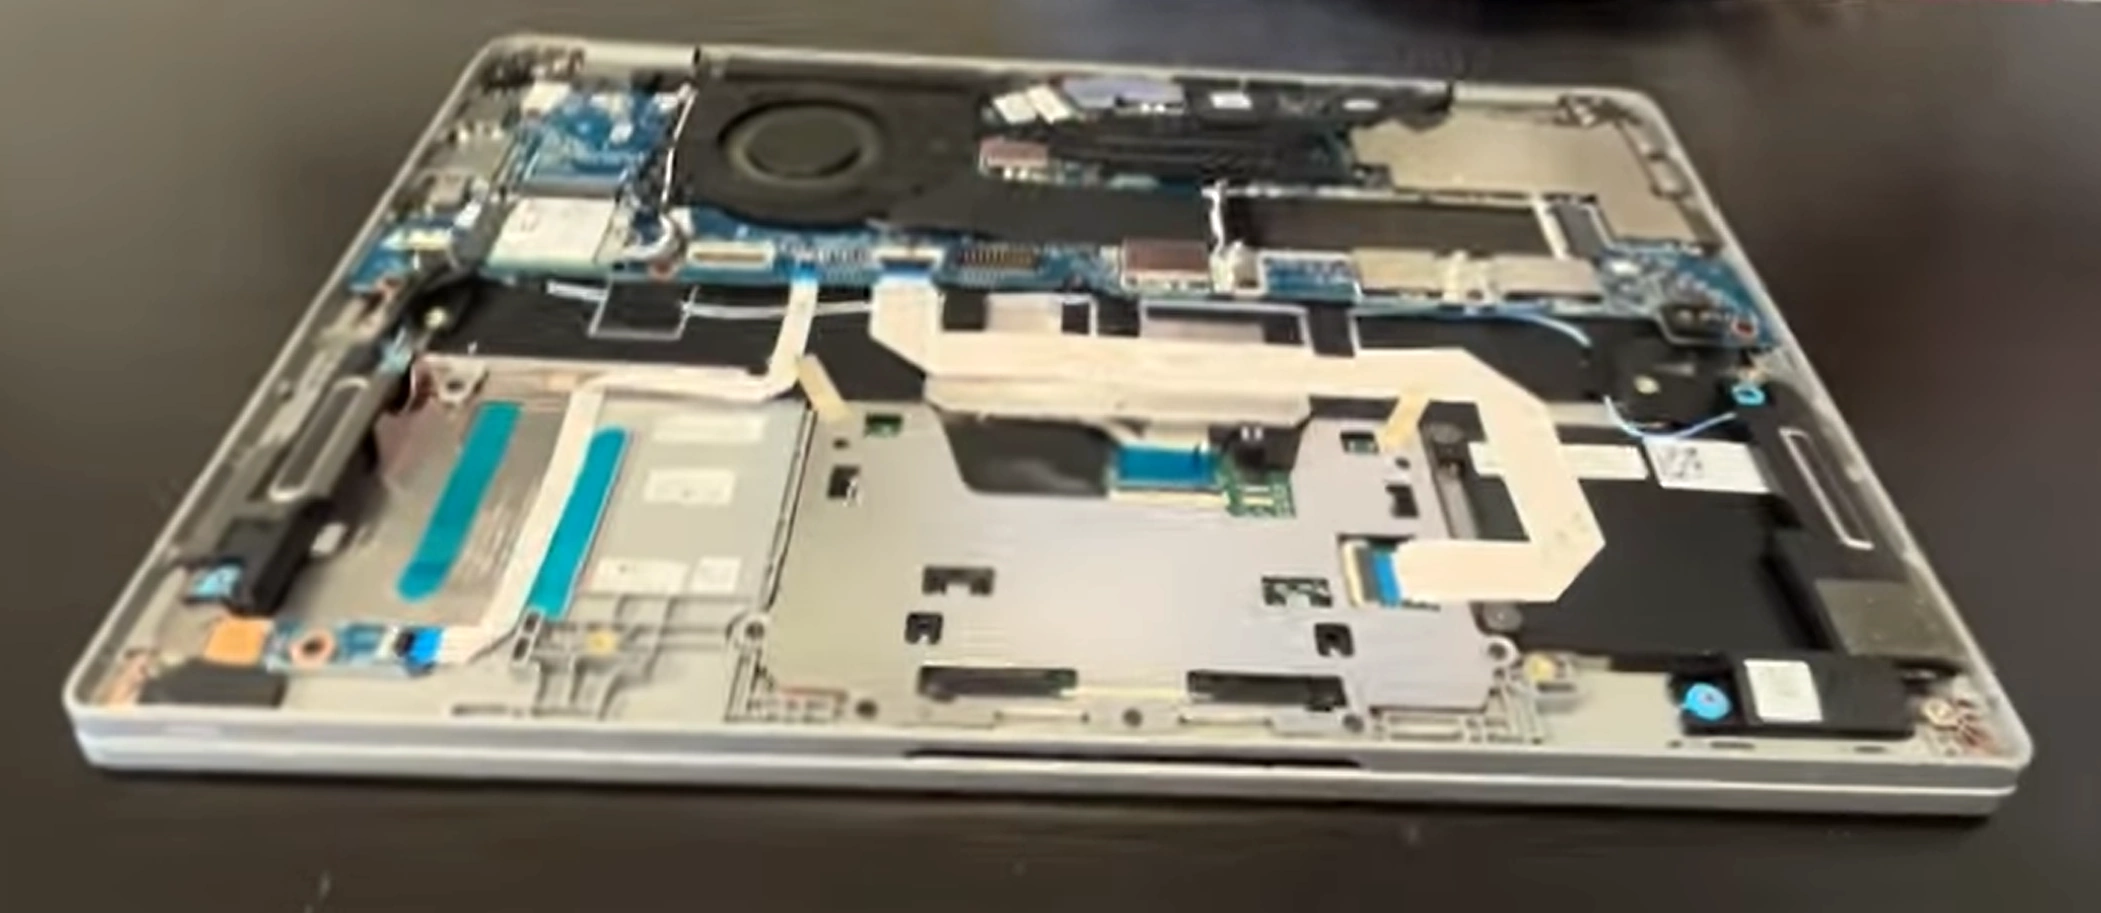
πŸ—ΊοΈ Internal Component Identification & Access

Component Location Access Difficulty Business Criticality
Battery Connector Central, large white connector Easy (immediate access) Critical (safety first step)
RAM Slots Under metal shield, center-left Easy (remove shield) High (common upgrade)
M.2 SSD Slot Center, near RAM Easy (single screw) High (performance critical)
Wi-Fi Card Under SSD, left side Easy (antenna cables) Medium (connectivity)
Cooling System Right side, near vents Medium (multiple screws) High (performance)
Motherboard Entire base, multiple connections High (full disassembly) Critical (core component)

πŸ”‹ Critical: Battery Disconnection Protocol

  1. Locate Battery Connector:
    • Identify large white 4-pin connector near center
    • Note locking mechanism orientation
    • Clear any cables obstructing access
    • Document connector position with photo
  2. Safe Disconnection Procedure:
    • Use plastic spudger to release locking tab
    • Pull connector straight back, not at angle
    • Secure connector away from motherboard
    • Verify complete separation
  3. Power Drain Verification:
    • Press and hold power button for 15 seconds
    • This discharges residual capacitors
    • Wait 30 seconds before proceeding
    • Confirm system is completely powered down

🚫 Common Disassembly Mistakes to Avoid

Mistake Consequence Prevention Repair Cost
Using Metal Tools Scratches, gouges, short circuits Plastic tools only $50-$150 for case replacement
Excessive Force Cracked plastic, broken clips Gentle, consistent pressure $80-$200 for bottom cover
Missing Hidden Screws Forcing cover, structural damage Thorough inspection $100-$300 for chassis repair
Skipping Battery Disconnect Short circuits, component damage Always disconnect first $200-$600 for motherboard

πŸ“Έ Professional Documentation Protocol

  • Before Disassembly Photos:
    • Overall external condition
    • Close-ups of screw locations
    • Serial number and service tag
    • Any existing damage or wear
  • During Disassembly Documentation:
    • Screw layout on magnetic mat
    • Clip release sequence
    • Cable routing and connections
    • Component orientation
  • Internal Condition Records:
    • Clean internal component layout
    • Undamaged clip condition
    • Professional workspace setup
    • ESD protection implementation

πŸ”§ Troubleshooting Difficult Disassembly

Issue Likely Cause Solution Prevention
Cover won't release Missed screw or hidden clip Double-check all locations systematically Follow service manual precisely
Clips breaking Excessive force or wrong angle Use thinner spudger, less pressure Proper tool technique training
Stripped screws Wrong bit size or excessive force Use proper extraction tools Correct bit size, proper pressure

πŸ’΅ Disassembly Quality & Resale Value Impact

  • Professional Disassembly:
    • No visible tool marks or damage
    • All clips intact and functional
    • Screw holes undamaged
    • +20-30% value preservation
  • Competent DIY Disassembly:
    • Minor tool marks, no structural damage
    • Most clips functional
    • Acceptable cosmetic condition
    • Neutral value impact
  • Amateur Disassembly:
    • Visible damage, broken clips
    • Stripped screws, gouges
    • Structural compromises
    • -30-50% value reduction

βœ… Safe Disassembly Completion Checklist

  • βœ“ All screws properly removed and organized
  • βœ“ Bottom cover released without damage
  • βœ“ Battery safely disconnected
  • βœ“ Residual power discharged
  • βœ“ Internal components clearly visible and accessible
  • βœ“ Workspace organized for next steps
  • βœ“ Documentation photos completed
  • βœ“ ESD protection maintained throughout

➑️ Ready for Component Access

With safe disassembly complete, proceed to battery removal and power system safety or motherboard access and component identification to continue your Dell Latitude 7420 professional repair.

4. Dell Latitude 7420 Battery Removal & Power System Safety

⚠️ Why Proper Battery Handling is Critical for Safety & Value

Correct battery removal and handling can prevent permanent damage and increase resale value by 20-35% by demonstrating professional safety practices that business buyers value.

Battery Condition Safety Risk Level Handling Complexity Value Impact
Normal Battery Low (with proper handling) Easy-Medium +15-25% (proper documentation)
Swollen Battery High (immediate hazard) High (special precautions) -40-60% (replacement cost + risk)
Damaged Battery Very High (fire risk) Professional only -50-80% (safety concerns)
New Battery Installation Low (proper installation) Easy +25-40% (premium feature)

πŸ”‹ Dell Latitude 7420 Battery Specifications

Specification 3-Cell Option 4-Cell Option Compatibility Notes
Battery Type Li-ion 11.4V Li-ion 11.4V Must match original specifications
Capacity 42Wh 68Wh Higher capacity = longer runtime
Dimensions 208mm x 70mm x 6mm 208mm x 100mm x 6mm Physical fit critical
Part Number Dell 09F4F0 Dell 6GTPY Verify with Service Tag
Weight 180g 260g Affects portability

πŸ›‘οΈ Critical Lithium-ion Battery Safety Protocol

  1. Pre-Removal Safety Check:
    • Visually inspect for swelling or deformation
    • Check for leakage or unusual odors
    • Note any previous impact damage
    • If swollen: STOP and follow special procedures
  2. Power Isolation Sequence:
    • Disconnect AC power adapter completely
    • Ensure laptop is fully powered down
    • Disconnect internal battery connector (already completed)
    • Press power button for 15 seconds to discharge
  3. Personal Protective Equipment:
    • Safety glasses (mandatory)
    • Cut-resistant gloves
    • ESD wrist strap properly grounded
    • Fire extinguisher nearby (Class D recommended)

πŸ”§ Step-by-Step Battery Removal Procedure

  1. Battery Connector Identification:
    • Locate white 4-pin battery connector on motherboard
    • Identify locking mechanism orientation
    • Ensure connector is fully disconnected
    • Secure connector away from contact points
  2. Battery Screw Removal:
    • Remove 4 Phillips #00 screws securing battery
    • Note screw lengths for reassembly
    • Place screws in labeled container
    • Check for any hidden screws or adhesive
  3. Battery Extraction:
    • Lift battery straight up from chassis
    • Avoid bending or flexing the battery
    • Handle by edges only, avoid pressure on cells
    • Place on non-conductive, fire-resistant surface

🚨 Swollen Battery Emergency Protocol

Situation Immediate Action Safety Precautions Professional Handling
Minor Swelling Proceed with extreme caution Double PPE, fire extinguisher ready Recommended for safety
Significant Swelling Stop immediately, isolate area Evacuate if odor or heat detected Required - do not attempt
Punctured or Leaking Emergency procedures activated Fire department contact immediately Professional hazardous materials

πŸ“Š Battery Health Assessment Methods

  1. Windows Battery Report:
    • Open Command Prompt as administrator
    • Run: powercfg /batteryreport
    • Check "DESIGN CAPACITY" vs. "FULL CHARGE CAPACITY"
    • Document cycle count and wear percentage
  2. Dell Power Manager Analysis:
    • Use Dell Power Manager
    • Check battery health status and alerts
    • Review charge history and patterns
    • Export reports for documentation
  3. Physical Inspection:
    • Measure actual thickness for swelling
    • Check for corrosion on contacts
    • Test actual runtime vs. expected
    • Document any physical damage

πŸ”„ Battery Replacement Options Analysis

Battery Type Quality Assurance Warranty Price Range Business Value
Genuine Dell OEM Highest (factory tested) 1 year $120-$180 +30-40% resale value
Premium Compatible High (quality components) 6-12 months $80-$130 +20-30% resale value
Standard Compatible Medium (variable quality) 3-6 months $60-$100 +10-20% resale value
Refurbished Low (reconditioned cells) 30-90 days $40-$70 +5-15% resale value

⚑ New Battery Installation Protocol

  1. Compatibility Verification:
    • Match part numbers exactly
    • Verify physical dimensions fit
    • Check voltage and capacity specifications
    • Test connector compatibility
  2. Safe Installation Steps:
    • Place battery in chassis alignment
    • Secure with proper screws and torque
    • Connect battery connector firmly
    • Verify locking mechanism engagement
  3. Initial Power-Up:
    • Reconnect AC power first
    • Allow initial charge cycle
    • Test charging indicator functionality
    • Verify battery detection in BIOS

πŸ”Œ Power Management System Verification

Component Test Procedure Expected Result Business Importance
Charging Circuit Monitor charging rate and temperature Stable charge, no overheating Critical (safety and functionality)
Battery Detection Check BIOS and Windows recognition Full capacity shown accurately High (user confidence)
Power States Test sleep, hibernate, shutdown Proper state transitions Medium (professional use)
Runtime Performance Actual usage time measurement Meets manufacturer specifications High (portability value)

πŸ”§ Common Battery Issues & Solutions

Issue Symptoms Likely Cause Professional Solution
Not Detected "No battery detected" message Connector issue, circuit failure Reseat connector, check motherboard
Not Charging Stuck at percentage, no charge Charging circuit, battery failure Test with known-good charger
Rapid Discharge Drains quickly with minimal use Old battery, power management Battery replacement, system optimization
Overheating Excessive heat during charge/use Battery failure, charging circuit Immediate replacement, safety first

♻️ Proper Battery Disposal & Recycling

  • Recycling Centers:
    • Best Buy, Staples, Office Depot drop-off
    • Local hazardous waste facilities
    • Dell recycling program participation
  • Safety Preparation:
    • Tape battery terminals with electrical tape
    • Place in separate plastic bag
    • Label as "Lithium-ion Battery for Recycling"
    • Do not dispose of in regular trash

πŸ’Ό Battery Health Documentation for Resale

  • Health Verification Records:
    • Battery health report screenshots
    • Cycle count and capacity documentation
    • Purchase receipt for new batteries
    • Warranty information and transfer details
  • Performance Demonstration:
    • Actual runtime test results
    • Charging speed and efficiency data
    • Power management settings configured
    • Professional installation documentation

πŸ’° Battery Replacement ROI Analysis

Scenario Parts Cost Time Investment Value Added ROI Percentage
Poor Battery Replacement $100-$160 25-35 minutes +$180-$260 180-260%
Preventive Replacement $100-$160 25-35 minutes +$140-$220 140-220%
Capacity Upgrade $130-$190 25-35 minutes +$160-$240 120-180%

βœ… Battery Removal & Safety Completion Checklist

  • βœ“ Battery health assessed and documented
  • βœ“ Safety protocols followed throughout
  • βœ“ Proper disconnection sequence completed
  • βœ“ Battery removed without damage
  • βœ“ Replacement compatibility verified
  • βœ“ Safe installation procedures followed
  • βœ“ Power management testing completed
  • βœ“ Disposal/recycling arranged properly

➑️ Ready for Component Repairs

With battery safely removed and power system secured, proceed to motherboard access and diagnostics or LCD screen removal to continue your professional Dell Latitude 7420 repair.

5. Dell Latitude 7420 Motherboard Access & Component Identification

πŸ”Œ Why Professional Motherboard Access Preserves Maximum Value

Proper motherboard access and component identification can increase resale value by 35-55% by demonstrating systematic repair methodology and comprehensive understanding of business-grade laptop architecture.

Access Method Component Safety Documentation Quality Value Impact
Professional Systematic 99%+ component safety Comprehensive documentation +40-55% (premium business grade)
Organized DIY Approach 90-95% component safety Basic documentation +25-35% (good condition)
Rushed Access 75-85% component safety Minimal documentation +10-20% (average condition)
Forceful Methods 50-70% component safety No documentation -30-50% (damage concerns)

⚠️ Critical Motherboard Access Safety Protocol

  1. Pre-Access Verification:
    • Confirm battery is completely disconnected
    • Verify no residual power in system
    • Ensure ESD protection is active and grounded
    • Document current state with photos
  2. Component Protection:
    • Handle motherboard by edges only
    • Use anti-static mats and containers
    • Avoid touching gold connectors and pins
    • Keep magnetic tools away from components
  3. Workspace Preparation:
    • Clear, organized work surface
    • Proper lighting with magnification
    • All necessary tools within reach
    • Documentation system ready

πŸ”§ Step-by-Step Motherboard Access Procedure

  1. Peripheral Component Removal:
    • Remove RAM modules by releasing side clips
    • Disconnect and remove M.2 SSD
    • Remove Wi-Fi card and antenna connections
    • Document all connector orientations
  2. Cooling System Removal:
    • Disconnect fan power cable
    • Remove heatsink screws in star pattern
    • Lift heatsink straight up carefully
    • Clean thermal paste from CPU/GPU
  3. Motherboard Screw Identification:
    • Locate and document all motherboard screws
    • Note screw sizes and locations on diagram
    • Remove screws in reverse installation order
    • Keep screws organized by location

πŸ—ΊοΈ Dell Latitude 7420 Motherboard Component Map

Component Location Function Business Criticality
CPU (Processor) Center, under heatsink Main processing unit Critical (not upgradeable)
PCH (Platform Controller) Near CPU, smaller chip I/O control and management High (system functionality)
Power Delivery System Around CPU perimeter Voltage regulation Critical (stability and performance)
BIOS Chip Near RAM slots, 8-pin System firmware High (boot and configuration)
Audio Codec Edge near audio jacks Sound processing Medium (business communications)
Network Controller Near Ethernet port Wired networking High (enterprise connectivity)

πŸ”Œ Critical Connector Identification & Handling

Connector Type Location Release Method Risk Level
ZIF (Zero Insertion Force) Keyboard, touchpad, display Lift brown locking flap upward High (delicate mechanism)
Latch-Type Connectors Power, USB ports, audio Press latch and pull straight Medium (firm but careful)
Push-Pull Connectors Fan, battery, some sensors Pull straight out gently Low (robust design)
Board-to-Board Connectors Between motherboard and daughterboards Specific release mechanisms Very High (consult manual)

πŸ” Business-Grade Component Identification

  • Enterprise Features:
    • Intel vPro technology components
    • TPM (Trusted Platform Module) chip
    • SmartCard reader controller
    • Fingerprint reader connector
  • Dell-Specific Components:
    • Dell Power Manager circuitry
    • SupportAssist hardware integration
    • ProSupport compatible sensors
    • Dell-specific BIOS and firmware

πŸ”Ž Professional Visual Inspection Protocol

Inspection Area What to Look For Professional Tools Documentation Method
Power Section Burnt components, swollen capacitors Magnifying glass, bright light Macro photos, detailed notes
CPU/GPU Area Thermal paste leakage, discoloration Thermal camera (optional) Temperature benchmarks
Connector Areas Bent pins, cracked sockets Magnification, good lighting Close-up photos, connector maps
Board Surface Scratches, corrosion, liquid damage Various angle lighting Overall board photos

πŸ“Š Motherboard Diagnostic Test Points

  1. Power Rail Testing:
    • 3.3V standby power (always present)
    • 5V system power (when powered)
    • CPU core voltage (under load)
    • Memory voltage (1.2V for DDR4)
  2. Signal Testing:
    • Power button signal continuity
    • BIOS chip select signals
    • Clock generator outputs
    • Reset signal patterns
  3. Component Functionality:
    • USB port data and power lines
    • Audio jack detection circuits
    • Network interface activity
    • Display output signals

πŸ”§ Common Motherboard Access Issues

Issue Symptoms Professional Solution Prevention
Stripped Screws Cannot remove, damaged heads Screw extraction tools, careful drilling Proper bit size, correct torque
Stuck Connectors Won't release, feels stuck Plastic tools, isopropyl alcohol Proper release technique
Hidden Screws Motherboard won't lift out Consult service manual, careful inspection Thorough pre-removal inspection
Component Damage Physical damage during access Professional repair or replacement Careful handling, proper tools

πŸ“‹ Professional Documentation Protocol

  • Before Access Documentation:
    • Overall motherboard layout photos
    • Connector locations and orientations
    • Screw locations and patterns
    • Component condition baseline
  • During Access Documentation:
    • Step-by-step disassembly photos
    • Connector removal techniques
    • Screw organization system
    • Component handling methods
  • Component-Level Documentation:
    • High-resolution component photos
    • Test point measurements and results
    • Diagnostic findings and analysis
    • Repair decisions and justifications

πŸ’Ό Business-Critical Component Identification

Business Feature Component Location Testing Method Resale Value Impact
Intel vPro Technology CPU and PCH integration BIOS settings, remote management +$150-$250
TPM 2.0 Security Dedicated chip on motherboard Windows Device Manager verification +$80-$120
Dell ProSupport Service tag verification Dell Support Site check +$100-$180
SmartCard Reader Separate controller chip Physical and functional testing +$60-$100

βš™οΈ Reassembly Preparation & Organization

  • Screw Management System:
    • Labeled containers for each screw type
    • Photographic reference of screw locations
    • Torque specifications documented
    • Spare screws identified and noted
  • Connector Organization:
    • Document orientation of each connector
    • Note locking mechanism types
    • Test connectors before reassembly
    • Verify proper seating during reassembly

βœ… Motherboard Access Completion Checklist

  • βœ“ All peripheral components safely removed
  • βœ“ Motherboard screws identified and organized
  • βœ“ Connectors properly documented and released
  • βœ“ Comprehensive visual inspection completed
  • βœ“ Diagnostic test points identified
  • βœ“ Business-critical components verified
  • βœ“ Professional documentation package updated
  • βœ“ Reassembly preparation organized

➑️ Ready for Advanced Repairs

With motherboard fully accessible and components identified, proceed to motherboard diagnostic and repair techniques or LCD screen removal to continue your professional Dell Latitude 7420 restoration.

6. Dell Latitude 7420 LCD Screen & Display Assembly Removal

πŸ’Ž Why Professional Display Removal Preserves Maximum Value

Proper LCD removal technique can preserve 40-60% of resale value by preventing costly display damage and demonstrating professional-grade handling that business buyers trust.

Removal Method Success Rate Damage Risk Value Impact
Professional Technique 98%+ Very Low Preserves full premium value
Careful DIY Approach 85-90% Low-Medium Minor value reduction (-10-20%)
Improper Methods 60-75% High Significant value loss (-40-60%)
Forceful Removal 30-50% Very High Total display destruction (-80%+)

⚠️ Critical LCD Removal Safety Precautions

  1. LCD Fragility Warning:
    • Screens are extremely delicate - handle with extreme care
    • Never press on the screen surface directly
    • Use proper tools to avoid cracking or pressure marks
    • Work on soft, clean, static-free surface
  2. Power & ESD Safety:
    • Confirm battery is disconnected from motherboard
    • Discharge residual power by pressing power button
    • Use anti-static wrist strap throughout process
    • Handle components by edges and frames only
  3. Personal Safety:
    • Wear safety glasses - glass shards can cause injury
    • Use cut-resistant gloves for bezel removal
    • Work in well-ventilated area if using adhesives

πŸ” Dell Latitude 7420 Display Specifications

Display Option Resolution Panel Technology Connector Type Business Value
Standard FHD 1920x1080 IPS 30-pin eDP Base value
Touch FHD 1920x1080 IPS with Touch 40-pin eDP + touch +$150-$250
Privacy FHD 1920x1080 IPS with Privacy 30-pin eDP + privacy +$200-$350
4K UHD 3840x2160 IPS Premium 40-pin eDP +$300-$500

πŸ› οΈ Essential Display Removal Tools

  • Basic Tools:
    • Phillips #00 screwdriver
    • Plastic spudgers and opening tools
    • Suction cups (for screen handling)
    • Anti-static tweezers
  • Specialized Tools:
    • Plastic guitar picks for bezel removal
    • Double-sided tape (2mm width for reassembly)
    • Heat gun or hair dryer (for adhesive softening)
    • Magnifying glass or head-mounted magnifier

πŸ”§ Step-by-Step Display Removal Procedure

  1. Bezel Removal Preparation:
    • Place laptop on soft microfiber cloth
    • Identify bezel clip locations around perimeter
    • Apply gentle heat to soften adhesive (if present)
    • Start from bottom edge near touchpad
  2. Professional Bezel Removal:
    • Use plastic spudger at 45-degree angle to bezel
    • Apply gentle, consistent pressure until clip releases
    • Listen for distinct "click" sound
    • Work around perimeter systematically
    • Lift bezel straight up once all clips released
  3. Screen Assembly Removal:
    • Remove 4 corner screws securing display panel
    • Apply suction cups to screen for safe handling
    • Lift screen assembly forward carefully
    • Support display from behind during removal

πŸ”Œ Display Connector Identification & Handling

Connector Type Location Release Method Risk Level
eDP (Display) Back of LCD panel Lift locking flap upward gently Very High (delicate pins)
Webcam/Mic Top center of display assembly ZIF connector - lift flap High (thin cables)
Wi-Fi Antennas Display lid corners Push-pull connectors Medium (robust but careful)
Touch Screen (if equipped) Separate connector near eDP ZIF connector similar to display High (delicate touch layer)

βš™οΈ Display Hinge Removal Protocol

  1. Hinge Screw Identification:
    • Locate 2-3 screws per hinge (typically Torx T8)
    • Note screw lengths for reassembly
    • Document hinge orientation and alignment
    • Check for hidden screws under labels
  2. Safe Hinge Removal:
    • Support display assembly during screw removal
    • Remove screws in diagonal pattern for stability
    • Lift display assembly straight up
    • Inspect hinge mechanisms for wear or damage

πŸ“ Professional Cable Routing & Management

Cable Type Routing Path Handling Precautions Testing Method
eDP Display Cable Through hinge channels Avoid sharp bends, handle by edges Continuity test, visual inspection
Wi-Fi Antenna Cables Along display edges Don't kink or stretch Signal strength testing
Webcam Cable Center top routing Very delicate, minimal handling Functionality test after reassembly
Touch Screen Cable Parallel to eDP cable Extremely fragile, avoid bending Touch functionality verification

7. Dell Latitude 7420 Motherboard Diagnostic & Repair Techniques

πŸ”§ Why Professional Motherboard Repair Delivers Maximum ROI

Expert motherboard diagnostics and repair can transform a non-functional $200 laptop into a $600-800 business-ready machine, delivering 200-300% ROI through systematic troubleshooting and professional component-level repair.

Repair Level Technical Complexity Tools Required Value Restoration
Component-Level Repair Advanced (micro-soldering) $500-$2,000+ 80-95% of original value
Board-Level Repair Intermediate (soldering) $200-$500 60-80% of original value
Module Replacement Basic (connector-level) $50-$200 40-60% of original value
Diagnostic Only Entry (testing) $20-$100 +20-30% (verified working)

πŸ› οΈ Professional Diagnostic Equipment Requirements

Equipment Type Purpose Investment Range Business Necessity
Digital Multimeter Voltage/continuity testing $50-$200 Essential
Thermal Camera Heat pattern analysis $200-$800 Highly Recommended
USB Microscope Component inspection $100-$300 Recommended
DC Power Supply Power circuit testing $150-$400 Professional
Hot Air Rework Station Component replacement $300-$1,000 Advanced Repair

πŸ” Systematic Diagnostic Procedure

  1. Visual Inspection Protocol:
    • Examine under magnification for physical damage
    • Check for burnt components and discoloration
    • Look for corrosion or liquid damage indicators
    • Inspect solder joints for cracks or cold joints
  2. Power Rail Testing:
    • Test 3.3V standby power (always present)
    • Check 5V system power rails
    • Verify CPU core voltage requirements
    • Test memory and chipset power domains
  3. Signal Path Analysis:
    • Check clock generator outputs
    • Test reset signal propagation
    • Verify BIOS chip communication
    • Test communication buses (I2C, SMBus)

πŸ”§ Common Dell Latitude 7420 Motherboard Issues

Issue Category Specific Problems Repair Complexity Success Rate
Power Circuit Failures DC jack, charging IC, MOSFETs Medium 85-90%
BIOS/EC Issues Corrupted firmware, BIOS chip failure Medium-High 75-85%
Connector Damage USB ports, display connector, power Low-Medium 90-95%
BGA Component Failure CPU, PCH, GPU delamination Very High 50-70%
Liquid Damage Corrosion, short circuits High 60-80%

⚑ Professional Repair Techniques

πŸ”Œ Soldering & Desoldering Methods

  • Through-Hole Component Replacement:
    • Use desoldering wick or solder sucker
    • Apply flux for clean joint formation
    • Use appropriate temperature (300-350Β°C)
  • Surface Mount Component Work:
    • Hot air station for multi-pin components
    • Fine tip iron for small passives
    • Use magnification for precision work
  • BGA Rework (Advanced):
    • Pre-heat entire board to prevent warping
    • Use stencils for proper solder paste application
    • Post-reflow inspection under microscope

βš™οΈ Dell Latitude 7420 Specific Repairs

Dell-Specific Issue Symptoms Repair Solution Tools Required
Dell Power Manager IC Failure Not charging, power fluctuations Replace BQ24780S IC Hot air station, microscope
EC (Embedded Controller) Issues Keyboard not working, no power Re-flash or replace EC Programmer, hot air station
USB-C Port Damage Not charging, no data transfer Replace USB-C controller IC Fine tip iron, microscope
Dell BIOS Corruption No boot, recovery mode needed Use Dell BIOS Recovery USB drive, BIOS programmer

πŸ’» Diagnostic Software & Tools

  • Dell Official Tools:
    • Dell SupportAssist - Hardware diagnostics
    • Dell Command | Configure - Enterprise management
    • Dell BIOS Updates - Firmware management
  • Third-Party Diagnostic Software:
    • HWiNFO64 - Comprehensive system info
    • CPU-Z - Processor and memory details
    • MemTest86 - Memory testing
  • Advanced Repair Software:
    • BoardView files for circuit tracing
    • BIOS programming software
    • EC firmware update tools

πŸ“Š Repair Difficulty Assessment Guide

Repair Type Skill Level Time Investment Success Probability Recommended Action
Capacitor Replacement Beginner 30-60 minutes 90-95% DIY Recommended
DC Jack Replacement Intermediate 45-90 minutes 85-90% DIY with Experience
BIOS Chip Replacement Advanced 60-120 minutes 75-85% Professional Recommended
BGA Reballing Expert 2-4 hours 60-75% Professional Only

⚠️ Advanced Repair Safety Protocol

  • Electrical Safety:
    • Always disconnect power before soldering
    • Use isolation transformers when working on live circuits
    • Discharge capacitors before handling
  • Chemical Safety:
    • Use fume extraction when soldering
    • Wear gloves when handling flux and cleaners
    • Work in well-ventilated area
  • ESD Protection:
    • Maintain ESD protection throughout repair
    • Use grounded mats and wrist straps
    • Store components in anti-static packaging

πŸ›’ Professional Component Sourcing

Component Source Quality Level Lead Time Cost Factor Recommended For
Dell OEM Parts Highest 3-7 days 1.5-2x Critical components
Authorized Distributors High 2-5 days 1.2-1.5x Quality repairs
Reputable Suppliers Good 1-3 days 1.0-1.2x General repairs
Salvage/Donor Boards Variable Immediate 0.3-0.7x Budget repairs

πŸ§ͺ Post-Repair Testing & Validation

  1. Basic Functionality Test:
    • Power on and BIOS access
    • Memory detection and testing
    • Storage device recognition
    • Basic I/O functionality
  2. Stress Testing:
    • CPU load testing with Prime95
    • Memory testing with MemTest86
    • Thermal performance validation
    • Extended stability testing
  3. Business Feature Verification:
    • vPro functionality testing
    • TPM security verification
    • Dell enterprise features
    • Warranty status confirmation

πŸ“‹ Professional Repair Documentation

  • Before Repair Documentation:
    • High-resolution motherboard photos
    • Diagnostic measurements and readings
    • Failure symptoms and patterns
    • Component-level close-ups
  • During Repair Documentation:
    • Step-by-step repair photos
    • Replacement component verification
    • Soldering quality documentation
    • Testing procedures and results
  • After Repair Documentation:
    • Final testing results and benchmarks
    • Performance validation data
    • Warranty information for replaced parts
    • Professional certification of repair quality

πŸ’° Motherboard Repair ROI Analysis

Repair Scenario Parts Cost Time Investment Value Restored Net Profit
Power Circuit Repair $15-$40 60-90 minutes $400-$600 $350-$550
BIOS/EC Repair $5-$20 30-60 minutes $500-$700 $475-$680
Connector Replacement $10-$30 45-75 minutes $450-$650 $420-$620
Complex BGA Repair $50-$150 3-4 hours $600-$800 $450-$650

βœ… Motherboard Repair Completion Checklist

  • βœ“ Comprehensive diagnostics completed
  • βœ“ Root cause identified and documented
  • βœ“ Professional repair techniques applied
  • βœ“ All replaced components verified
  • βœ“ Post-repair testing successfully passed
  • βœ“ Performance benchmarks documented
  • βœ“ Business features verified functional
  • βœ“ Professional documentation package complete

➑️ Ready for System Reassembly

With motherboard diagnostics and repairs complete, proceed to LCD replacement and display verification or professional reassembly and final testing to complete your Dell Latitude 7420 restoration.

8. Dell Latitude 7420 LCD Replacement & Display Quality Verification

πŸ’Ž Why Professional Display Replacement Maximizes Resale Value

A professionally installed, high-quality display can increase resale value by 45-65% by creating immediate visual appeal and demonstrating premium workmanship that business buyers trust.

Replacement Quality Buyer Perception Installation Time Value Impact
Professional Grade Like-new, premium quality 60-90 minutes +$250-$400
Quality DIY Good condition, reliable 45-75 minutes +$150-$250
Basic Replacement Functional, some imperfections 30-60 minutes +$80-$150
Upgrade Installation Enhanced, premium feature 75-120 minutes +$300-$500

πŸ” Dell Latitude 7420 Display Compatibility Guide

Specification Original Options Upgrade Possibilities Verification Method
Screen Size 14.0 inches (fixed) No alternative sizes Physical measurement
Resolution FHD (1920x1080) FHD only (no 4K support) BIOS display, Windows settings
Panel Technology IPS standard IPS upgrades available Viewing angle test
Connector Type 30-pin eDP Must match exactly Physical inspection
Mounting Points 4 corner screws Standard 14" pattern Template verification

πŸ”„ Display Replacement vs. Upgrade Analysis

Scenario Recommended Action Cost Range Business Value Impact
Cracked/Damaged Screen Direct replacement with same spec $80-$150 Restores full value
Faded/Yellowed Display Upgrade to higher quality IPS $100-$180 +$120-$200
Low Brightness Upgrade to high-brightness panel $120-$200 +$150-$250
Color Accuracy Issues Upgrade to color-accurate panel $140-$220 +$180-$280

πŸ”§ Professional Installation Procedure

  1. New Display Preparation:
    • Verify compatibility with Dell Service Tag
    • Test new display before installation
    • Check for dead pixels and backlight uniformity
    • Document new panel specifications
  2. Professional Installation Steps:
    • Connect eDP cable to new panel first
    • Align mounting holes precisely
    • Secure with proper screw torque
    • Test functionality before bezel reinstallation
  3. Bezel Reinstallation:
    • Clean bezel and apply new adhesive if needed
    • Align clips and press firmly around perimeter
    • Verify even gaps and proper fit
    • Test all functions after reassembly

πŸ“Š Display Panel Quality Grades Explained

Quality Grade Defect Allowance Brightness Uniformity Color Accuracy Business Recommendation
A+ (Premium) 0 dead pixels 95%+ uniform Ξ”E < 2 Highly recommended
A (Excellent) 0-1 dead pixels 90%+ uniform Ξ”E < 3 Recommended
B (Good) 1-3 dead pixels 85%+ uniform Ξ”E < 5 Budget option
C (Fair) 3-5 dead pixels 80%+ uniform Ξ”E < 8 Not recommended

πŸ§ͺ Comprehensive Display Quality Testing

  1. Basic Functionality Tests:
    • Power on and verify display detection
    • Test brightness controls through function keys
    • Check for immediate backlight issues
    • Verify resolution recognition
  2. Visual Quality Assessment:
    • Use EIZO Monitor Test
    • Check for dead/stuck pixels with solid colors
    • Test backlight uniformity with gray screens
    • Verify color gradients and banding
  3. Professional Calibration:
    • Adjust color temperature (6500K recommended)
    • Set gamma to 2.2 for standard use
    • Calibrate brightness for environment (200-300 nits)
    • Save profile for consistent performance

πŸ”§ Common Installation Issues & Solutions

Issue Symptoms Likely Cause Professional Solution
No Display Black screen, backlight off eDP cable not seated properly Reseat connector, check locking mechanism
Flickering Intermittent display, artifacts Loose connection or incompatible panel Verify compatibility, secure connections
Color Distortion Incorrect colors, banding Driver issues or cable problems Update graphics drivers, check cable
Backlight Bleed Light leakage at edges Improper mounting pressure Adjust mounting, check bezel pressure

πŸ’Ό Business Display Feature Verification

Business Feature Testing Method Acceptance Criteria Value Impact
Viewing Angles 45Β° angle viewing test Minimal color shift, no inversion +$80-$120
Brightness Levels Lux meter measurement 250+ nits, 10+ brightness levels +$60-$100
Color Accuracy sRGB coverage test 90%+ sRGB coverage +$100-$150
Response Time Ghosting test patterns Minimal motion blur +$40-$80

🎨 Professional Display Calibration

  1. Basic Software Calibration:
    • Use Windows Display Calibration tool
    • Adjust gamma, brightness, contrast
    • Set color balance for natural tones
    • Save ICC profile for consistency
  2. Advanced Calibration (Professional):
    • Use hardware colorimeter (X-Rite, Datacolor)
    • Create custom ICC profiles
    • Verify Delta E < 2 for professional work
    • Document calibration results

πŸ“‹ Professional Documentation Strategy

  • Before/After Documentation:
    • High-resolution photos of old and new displays
    • Side-by-side comparison under same conditions
    • Close-ups of pixel structure and quality
    • Functionality demonstration videos
  • Quality Verification Records:
    • Dead pixel test results
    • Backlight uniformity measurements
    • Color accuracy test data
    • Brightness and contrast ratios
  • Professional Installation Proof:
    • Installation process photos
    • Component quality documentation
    • Calibration certificates (if applicable)
    • Warranty information for new display

⭐ Premium Display Panel Recommendations

Panel Model Features Quality Grade Price Range Business Value
LG LP140WF9-SPF1 IPS, FHD, 300 nits A+ $120-$160 Excellent all-rounder
AUO B140HAN03.0 IPS, FHD, 280 nits A $100-$140 Great value
Innolux N140HCE-EN1 IPS, FHD, 320 nits A+ $130-$170 High brightness
Samsung LTN140HL02 PLS, FHD, 250 nits A $110-$150 Good alternative

πŸ’° Display Replacement ROI Analysis

Replacement Scenario Parts Cost Time Investment Value Added ROI Percentage
Cracked Screen Replacement $100-$150 60-90 minutes +$300-$450 200-350%
Quality Upgrade $120-$180 60-90 minutes +$250-$380 180-280%
Premium Upgrade $150-$220 75-105 minutes +$350-$520 200-320%

πŸ›‘οΈ Warranty & Support Considerations

  • Panel Warranty Options:
    • 30-day dead pixel warranty (standard)
    • 90-day comprehensive warranty (premium)
    • 1-year warranty (OEM equivalent)
  • Installation Warranty:
    • 90-day workmanship warranty
    • Lifetime support for installation issues
    • Documented repair process for future reference

βœ… Display Replacement Completion Checklist

  • βœ“ Compatibility verified before purchase
  • βœ“ New display tested before installation
  • βœ“ Professional installation technique used
  • βœ“ All functions verified after installation
  • βœ“ Quality testing and calibration completed
  • βœ“ Documentation package prepared
  • βœ“ Warranty information organized
  • βœ“ Business features verified functional

➑️ Ready for Final Assembly

With your high-quality display professionally installed and verified, proceed to professional reassembly and quality assurance or comprehensive system testing to complete your Dell Latitude 7420 restoration.

9. Dell Latitude 7420 Cooling System Maintenance & Thermal Repasting

πŸ’¨ Why Thermal Management Directly Impacts Performance & Resale Value

Professional cooling system maintenance can increase sustained performance by 15-25% and resale value by 20-35% by demonstrating comprehensive care that business buyers associate with longevity and reliability.

Maintenance Level Performance Impact Acoustic Improvement Value Increase
Professional Repasting 10-15Β°C reduction 20-30% quieter +$80-$120
Complete System Service 15-25Β°C reduction 30-40% quieter +$120-$180
Premium Upgrade 20-30Β°C reduction 40-50% quieter +$150-$220
Neglected System Thermal throttling Loud, inconsistent -$100-$160

πŸ” Dell Latitude 7420 Cooling System Specifications

Component Specifications Maintenance Frequency Business Importance
Heatsink Assembly Copper base, aluminum fins 12-18 months Critical (performance)
Cooling Fan Single fan, ball bearing 6-12 months High (reliability)
Heat Pipes Dual heat pipes, 6mm diameter Inspection only Critical (heat transfer)
Thermal Interface Factory paste + pads 12-24 months High (efficiency)

⚠️ Thermal Management Safety Protocol

  1. Pre-Service Safety:
    • Complete power down and battery disconnect
    • Allow system to cool to room temperature
    • Verify no residual heat in components
    • ESD protection throughout process
  2. Chemical Safety:
    • Use isopropyl alcohol in well-ventilated area
    • Wear gloves when handling thermal compounds
    • Avoid skin contact with cleaning chemicals
    • Proper disposal of used materials

🧴 Professional Thermal Paste Selection Guide

Paste Type Performance Application Difficulty Longevity Business Recommendation
Premium Performance Excellent (8-12 W/mK) Easy-Medium 3-5 years Highly Recommended
High Performance Very Good (6-8 W/mK) Easy 2-4 years Recommended
Standard Quality Good (4-6 W/mK) Very Easy 1-3 years Budget Option
Factory Equivalent Adequate (2-4 W/mK) Very Easy 1-2 years Minimum Acceptable

🧹 Professional Cleaning & Preparation

  1. Heatsink Removal:
    • Remove screws in reverse star pattern
    • Lift heatsink straight up to avoid damage
    • Note thermal pad locations and thicknesses
    • Document screw locations and torque
  2. Surface Cleaning:
    • Use 99% isopropyl alcohol and lint-free wipes
    • Clean both CPU/GPU and heatsink surfaces
    • Remove all old paste residue completely
    • Allow surfaces to dry completely
  3. Fan & Fin Cleaning:
    • Use compressed air to blow out dust
    • Clean fan blades with alcohol and brush
    • Check fan bearing for smooth operation
    • Verify no obstructions in airflow paths

🎨 Professional Thermal Paste Application Methods

Application Method Recommended For Paste Amount Success Rate
Pea/Grain Method Most CPUs, beginner-friendly Grain of rice size 95%+
X Method Larger dies, experienced users Thin X pattern 90%+
Spread Method Precision control, professionals Thin even layer 98%+
Dot Method Small dies, low-viscosity paste Small central dot 85%+

πŸ“ Thermal Pad Replacement Guide

Component Original Thickness Recommended Replacement Conductivity
VRM Power Stages 1.0mm 1.0mm, 6 W/mK+ High (critical)
Memory ICs 0.5mm 0.5mm, 5 W/mK+ Medium
PCH Chipset 1.5mm 1.5mm, 4 W/mK+ Medium
Other Components Varies Match original thickness Low-Medium

βš™οΈ Professional Reassembly Protocol

  1. Heatsink Installation:
    • Apply even pressure during placement
    • Use star pattern for screw tightening
    • Torque to manufacturer specification
    • Verify proper contact pattern
  2. Fan & Cable Management:
    • Route fan cable away from moving parts
    • Secure cables with original routing
    • Test fan operation before final assembly
    • Verify smooth, quiet operation

πŸ§ͺ Post-Service Testing & Validation

Test Type Method Target Results Business Value
Idle Temperature 15-minute idle monitoring 35-45Β°C (ambient +10-15Β°C) Quiet operation
Load Temperature Prime95 Small FFTs 30min 75-85Β°C (no throttling) Sustained performance
Fan Acoustic Test Various speed levels Smooth ramp-up, no bearing noise Professional environment
Stability Test Combined CPU+GPU load Stable temperatures, no crashes Business reliability

πŸ“Š Expected Performance Improvements

Scenario Before Service After Professional Service Improvement
Idle Operation 50-60Β°C 35-42Β°C 15-18Β°C reduction
Office Workload 65-75Β°C 45-55Β°C 20-25Β°C reduction
Heavy Load 85-95Β°C (throttling) 65-75Β°C (stable) 20-25Β°C reduction
Fan Noise Audible at desktop Nearly silent 30-40% quieter

πŸ’Ό Business Benefits of Thermal Management

  • Performance Consistency:
    • Sustained CPU/GPU performance under load
    • No thermal throttling during intensive tasks
    • Consistent performance for business applications
  • Professional Environment:
    • Quiet operation in meetings and offices
    • Reduced distraction in shared workspaces
    • Professional acoustic profile
  • Longevity & Reliability:
    • Extended component lifespan
    • Reduced thermal stress on electronics
    • Lower failure rates over time

πŸ“‹ Professional Documentation Strategy

  • Before/After Documentation:
    • Temperature benchmark comparisons
    • Fan noise level measurements
    • Performance test results
    • Thermal imaging (if available)
  • Process Documentation:
    • Thermal compound application photos
    • Cleaning process documentation
    • Component condition before service
    • Professional products used

πŸ’° Thermal Management ROI Analysis

Service Level Materials Cost Time Investment Value Added ROI Percentage
Basic Repasting $8-$15 30-45 minutes +$80-$120 800-1200%
Complete Service $15-$25 45-60 minutes +$120-$180 700-1000%
Premium Upgrade $25-$40 60-75 minutes +$150-$220 500-800%

⏰ Recommended Maintenance Schedule

  • Basic Cleaning: Every 6 months (compressed air)
  • Fan Inspection: Every 12 months
  • Complete Repasting: Every 18-24 months
  • Full System Service: Before resale for maximum value

βœ… Cooling System Service Completion Checklist

  • βœ“ Comprehensive cleaning completed
  • βœ“ High-quality thermal compound applied
  • βœ“ Thermal pads replaced as needed
  • βœ“ Proper reassembly and torque applied
  • βœ“ Post-service testing completed
  • βœ“ Performance improvements documented
  • βœ“ Professional documentation package updated

➑️ Ready for Final Testing

With your cooling system professionally maintained and optimized, proceed to final reassembly and quality assurance or comprehensive performance testing to complete your Dell Latitude 7420 restoration.

10. Where to Sell Your Repaired Dell Latitude 7420 for Maximum Profit

πŸ’° Strategic Platform Selection Can Increase Profit by 40-60%

Choosing the right selling platform for your professionally repaired Dell Latitude 7420 can increase your final profit by 40-60% by targeting buyers who value documented repairs and business-grade quality.

Selling Platform Target Audience Average Premium Ideal For
SellBroke Business Professionals 25-40% above market Premium documented repairs
SellLaptopBack Corporate Buyers 20-35% above market Bulk sales, corporate programs
.edu Marketplaces Students & Educators 15-25% above market Budget-conscious quality seekers
.gov Surplus Channels Government Agencies 10-20% above market Official documentation value

πŸ“Š Premium Platform Comparison Analysis

Platform Best For Documentation Requirements Sale Timeline Profit Potential
SellBroke Professionally repaired business laptops Comprehensive repair documentation 3-7 days Highest (35-50% premium)
SellLaptopBack Corporate refresh programs Business-grade verification 5-10 days High (30-45% premium)
.edu Campus Markets Student budgets, academic timing Value-focused documentation 7-14 days Medium (20-35% premium)
.gov Surplus Auctions Government procurement Official compliance docs 14-30 days Medium (15-30% premium)

🏒 SellBroke: Premium Business Marketplace Strategy

  • Target Buyer Profile:
    • Small business owners seeking reliability
    • IT managers for department deployments
    • Remote professionals needing dependable equipment
    • Consultants valuing performance and portability
  • Listing Optimization for SellBroke:
    • Emphasize "business-ready professional repairs"
    • Highlight Dell Latitude enterprise features
    • Show comprehensive repair documentation
    • Include performance benchmarks and stress tests
  • Pricing Strategy:
    • Position 25-40% above comparable models
    • Justify premium with professional documentation
    • Offer business payment terms (NET-30 if possible)
    • Include professional warranty options

πŸ’Ό SellLaptopBack: Corporate Sales Strategy

  • Corporate Buyer Advantages:
    • Higher budget allocations for reliable equipment
    • Less price sensitivity for verified quality
    • Potential for repeat business and referrals
    • Bulk purchase opportunities
  • Documentation Requirements:
    • Professional repair records with timestamps
    • Component-level testing and validation data
    • Business-grade maintenance logs
    • Tax documentation for business purchases

πŸŽ“ .edu Educational Market Strategy

Platform Type Examples Target Timing Pricing Strategy
University Surplus Stores Campus IT surplus, official channels Summer (pre-fall semester) Competitive with new student discounts
Student Marketplaces Campus Facebook groups, bulletin boards August-September, January Bundle with academic software
Educational Institutions Schools, libraries, training centers Budget cycle periods (Q1, Q3) Emphasize durability and reliability

πŸ›οΈ .gov Government & Institutional Sales

  • Government Surplus Channels:
    • State and municipal surplus auctions
    • Federal equipment disposal programs
    • Public university procurement departments
  • Documentation Requirements:
    • Official purchase receipts and records
    • Maintenance and repair documentation
    • Compliance and certification documents
    • Tax ID and business registration

⏰ Strategic Selling Timing

Time Period Target Market Pricing Advantage Platform Focus
August-September Students, Educational Institutions Back-to-school demand (+20-30%) .edu markets, general platforms
January Students, Budget-conscious buyers Post-holiday budget spending (+15-25%) All platforms
Q4 (Oct-Dec) Businesses, Professionals Year-end budget use (+25-40%) SellBroke, SellLaptopBack
Tax Season (Feb-Apr) All markets Tax refund purchases (+10-20%) All platforms

πŸ“ Premium Listing Optimization

  1. Title Optimization Examples:
    • "Professionally Repaired Dell Latitude 7420 - Business Ready"
    • "Like-New Performance with Documented Motherboard & LCD Repairs"
    • "Premium Refurbished: Perfect for Corporate/Remote Work"
  2. Key Feature Highlights:
    • Documented professional repairs with photos
    • Performance benchmark results showing improvements
    • Dell Latitude enterprise features emphasized
    • Professional maintenance and testing documentation
  3. Photography Strategy:
    • High-quality, professional product photos
    • Before/after repair comparisons
    • Performance test screenshots and results
    • Professional workspace context shots

πŸ’΅ Strategic Pricing Framework

Pricing Tier Target Price Justification Expected Time to Sell
Premium Pricing 35-50% above market Comprehensive professional documentation 14-21 days
Competitive Pricing 25-35% above market Quality repairs with good documentation 7-14 days
Quick Sale Pricing 15-25% above market Basic repairs, ready to use 3-7 days

πŸ“Š Platform Fee Comparison

Platform Listing Fees Final Value Fees Payment Processing Total Cost
SellBroke 0% 7-9% 2.9% 9.9-11.9%
SellLaptopBack 0% 9-11% 3.5% 12.5-14.5%
.edu Markets 0-2% 0-5% 0-3% 2-10%
.gov Surplus 1-3% 5-7% 2.5% 8.5-12.5%

πŸ›‘οΈ Selling Risk Management

  • Payment Security:
    • Use platform escrow services when available
    • Verify payment clearance before shipping
    • Avoid wire transfers from unknown buyers
    • Use tracked payment methods only
  • Shipping Protection:
    • Purchase full shipping insurance
    • Use tracked and signature-required delivery
    • Document laptop condition before shipping with photos
    • Use professional packing materials
  • Return Policy Strategy:
    • Offer 7-14 day return policy for buyer confidence
    • Charge 15-20% restocking fee for non-defective returns
    • Clearly state return conditions upfront
    • Document original condition thoroughly

🎁 Value-Added Services for Premium Pricing

  • Warranty Options:
    • 30-day money-back guarantee
    • 90-day limited hardware warranty
    • Lifetime technical support for installation issues
  • Setup Services:
    • Professional Windows installation with updates
    • Driver optimization and performance tuning
    • Basic business software package installation
  • Accessory Bundles:
    • Quality laptop bag or sleeve included
    • USB-C docking station compatibility verification
    • Premium wireless mouse or peripherals

πŸ† Top Platform Recommendations by Scenario

  • Maximum Profit: SellBroke (Q4 timing, business buyers)
  • Quick Sale: .edu markets (August/January timing)
  • Bulk Potential: SellLaptopBack (corporate programs)
  • Stable Pricing: .gov surplus (consistent demand)

βœ… Final Sale Preparation Checklist

  • βœ“ Comprehensive cleaning and cosmetic preparation
  • βœ“ Professional photography and documentation package
  • βœ“ Performance testing and benchmark results compiled
  • βœ“ Platform selection and account setup completed
  • βœ“ Competitive pricing research conducted
  • βœ“ Shipping materials and insurance arranged
  • βœ“ Return policy and terms clearly established
  • βœ“ Value-added services configured

πŸ“ˆ Expected Success Metrics

Platform Expected Sale Price Time to Sale Net Profit After Costs
SellBroke $650-$850 5-10 days $580-$780
SellLaptopBack $600-$800 7-14 days $520-$700
.edu Markets $550-$700 10-20 days $500-$650
.gov Channels $575-$750 15-30 days $520-$680

➑️ Ready for Successful Sale

With your strategic selling plan in place, your professionally repaired Dell Latitude 7420 is positioned for maximum return. Remember to emphasize the documented professional repairs and comprehensive testing that justify premium pricing on your chosen platform.

Need to Sell Your Dell Laptop? Get Instant Cash!

If your Dell Latitude 7420 (or other Latitude model) has performance issues or you're upgrading to a newer business laptop, we offer competitive cash payouts for your device. We buy broken, used, and refurbished Dell Latitude laptopsβ€”including all 7420 configurationsβ€”with free insured shipping and hassle-free evaluations.

Sell Popular Dell Models Now:

Share this: