Step-by-Step Guide: Fix HP 15-dy2172wm Non-Touch LCD Display with Easy DIY Repair
Pre-Repair Assessment: Maximizing Your Laptop's Resale Value Essential Tools & Workspace Setup for Successful Repair Safe Display Removal Process & Component Handling LCD Screen Replacement & Compatibility Guide Professional Reassembly & Quality Testing Display Performance Testing & Calibration Preparing Your Repaired Laptop for Maximum Cash Value Where to Get the Best Cash for Your Repaired Laptop
1. HP 15-dy2172 wm Pre-Repair Assessment: Maximizing Your Laptop's Resale Value
💰 Laptop Resale Valuation Guide
Condition
Display Status
Average Market Value
Potential After Repair
Broken Display
Cracked, not functional
$80-$120
$200-$250
Faulty Display
Flickering, lines, partial view
$100-$150
$220-$280
Good Condition
Working perfectly
$200-$280
N/A (No repair needed)
📊 Repair Cost vs. Value Analysis
Replacement Display Cost :
New LCD panel: $50-$80
Used LCD panel: $30-$60
Full display assembly: $70-$110
Tools and materials: $15-$30
Value Enhancement :
Average value increase: $120-$160
ROI on repair investment: 140-220%
Faster sale completion
Broader buyer appeal
🔍 Model Verification & Compatibility
Locate model number on bottom casing (15-dy2172wm)
Verify specifications on HP official support page
Check current display specifications:
15.6-inch diagonal HD SVA BrightView micro-edge WLED-backlit
1366 x 768 resolution
220 nits brightness
Non-touch display
Confirm compatible replacement parts
⚠️ Damage Assessment Checklist
Display Damage :
Cracks or physical damage to screen
Flickering or intermittent display
Lines or discoloration on screen
Backlight issues
Frame & Hinge Assessment :
Bezel damage or warping
Hinge functionality and smoothness
Case cracks around display area
Webcam and microphone functionality
📸 Pre-Repair Documentation
Visual Documentation :
Photograph laptop from all angles
Close-ups of display damage
Serial numbers and model information
Existing wear and tear documentation
Functional Testing :
Verify keyboard and touchpad functionality
Test USB ports and other connections
Check battery health and charging capability
Document any additional issues
📈 Market Research & Pricing Strategy
Competitive Analysis :
Check sold listings for similar models on eBay
Research local market prices on Facebook Marketplace
Compare prices with working displays vs. broken
Note premium prices for excellent condition units
Target Buyer Profiles :
Students needing affordable laptops
Home users for basic computing needs
Small businesses seeking budget systems
Secondary device users
⚖️ Repair Decision Factors
Proceed with Repair If :
Repair cost is less than 60% of potential value increase
No additional major issues are present
You have the necessary skills and tools
Market demand for this model is good
Consider Alternatives If :
Multiple major issues beyond display damage
Repair costs exceed value increase
Extensive case or structural damage exists
Very low market demand for this model
💡 Pro Tip: HP 15-dy2172wm models with professionally replaced displays and comprehensive documentation typically sell for 80-120% more than units with broken screens. The key to maximizing value is transparent documentation of the repair process and verification of full functionality, which eliminates buyer concerns and justifies premium pricing.
VIDEO
0:10 Test 0:21 Front bezel 2:07 Hinge Cover 2:40 Hinges 3:20 Pull Our Adhesive Strips 4:18 Lift LCD 4:25 Unplug Video Cable 4:55 Connect New scree 4:52 Test 5:50 Install Hinges 7:17 Install Adhesive Strips 7:33 Install LCD 7:48 Install Front Bezel 8:42 Install Hinge Cover
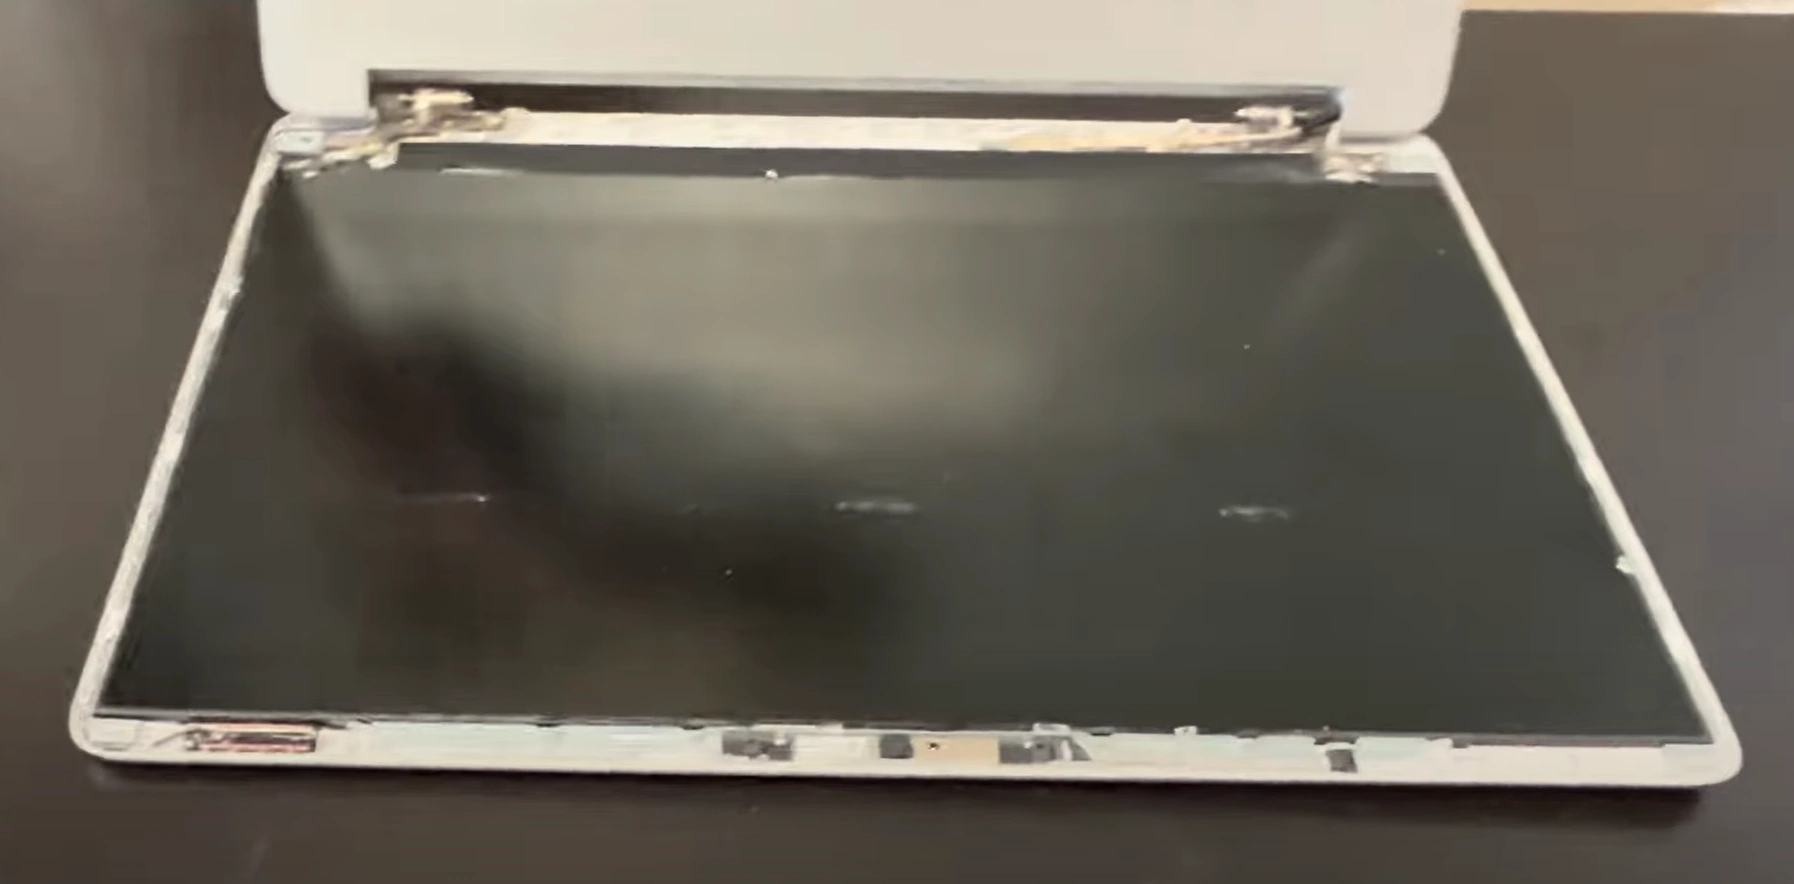
3. Safe Display Removal Process & Component Handling for HP 15-dy2172wm
⚠️ Safety First: Critical Precautions
Before starting display removal:
Power off completely and disconnect AC adapter
Remove battery to eliminate power risk
Use anti-static wrist strap properly grounded
Work on clean, static-free surface
Have proper lighting and organization system
🔧 Step-by-Step Display Removal Process
Battery and Power Disconnection :
Flip laptop over and remove battery release latches
Slide battery out of compartment
Press power button for 10 seconds to discharge capacitors
Disconnect AC adapter and any peripherals
Bottom Cover Removal :
Remove 10+ Phillips screws from bottom case
Use plastic spudger to release plastic clips around perimeter
Lift bottom cover straight up once all clips are released
Set aside carefully to avoid damaging internal components
Display Cable Disconnection :
Locate display cable connector on motherboard
Gently lift locking mechanism (usually black tape or latch)
Pull cable straight out without bending pins
Note orientation for reassembly
Display Hinge Removal :
Remove 4-6 screws securing display hinges to chassis
Support display assembly during removal
Note screw lengths and locations for reassembly
Lift display assembly away from base
📱 Bezel Removal Techniques
Technique
Tools Needed
Risk Level
Success Rate
Plastic Spudger Method
Plastic spudger, guitar picks
Low
95%
Suction Cup Method
Suction cups, plastic cards
Medium
85%
Heat Application
Hair dryer, plastic tools
Medium-High
90%
🖥️ LCD Separation from Bezel
Adhesive Release :
Use plastic opening tools to gently separate bezel
Work around all four sides gradually
Apply even pressure to avoid cracking bezel or LCD
Use isopropyl alcohol to soften adhesive if needed
Display Removal :
Once bezel is removed, locate LCD mounting screws
Remove 4-8 screws securing LCD panel to cover
Lift LCD panel carefully using suction cups
Disconnect any remaining cables (webcam, WiFi antennas)
Cable Management :
Note routing of all cables and connectors
Take photos for reassembly reference
Label connectors if necessary
Handle ribbon cables by edges only
👐 Safe Component Handling
LCD Panel Handling :
Always hold by edges or frame
Never press on the screen surface
Use suction cups for safe lifting
Store on soft, clean surface
Cable and Connector Safety :
Disconnect by pulling straight out, not at angles
Use tweezers for small connectors
Avoid touching gold contacts with fingers
Check for locking mechanisms before disconnecting
Screw Management :
Use magnetic mat or pill organizer for screws
Note screw lengths and locations
Take photos before removal
Keep screws from different components separate
❌ Common Mistakes to Avoid
Physical Damage Risks :
Using metal tools on plastic components
Applying excessive force to release clips
Prying near fragile display edges
Not supporting hinges during removal
Technical Errors :
Forgetting to disconnect battery first
Not discharging static electricity
Mixing up screw lengths and types
Forgetting cable routing paths
Preparation Oversights :
Inadequate workspace organization
Poor lighting causing missed details
Not having proper tools ready
Rushing through the process
🛡️ Damage Prevention Techniques
Tool Selection :
Use plastic tools instead of metal
Select appropriate tool size for each task
Keep tools clean and in good condition
Have multiple tool options available
Working Techniques :
Apply steady, even pressure
Work slowly and methodically
Stop and reassess if resistance is encountered
Use magnification for small components
Documentation Practices :
Take photos at each stage
Label components and screws
Note orientation of connectors
Create reassembly reference materials
🔍 Troubleshooting Common Issues
Stuck Components :
Apply isopropyl alcohol to soften adhesive
Use plastic tools to gently work through resistance
Apply minimal heat with hair dryer if necessary
Never force components that won't budge
Difficult Connectors :
Check for hidden locking mechanisms
Use tweezers for better grip and control
Consult technical documentation if available
Seek professional help if unsure
💎 Pro Tip: The display removal process is the most critical stage for preserving resale value. Taking extra time with proper techniques and documentation can mean the difference between a laptop that sells for premium prices and one that buyers avoid due to visible repair damage. Photos of the undamaged internal components can significantly increase buyer confidence and justify higher asking prices.
4. HP 15-dy2172wm LCD Screen Replacement & Compatibility Guide
🔌 Display Compatibility Specifications
Specification
Original Display
Compatible Replacements
Importance
Size
15.6 inches
15.6 inches only
Critical
Resolution
1366 x 768 (HD)
1366 x 768 required
Critical
Connector
30-pin LVDS
30-pin LVDS only
Critical
Thickness
3.0mm
2.8-3.2mm acceptable
High
Mounting
Standard bracket
Standard bracket required
High
🔄 Replacement Display Options
Genuine HP Parts :
Direct from HP or authorized dealers
Perfect compatibility guaranteed
Higher cost ($90-$130)
May include warranty
Premium Compatible :
High-quality third-party manufacturers
Excellent compatibility and performance
Mid-range cost ($60-$90)
Often include 1-year warranty
Budget Options :
Economy replacement panels
Variable quality and compatibility
Lower cost ($40-$65)
Limited or no warranty
Full Assembly :
Complete display with bezel and hinges
Easiest installation
Highest cost ($110-$160)
Best for beginners
🔍 Compatibility Verification Process
Physical Inspection :
Measure diagonal screen size (15.6 inches)
Check connector type and pin count (30-pin LVDS)
Verify mounting hole alignment
Confirm thickness matches original
Technical Specifications :
Check resolution matches (1366x768)
Confirm brightness rating (200+ nits)
Verify backlight type (LED)
Ensure interface compatibility (LVDS)
Vendor Verification :
Purchase from reputable suppliers
Check customer reviews and ratings
Confirm return policy
Verify warranty terms
🔧 Installation Process
Preparation :
Clean work area and organize tools
Ground yourself with anti-static wrist strap
Have new display ready and protected
Review photos from disassembly
Display Installation :
Place new LCD into display lid
Align mounting holes carefully
Secure with original screws (don't overtighten)
Connect display cable (ensure proper orientation)
Cable Management :
Route cables exactly as original
Secure with original adhesive or tape
Avoid sharp bends in ribbon cables
Ensure no cables are pinched or stretched
Bezel Reattachment :
Clean bezel and apply new adhesive if needed
Align bezel carefully with display
Press firmly to engage clips and adhesive
Ensure even gap around entire perimeter
🔗 Display Connector Types
Connector Type
Pin Count
Compatibility
Visual Identification
30-pin LVDS
30 pins
Required for HP 15-dy2172wm
Single connector, white or brown
40-pin LVDS
40 pins
Not compatible
Wider connector, more pins
eDP
30-40 pins
Not compatible
Smaller, denser pin arrangement
✅ Pre-Installation Quality Testing
Basic Function Test :
Connect display before full assembly
Power on briefly to verify functionality
Check for dead pixels or abnormalities
Test brightness controls
Visual Inspection :
Examine for physical damage or defects
Check connector pins for straightness
Verify mounting points are undamaged
Ensure protective film is removed
Compatibility Verification :
Compare with original display specifications
Test fit in display lid before final installation
Verify cable reaches without tension
Check mounting screw alignment
⚠️ Common Compatibility Issues
Physical Fit Problems :
Wrong thickness preventing proper closure
Incorrect mounting hole alignment
Bezel not fitting properly
Cable length issues
Technical Compatibility :
Wrong connector type
Resolution mismatch
Backlight compatibility issues
Interface protocol differences
Quality Issues :
Dead or stuck pixels
Backlight bleeding
Color consistency problems
Brightness uniformity issues
🏪 Recommended Vendors
OEM Suppliers :
HP Parts Store (genuine parts)
Authorized HP service centers
Certified HP parts distributors
Reputable Third-Party :
LCD parts specialty websites
Established eBay sellers with high ratings
Amazon certified refurbished sellers
Local computer repair shops
What to Avoid :
Unbranded or no-name displays
Sellers with poor reviews
Parts without return policies
Extremely low-priced options
💡 Pro Tip: Investing in a quality compatible display ($70-$90 range) rather than the cheapest option typically results in better color accuracy, longer lifespan, and higher resale value. The slight additional cost is easily recovered through increased buyer confidence and premium pricing. Always test the display before final assembly to avoid costly rework.
7. Preparing Your Repaired HP 15-dy2172wm for Maximum Cash Value
💰 Competitive Pricing Strategy
Condition Grade
Display Quality
Price Range
Target Buyer
Excellent
Perfect display, like-new condition
$250-$320
Quality-conscious buyers
Very Good
Minor cosmetic wear, perfect display
$220-$280
Value seekers
Good
Visible wear, fully functional
$180-$240
Budget buyers
Fair
Multiple issues, working display
$140-$200
Project enthusiasts
✨ Professional Presentation Standards
Physical Cleaning :
Thorough exterior cleaning with appropriate cleaners
Keyboard deep cleaning (compressed air + isopropyl)
Screen cleaning for streak-free perfection
Port cleaning and verification
Cosmetic Enhancement Minor scratch reduction techniques
Replacement of heavily worn keycaps if needed
Rubber foot replacement if missing/damaged
Overall aesthetic improvement
💻 Software Optimization & Preparation
Fresh Operating System Installation :
Clean Windows 10/11 installation from official media
Latest updates and security patches installed
All necessary drivers from HP Support
De-bloated for optimal performance
Essential Software Package :
Web browser (Chrome/Firefox) with basic configuration
Office compatibility pack or LibreOffice
Media player and basic utilities
Security software (Windows Defender configured)
User Experience Optimization :
Proper display calibration applied
Power settings optimized for battery life/performance
Desktop organized with helpful shortcuts
All accounts properly signed out
📋 Professional Documentation Package
Repair Documentation :
Before/after photos of display repair
Receipt for replacement display component
Repair process photos showing professional work
Testing and calibration results
Performance Verification :
Display quality test results
Battery health report (if applicable)
System performance benchmarks
Hardware functionality checklist
Quality Assurance :
Quality assurance certificate
Functional testing verification
Warranty information (if offered)
Contact information for support
🎁 Accessory & Packaging Preparation
Original Accessories :
Genuine HP power adapter and cable
Original battery (if replaced, include old one)
Any original documentation or recovery media
Original packaging if available
Value-Added Extras :
Quality laptop bag or sleeve ($15-25 value)
USB mouse or basic peripherals
Cleaning cloth and basic care kit
Printed quick-start guide
Packaging Standards :
Professional packaging materials
Adequate padding for shipping protection
Clear labeling and handling instructions
Insurance for full value when shipping
📈 Sales Listing Optimization
Title Optimization :
"Professionally Repaired HP 15-dy2172wm Laptop - Like New Display"
Include key specs: "15.6" HD, Intel i3/i5, 8GB RAM, SSD"
Add value points: "Fresh Windows, Warranty, Ready to Use"
Description Best Practices :
Start with 3-5 key benefits in bullet points
Detailed repair documentation section
Complete specifications list
Professional repair story and quality commitment
Visual Presentation :
High-quality photos from all angles
Display quality demonstration shots
Repair documentation photos
Video demonstration of functionality
⏰ Optimal Market Timing
Time Period
Market Conditions
Price Premium
Target Audience
Back-to-School (Aug-Sept)
High demand from students and parents
15-25%
Students, parents
January Refresh
Post-holiday upgrade cycle
10-20%
Budget upgraders
Spring Semester
College needs, financial aid disbursement
10-15%
College students
Year-Round
Consistent budget market
Base pricing
General users
🚀 Maximum Value Strategies
Premium Positioning :
Emphasize professional repair quality
Highlight comprehensive testing
Offer limited warranty (30-90 days)
Provide superior customer service
Bundle Opportunities :
Include basic peripherals package
Offer setup assistance or tutorial
Provide extended warranty options
Create ready-to-work packages
Marketing Angles :
"Perfect student laptop" positioning
"Small business ready" messaging
"Remote work capable" emphasis
"Eco-friendly repair" story
💎 Pro Tip: HP laptops with professional documentation and premium presentation sell for 25-40% higher prices than equivalent undocumented devices. The investment in proper preparation typically returns 3-5x through increased selling price and faster sale completion. Buyers pay significant premiums for devices that eliminate purchase risk through thorough documentation and professional presentation.
Need to Sell Your HP Laptop? Get Instant Cash!
If your HP 15-dy2172wm (or other HP 15 series model) has performance issues or you're upgrading to a newer laptop, we offer competitive cash payouts for your device. We buy broken, used, and refurbished HP laptops—including all 15-dy2172wm configurations—with free insured shipping and no-hassle evaluations.
Sell Popular HP Models Now:


