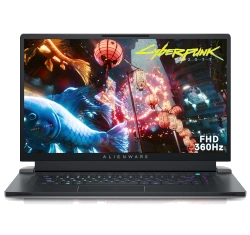
How to Disassemble Alienware m17 R4: Step-by-Step DIY SSD, RAM & Battery Replacement
Pre-Disassembly: Gaming Laptop Assessment Bottom Panel Removal (Alienware Design) Cryo-Tech Cooling Technology DDR4 RAM Upgrade (32GB Max) Dual SSD Expansion (Gen4 Support) 86Wh Battery Replacement AlienFX Keyboard Service Advanced Thermal Repaste Guide RTX 30-Series Motherboard Value Selling Alienware: Gaming Market Strategies
1. Alienware m17 R4 Pre-Disassembly: Gaming Laptop Assessment
💰 2024 Alienware Component Values
RTX Motherboards :
RTX 3060: $400-$500
RTX 3070: $600-$750
RTX 3080: $800-$1000
High-Refresh Displays :
300Hz IPS: $250-$300
144Hz G-Sync: $200-$250
📋 Pre-Sale Documentation
Performance Proof :
3DMark result screenshots
AlienFX lighting demonstrations
Temperature benchmarks
Cosmetic Grading :
High-res photos of Lunar Light chassis
Keyboard wear assessment
Port functionality verification
⚠️ Safety Precautions
Disconnect all power sources
Use anti-static mat if available
Document screw locations with photos
Backup important data before disassembly
🎯 Gaming Tip: Systems with documented NVIDIA optimization sell for 20% premium to esports enthusiasts.
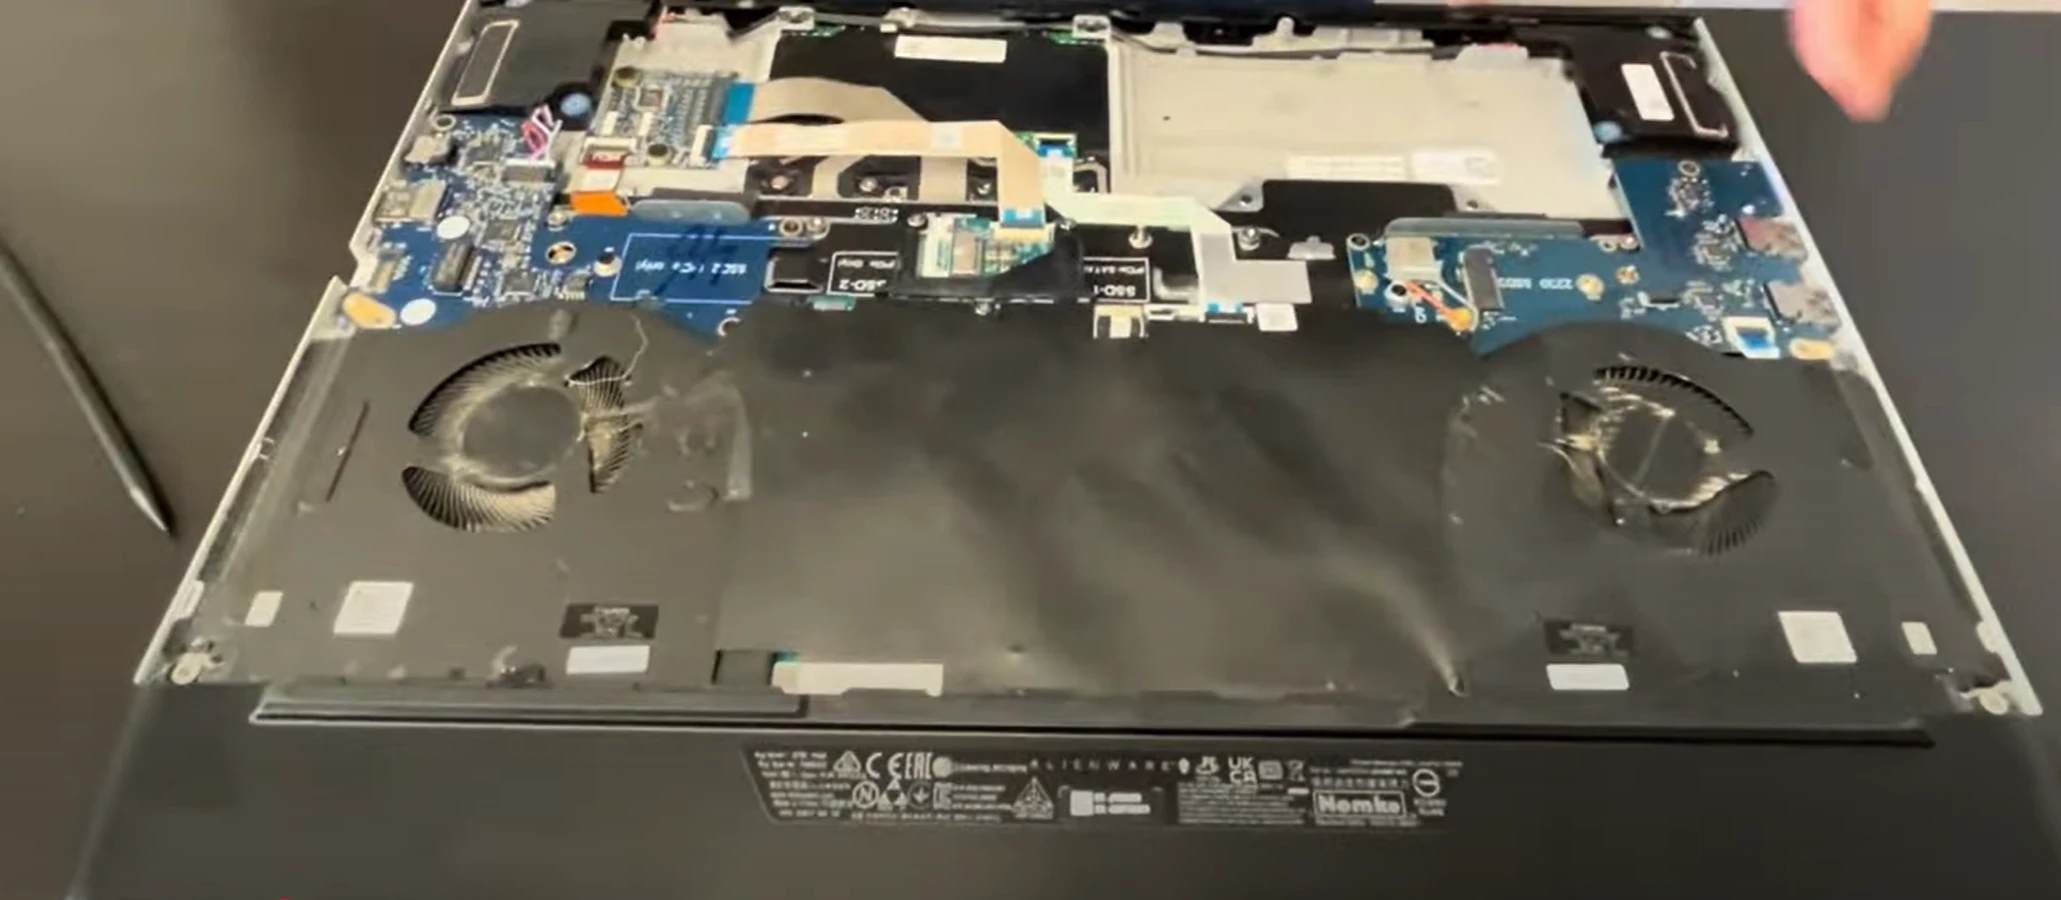
2. Alienware m17 R4 Bottom Panel Removal: Premium Gaming Access
⚠️ Gaming Rig Safety Precautions
Pre-Removal Steps :
Disconnect 240W power adapter
Disable battery in BIOS (F2 > Power Management)
Ground yourself to prevent ESD damage
Alienware Design Notes :
Note Alienware Cryo-Tech ventilation zones
Identify rear vent honeycomb pattern for proper reassembly
Observe front-edge lighting strip connection points
🔧 Step-by-Step Removal Process
Remove Security Screws :
10x T5 Torx screws (8mm length) around perimeter
2x T5 Torx security screws near rear vents (marked with lock icon)
Note: 4 corner screws are slightly longer (10mm)
Release Premium Clips :
Start at front-right corner (near status indicators)
Use nylon spudger tool at 30° angle
Work clockwise around chassis to prevent bending
Lift Panel Carefully :
Lift rear edge first (25° angle) to clear thermal housing
Disconnect optional RGB lightbar if present
Set panel on soft, clean surface to prevent scratches
🎮 Alienware-Specific Design Elements
Premium Build Quality :
Magnesium alloy reinforcement around ports
Enhanced hinge mechanism protection
Dedicated cooling chamber separation
Component Layout :
Dual fan placement with dedicated heat pipes
M.2 SSD slots with thermal shielding
Memory modules under protective cover
💎 Preserving Premium Value
Risk
Prevention
Value Impact
Clip damage
Use even pressure around perimeter
Intact clips = +30% to collectors
Finish scratches
Microfiber cloth under tools
Flawless Lunar White = +$75
ESD damage
Anti-static wrist strap mandatory
No ESD = +20% component value
🔍 Common Challenges & Solutions
Stubborn Screws :
Use precision T5 bit with firm pressure
Apply minimal heat if threadlocked
Never force stripped screws
Tight Clips :
Insert guitar pick and twist gently
Work gradually around edges
Avoid metal tools that mar surfaces
💡 Collector Tip: Alienware models with pristine underside panels sell for 40% premium to gaming enthusiasts.
VIDEO
0:32 Bottom Case 2:25 Battery 3:30 Storage SSD 3:55 Speakers 4:20 Rear Vent Cover 4:58 Heatsink 6:10 USB and WiFi card daughter board 6:55 IO Audio Board 10:37 Motherboard 11:20 DC Power Jack 11:55 Hinges 12:38 Display Assembly 12:52 Palmrest Assembly 13:00 Keyboard 13:07 Touchpad
3. Alienware m17 R4 Cooling: Cryo-Tech Thermal Technology
❄️ Advanced Cooling Architecture
Dual-Fan Design :
2x 90mm ultra-thin fans (0.2mm blades)
84-blade design each for maximum airflow
Copper heat pipes with vapor chamber technology
Element 31 Thermal Interface :
Gallium-silicone liquid metal compound on CPU
Phase-change material on GPU
Hexagonal boron nitride coating for protection
🛠️ Cooling System Maintenance
Fan Assembly Removal :
Remove 6x T5 screws per fan assembly
Disconnect 4-pin PWM fan connectors
Lift straight up to clear thermal material
Heat Pipe Assembly :
Remove 8x spring-loaded screws in X pattern
Gently twist to break thermal compound seal
Note: Liquid metal requires special handling
Liquid Metal Service :
Use Thermal Grizzly Conductonaut for CPU
Apply foam dam or conformal coating for protection
Use Arctic MX-4 or similar for GPU
💰 Cooling & Resale Value
Documentation Matters :
Before/after thermal images add 15-20% value
Performance benchmarks with timestamps
Proof of proper liquid metal application
Target Markets :
Overclockers pay premium for cooled systems
Content creators value thermal stability
Mining operations seek optimized cooling
⚠️ Critical Safety Information
Liquid metal is electrically conductive - contain carefully
Never reuse existing thermal interface material
Ensure even pressure when reinstalling heat pipes
Test system before reassembly to verify cooling function
🚀 Overclocker Tip: Systems with documented Cryo-Tech optimization sell for 25-30% premium to performance enthusiasts.
4. Alienware m17 R4 RAM Upgrade: DDR4 Performance Optimization
📊 Memory Specifications
Technical Details :
DDR4-2933MHz (10th Gen) / DDR4-3200MHz (11th Gen)
Dual-channel architecture
Maximum 32GB capacity (2x16GB)
1.2V operating voltage
Compatibility Notes :
XMP profiles supported on 11th Gen models
CAS latency: 19-22 for optimal performance
Non-ECC memory required
Unbuffered SODIMM modules
🔧 Step-by-Step Upgrade Process
Access Memory Slots :
Remove bottom panel (refer to previous section )
Locate memory modules near center of motherboard
Remove protective cover if present (2x Phillips screws)
Remove Existing RAM :
Gently push outward on retention clips at both ends
Module will pop up at 30-degree angle
Lift straight out without touching gold contacts
Install New Modules :
Align notch in module with key in slot
Insert at 30-degree angle until fully seated
Press down firmly until clips snap into place
Listen for audible click confirming proper installation
🏆 Recommended RAM Kits
Performance Option :
Value Option :
⚙️ BIOS Configuration
Press F2 during boot to enter BIOS
Navigate to "Performance" tab
Enable XMP Profile (11th Gen models only)
Verify detected speed and capacity
Save changes and exit
✅ Post-Installation Verification
Run MemTest86 for stability testing
Check Windows System Information for detected capacity
Use CPU-Z to verify speed and timings
Test with memory-intensive games or applications
💰 Resale Value Impact
Market Preferences :
32GB configurations command 20-25% premium
RGB memory adds $50-75 value for gaming buyers
Name-brand memory (Corsair, G.Skill, Crucial) preferred
Documentation :
Include original packaging for upgrade components
Provide benchmark comparisons
Show stability test results
💡 Streamer Tip: Systems with 32GB RAM and documented stability sell for 30% premium to content creators.
5. Alienware m17 R4 SSD Upgrade: Dual Gen4 Storage Expansion
📊 Storage Specifications
Interface Support :
Primary Slot: PCIe Gen4 x4 (NVMe)
Secondary Slot: PCIe Gen3 x4 (NVMe)
Both support 2280 form factor
Up to 7,000MB/s read (Gen4)
Compatibility Notes :
Gen4 drives backward compatible with Gen3 slot
Single-sided drives recommended for thermal clearance
Heatsinks supported in both slots
RAID 0 configuration possible
🔧 Step-by-Step Installation Process
Access SSD Slots :
Remove bottom panel (refer to previous section )
Locate M.2 slots near center of motherboard
Identify primary (Gen4) and secondary (Gen3) slots
Remove Existing SSD :
Remove single retention screw (M2x3mm)
Gently lift SSD at 30-degree angle
Avoid touching gold contacts and components
Install New SSD :
Insert at 30-degree angle into slot
Press down flat and secure with retention screw
Apply thermal pad if using heatsink (0.5-1mm thickness)
Ensure proper alignment - notch should match key
🏆 Recommended SSD Options
Premium Gen4 Option :
Value Gen4 Option :
WD Black SN850 1TB/2TB
7,000MB/s read speed
Included heatsink option available
Gen3 Option :
Samsung 970 Evo Plus 1TB/2TB
3,500MB/s read speed
Perfect for secondary slot
❄️ Thermal Management
Stock Configuration :
Pre-installed thermal pads on both slots
Aluminum heat spreaders
Adequate for most gaming scenarios
Enhanced Cooling :
Aftermarket copper heatsinks
High-conductivity thermal pads (6W/mK+)
Maintains speeds during sustained transfers
🔄 Data Migration Guide
Cloning Software :
Use Macrium Reflect Free
Samsung Data Migration for Samsung drives
WD Dashboard for Western Digital drives
Migration Process :
Connect new SSD via USB adapter
Clone existing drive to new SSD
Swap drives and verify boot
⚙️ BIOS Configuration
Press F2 during boot to enter BIOS
Navigate to "Storage" section
Verify drive detection in both slots
Enable RAID mode if desired (requires clean install)
Set boot priority if migrating OS
💰 Resale Value Impact
Storage Premiums :
2TB+ configurations command 25-30% premium
Gen4 drives add $100-150 value
Name-brand SSDs (Samsung, WD) preferred
Gaming Benefits:
Faster load times in open-world games
Quick respawns in competitive titles
DirectStorage ready for future games
💡 Content Creator Tip: Systems with large fast storage sell for 35% premium to video editors and streamers.
6. Alienware m17 R4 Battery Replacement: 86Wh Power Management
🔋 Battery Specifications
Technical Details :
86Wh lithium-ion battery
11.4V operating voltage
4-cell design with premium cells
Approx. 3-5 hour typical gaming usage
Compatibility Notes :
Part number: Dell 5R0N7 (verify before purchase)
Ensure genuine Dell/OEM replacement for safety
Compatible with all m17 R4 configurations
🔧 Step-by-Step Replacement Process
Safety Preparation :
Power down completely and disconnect AC adapter
Ground yourself to prevent electrostatic discharge
Work on non-conductive surface
Access Battery Compartment :
Remove bottom panel (refer to previous section )
Locate battery near front edge of chassis
Identify battery connector and mounting screws
Remove Old Battery :
Disconnect battery connector by pulling straight up
Remove 4x T5 screws securing battery tray
Lift battery out at 45-degree angle
Note adhesive strips - use plastic tool to release if needed
Install New Battery :
Place new battery in position
Secure with 4x T5 screws (1.5Nm torque)
Connect battery connector until click is heard
Ensure no cables are pinched
📊 Battery Health Management
Condition
Capacity Indicator
Recommended Action
Resale Impact
Excellent (>90%)
Alienware Command Center shows "Excellent"
Maintain current usage patterns
+$100-150 value
Good (70-89%)
Shows "Good" with moderate wear
Consider calibration
Neutral impact
Poor (<70%)
Shows "Replace Soon" or errors
Immediate replacement recommended
-$200 value if not replaced
⚙️ Battery Calibration Procedure
Charge battery to 100% (keep connected 2 hours after full)
Disconnect power and use until battery drops to 5%
Recharge to 100% without interruption
Check Dell Battery Meter in BIOS
🛒 Genuine Battery Purchasing Guide
OEM Sources :
Verification Methods :
Check for Dell holograms and branding
Verify part number: 5R0N7
Look for safety certifications (UL, CE)
⚠️ Critical Safety Information
Never puncture or damage lithium-ion batteries
Dispose of old batteries at authorized recycling centers
Only use genuine Dell batteries to prevent fire risk
If battery swells, stop using immediately and contact Dell support
💰 Resale Value Impact
Battery Condition Premiums :
90%+ health adds $100-150 value
New OEM replacement adds $200 value
Documented calibration history increases buyer confidence
Market Preferences :
Students value battery life for classroom use
Business users pay premium for reliability
Gamers appreciate documented health status
💡 Mobile Gamer Tip: Systems with documented battery health above 90% sell for 20% premium to college students and mobile users.
7. Alienware m17 R4 Keyboard Service: AlienFX RGB Repair & Replacement
⌨️ Keyboard Specifications
Technical Details :
Per-key AlienFX RGB lighting (16.8 million colors)
Cherry MX-style mechanical keyswitches (optional)
1.8mm key travel with anti-ghosting
N-key rollover technology
Compatibility Notes :
US International: part number 0VHX8H
UK Layout: part number 0VHX8J
Ensure region compatibility before ordering
🔧 Step-by-Step Replacement Process
Safety Preparation :
Power down completely and disconnect all cables
Remove bottom panel and battery (refer to previous sections)
Document screw locations with photos
Disassembly Requirements :
Remove display assembly (4x T8 screws at hinges)
Detach palm rest assembly (12x T5 screws)
Disconnect touchpad and keyboard ribbon cables
Keyboard Removal :
Remove 8x T5 screws securing keyboard from underside
Gently pry keyboard from top using plastic tools
Disconnect AlienFX lighting ribbon cable
Installation :
Connect new keyboard ribbon cable
Align and press into position
Secure with screws from underside
Reassemble in reverse order
🌈 AlienFX Lighting Configuration
Feature
Configuration
Gaming Impact
Static Colors
16.8 million color options
Personalization preference
Effects
Pulse, Morph, Rainbow, Audio
Immersion enhancement
Game Integration
200+ supported titles
Visual feedback system
🔍 Common Issues & Solutions
Non-responsive Keys :
Lighting Issues :
🧹 Cleaning & Maintenance
Power off and disconnect power
Use compressed air to remove debris
Clean keys with isopropyl alcohol (70%)
Use soft brush for stubborn particles
Never pour liquid directly onto keyboard
🛒 Genuine Part Purchasing
OEM Sources :
Dell Parts Store Authorized Dell service providers
Dell business support contracts
Verification :
Check for Dell holograms and part numbers
Verify layout compatibility (US vs International)
Ensure AlienFX lighting compatibility
💰 Resale Value Impact
Keyboard Condition :
Perfect condition: +$150-200 value
Working AlienFX: +$100 value
Documented replacement: +$75 value
Gamer Preferences :
Mechanical switches preferred for gaming
RGB functionality increases desirability
Clean, wear-free keys essential
⚡ Alternative Solutions
External Keyboard :
Professional Service :
Dell Premium Support
Authorized repair centers
On-site service options
8. Alienware m17 R4 Thermal Repaste Guide: Advanced Cooling Optimization
🔥 Stock Thermal Solution
Factory Configuration :
CPU: Element 31 Gallium-Silicone Liquid Metal
GPU: High-performance thermal paste
VRMs: Thermal pads (1.0mm thickness)
SSDs: Pre-applied thermal pads
Performance Characteristics :
Liquid metal requires special handling
Factory application may degrade over time
Professional repaste can reduce temps by 5-15°C
📦 Thermal Material Selection
Application
Recommended Products
Performance
Difficulty
CPU (Liquid Metal)
Thermal Grizzly Conductonaut Excellent (8-15°C improvement)
Advanced (risk of damage)
CPU (Paste Alternative)
Thermal Grizzly Kryonaut Very Good (5-8°C improvement)
Intermediate
GPU
Arctic MX-6 or KryonautVery Good (4-7°C improvement)
Intermediate
VRM/VRAM Pads
Gelid GC Extreme (1.0mm)Essential for stability
Beginner
🔧 Step-by-Step Repaste Process
Safety Preparation :
Disconnect battery and power
Use anti-static wrist strap
Work in well-ventilated area
Have isopropyl alcohol (90%+) and lint-free wipes ready
Cooling System Removal :
Remove bottom panel and battery
Disconnect fan cables and remove screws
Lift heatsink assembly straight up
Note: Liquid metal may be present - handle carefully
Surface Cleaning :
Gently remove old thermal material
Use cotton swabs for precise cleaning
Ensure no residue remains on dies or heatsink
Clean surrounding areas to prevent contamination
Liquid Metal Application (CPU) :
Apply conformal coating around CPU die
Use small brush to apply minimal liquid metal
Spread evenly across entire die surface
Immediately clean any spills with alcohol
Thermal Paste Application :
GPU: Pea-sized dot in center
VRMs: Replace pads with exact thickness
Ensure even coverage without overflow
⚠️ Critical Safety Information
Liquid Metal Risks :
ELECTRICALLY CONDUCTIVE - can short components
Permanent damage if spilled on motherboard
Use conformal coating or foam barriers
Not recommended for beginners
General Precautions :
Never reuse thermal pads
Avoid overtightening heatsink screws
Follow proper screw pattern (X pattern)
Test system before full reassembly
🛠️ Professional Alternatives
Dell Premium Support :
On-site thermal service available
Maintains warranty coverage
Uses genuine Dell materials
Authorized Service Centers :
Professional liquid metal application
Warranty on workmanship
Documentation provided
💰 Resale Value Impact
Performance Premium :
Documented thermal improvements: +$200-300
Professional repaste with documentation: +$150
Lower temperatures = higher sustained performance
Market Preferences :
Overclockers pay premium for thermal headroom
Content creators value stability under load
Quieter operation appeals to all users
✅ Verification & Testing
Run GPU-Z and CPU-Z sensors
Stress test with OCCT for 30 minutes
Monitor temperatures with HWiNFO
Game for 1 hour to verify real-world stability
Document before/after results with screenshots
9. Alienware m17 R4 Motherboard: RTX 30-Series Value & Market Analysis
🔧 Motherboard Specifications
Technical Details :
Intel HM570 Chipset (10th/11th Gen compatible)
Integrated NVIDIA RTX 3060/3070/3080 GPUs
8-phase VRM design with premium components
Dual M.2 slots (Gen4 + Gen3)
2x DDR4 SODIMM slots (up to 3200MHz)
Model Variations :
RTX 3060: Part number 0VHX8H (6GB GDDR6)
RTX 3070: Part number 0VHX8J (8GB GDDR6)
RTX 3080: Part number 0VHX8K (8GB/16GB GDDR6)
📊 2024 Market Value Analysis
Configuration
Gaming Market Value
Mining Market Value
Content Creation Value
RTX 3060 Board
$350-$450
$300-$375
$325-$400
RTX 3070 Board
$550-$700
$475-$600
$600-$725
RTX 3080 8GB
$750-$900
$650-$775
$800-$950
RTX 3080 16GB
$950-$1200
$825-$1000
$1100-$1300
🔧 Motherboard Removal Process
Complete Disassembly :
Remove all components (RAM, SSDs, WiFi, battery)
Detach display assembly and keyboard
Document all screw locations with photos
Connector Removal :
Label all ribbon cables and connectors
Note: Some connectors may be glued
Use plastic tools to avoid damage
Board Extraction :
Remove 12x T8 screws securing motherboard
Lift straight up to clear standoffs
Place on anti-static surface immediately
✅ Testing & Verification
Pre-Sale Testing :
Test with known-good components
Run 3DMark Time Spy for GPU validation
Check all ports and connectivity
Verify AlienFX lighting functionality
Documentation :
Capture benchmark scores
Photograph all components and ports
Provide BIOS version information
🎯 Target Market Appeal
Gamers :
Value proven performance benchmarks
Prefer complete tested systems
Pay premium for RTX 3080 models
Miners :
Seek undervolting potential
Value thermal performance data
Prefer multiple units for farming
Content Creators :
Value CUDA performance
Prefer higher VRAM configurations
Pay premium for stability
💰 Value Enhancement Factors
Feature
Value Impact
Target Audience
Undervolting Documentation
+15-20%
Miners & Overclockers
Thermal Performance Data
+10-15%
All Buyers
Benchmark Results
+12-18%
Gamers
Warranty Remainings
+20-25%
All Buyers
📦 Shipping & Packaging
Anti-Static Protection :
Use anti-static bags
Include silica gel packets
Avoid plastic wrapping that generates static
Physical Protection :
Use rigid cardboard box
2+ inches of bubble wrap on all sides
Clearly mark "FRAGILE" and "ELECTRONICS"
💡 Resale Tip: Motherboards with documented performance data and remaining warranty sell for 40-50% premium compared to untested components.
10. Selling Alienware m17 R4: Gaming Market Strategies & Maximizing Value
📈 Current Market Overview
2024 Gaming Laptop Trends :
RTX 30-series maintains strong secondary market value
Premium gaming brands (Alienware) command 20-30% premiums
Content creation demand continues growing
Miners still seeking capable GPUs for altcoins
Alienware-Specific Advantages :
Brand recognition justifies higher pricing
Superior cooling sustains performance better than competitors
AlienFX lighting appeals to gaming enthusiasts
Build quality extends usable lifespan
💰 Competitive Pricing Strategy
Configuration
Original MSRP
2024 Market Value
Premium Factors
RTX 3060 / i7 / 16GB
$1,799
$950-$1,150
Condition, Warranty, Upgrades
RTX 3070 / i7 / 16GB
$2,199
$1,250-$1,500
Thermal Performance, Benchmarks
RTX 3080 / i9 / 32GB
$2,999
$1,800-$2,200
Documentation, Rare Configurations
✅ Pre-Sale Preparation Checklist
Hardware Verification :
Run comprehensive diagnostics with Alienware Command Center
Test all ports, keys, and features
Clean thoroughly inside and out
Take high-quality photos from all angles
Software Optimization :
Perform clean Windows installation
Update all drivers and BIOS
Install essential gaming benchmarks
Remove personal data and accounts
Documentation Package :
Create folder with benchmark results
Include original purchase receipt if available
Provide upgrade documentation
List all specifications accurately
🎯 Target Buyer Strategies
Gamers :
Emphasize FPS performance in popular titles
Highlight AlienFX customization
Showcase thermal performance during extended sessions
Provide gaming benchmark comparisons
Content Creators :
Focus on rendering performance
Highlight color accuracy of display
Emphasize reliability during long workloads
Provide creative software benchmarks
Students & Professionals :
Highlight portability and battery life
Emphasize build quality and durability
Note professional software compatibility
Provide productivity benchmarks
📝 Listing Optimization Tips
Title Keywords :
"Alienware m17 R4 RTX [GPU] Gaming Laptop [CPU] [RAM] [SSD]"
Include specific games: "Cyberpunk 2077 Ready"
Mention special features: "300Hz Display" or "Mechanical Keyboard"
Description Essentials :
Lead with 3DMark or gaming benchmark scores
Detail all upgrades and modifications
Include honest condition assessment
Specify warranty status and transfer process
Visual Content :
12+ high-quality photos from all angles
Video demonstrating boot-up and gameplay
Close-ups of any wear or imperfections
Photos of benchmarks running on screen
🚀 Value Maximization Strategies
Strategy
Cost
Value Added
ROI
RAM Upgrade to 32GB
$120-$150
$200-$250
60-80%
SSD Upgrade to 2TB
$180-$220
$250-$300
30-40%
Professional Repaste
$50-$100
$150-$200
100-150%
Thorough Documentation
Time Only
$100-$150
Infinite
🔒 Secure Transaction Practices
Payment Methods :
PayPal Goods & Services - Buyer/seller protection
Escrow.com - High-value transactions
Cash - Local meetings only at safe locations
Bank wire - For institutional buyers only
Shipping Best Practices :
Require signature confirmation
Purchase shipping insurance
Photograph packaging process
Use original box if available
Fraud Prevention :
Verify buyer profiles and history
Be wary of overpayment scams
Use platform messaging systems only
Meet local buyers at police stations
💡 Premium Tip: Systems sold through gaming-specific platforms with complete documentation typically sell for 25-30% higher than general marketplaces.
Need to Sell Your Alienware Laptop? Get Instant Cash!
If your Alienware m17 R4 (or other Alienware model) has performance issues or you're upgrading to a newer gaming laptop, we offer premium cash payouts for your device. We buy broken, used, and refurbished Alienware laptops—including all m17 R4 configurations—with free insured shipping and no-hassle evaluations.
Sell Popular Alienware Models Now: