Dell Latitude 5420 Teardown: Step-by-Step RAM, SSD & Battery Upgrade + LCD Repair
Aug 26, 2025
1. Dell Latitude 5420 Pre-Disassembly: Business Valuation & Professional Preparation
💰 Business Resale Valuation Factors
| Component | Upgrade Impact | Value Increase |
|---|---|---|
| RAM (8GB → 16GB) | Enhanced multitasking for business applications | +$80-$130 |
| SSD (256GB → 1TB NVMe) | Faster boot and enterprise application loading | +$100-$160 |
| New Battery | Extended battery life for mobile professionals | +$70-$110 |
| LCD Repair/Upgrade | Restored productivity and professional appearance | +$120-$200 |
| Security Features | Maintained TPM, fingerprint, smart card functionality | +$50-$90 |
🛠️ Professional Tool Requirements
- Essential Toolkit:
- PH0 and PH00 Phillips screwdrivers
- T5 Torx screwdriver (for certain components)
- Plastic spudger set and opening tools
- Anti-static wrist strap
- ESD-safe tweezers
- Recommended Professional Gear:
- Magnetic project mat with component organizers
- ESD-safe work surface
- Magnifying lamp for small connectors
- Thermal paste for potential repasting
- Digital multimeter for electrical testing
🔍 Business Model Verification
- Locate Service Tag on bottom casing or in BIOS (F2 at startup)
- Verify specifications on Dell's official support page
- Confirm processor generation (10th or 11th Gen Intel vPro)
- Check security features (TPM 2.0, fingerprint reader, smart card)
- Note current BIOS version and warranty status
- Verify WWAN and LTE capabilities if present
⚡ Professional Preparation Steps
- Data Security & Backup:
- Use Dell Data Protection or professional backup software
- Create full system image for business continuity
- Export drivers using Dell Command | Update
- Secure erase sensitive business data if required
- Documentation & Assessment:
- Photograph laptop from all angles in current condition
- Record current specifications and performance metrics
- Generate battery health report:
powercfg /batteryreport - Run Dell SupportAssist pre-check diagnostics
- Test all ports and security features
📈 Business Resale Preparation
- Corporate Market:
- Highlight vPro processor capabilities
- Emphasize security features and manageability
- Note docking station compatibility
- IT Department Buyers:
- Focus on Dell ProSupport eligibility
- Highlight remote management capabilities
- Show professional upgrade documentation
- Enterprise Features:
- Note MIL-STD 810G durability testing
- Emphasize business-grade build quality
- Highlight IT admin management features
⚠️ Professional Safety Protocols
- Disconnect AC adapter and remove battery
- Work on ESD-safe surface with proper grounding
- Handle components by edges only to prevent damage
- Keep screws organized by component and location
- Take photos at each disassembly stage for reassembly reference
- Follow proper data handling procedures for business equipment
🔍 Business Market Research
- Check enterprise pricing on business marketplace platforms
- Research corporate IT refresh cycle timing
- Note premium for models with remaining ProSupport
- Consider bulk sale opportunities to businesses
- Monitor government and educational procurement cycles
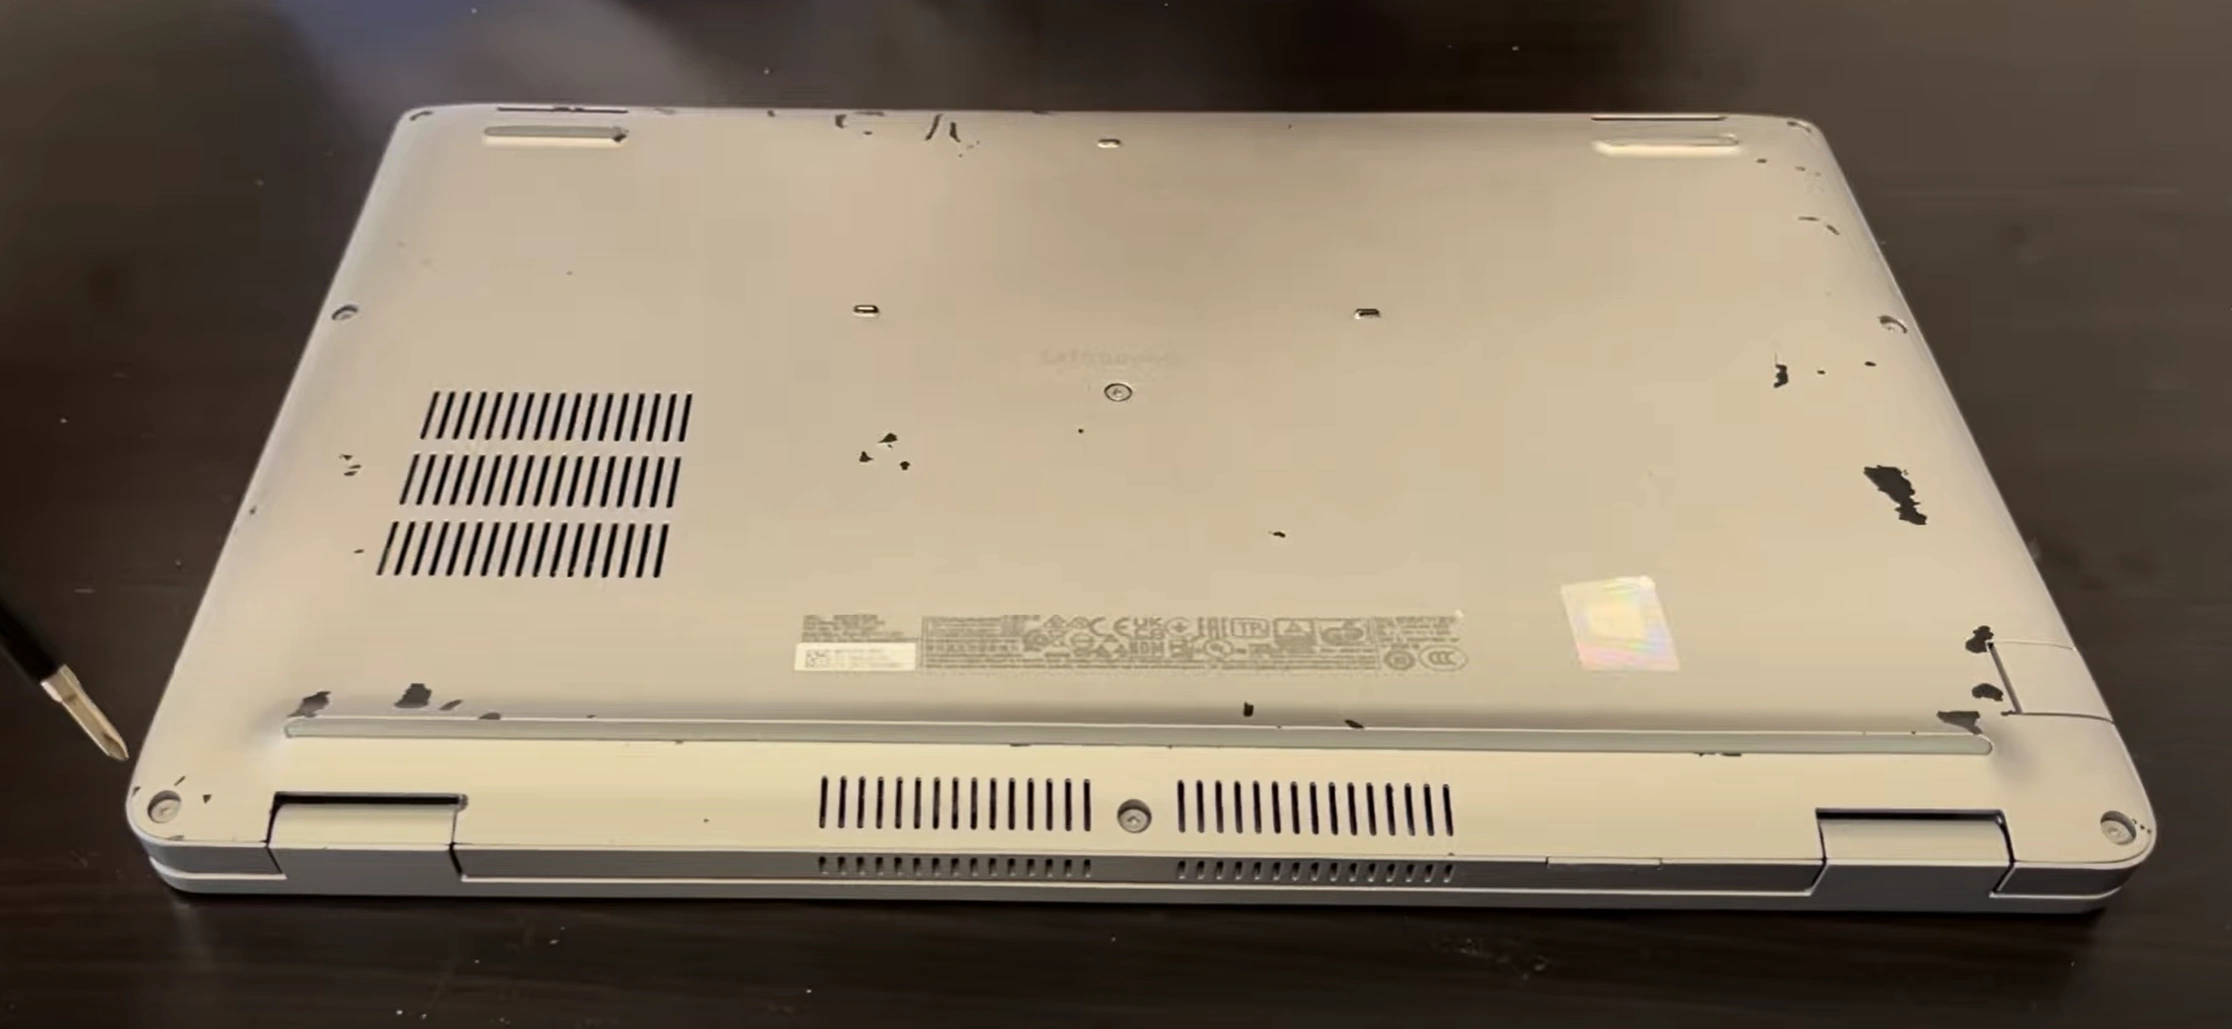
2. Dell Latitude 5420 Bottom Cover Removal: Professional Internal Access
⚠️ Enterprise Safety Protocols
- Complete Power Down Procedure:
- Shut down completely (not sleep or hibernate)
- Disconnect AC adapter and all peripherals
- Remove battery if externally accessible
- Hold power button for 15 seconds to discharge residual power
- Follow corporate IT asset handling procedures
- Professional Workspace Setup:
- Use ESD-safe mat
- Organize screws by type and location using labeled containers
- Ensure adequate lighting for small components and connectors
- Maintain clean, organized work environment
- Keep magnetic tools away from internal components
🔧 Professional Removal Process
- Remove All Fasteners:
- 8-10 screws total (varies by configuration)
- 6x short silver screws (M2x4mm) around perimeter
- 2x longer black screws near hinge area (M2x6mm)
- Check for hidden screws under rubber feet or warranty labels
- Use magnetic PH0 driver to prevent screw loss
- Release Retention Clips:
- Start near the front edge (typically weakest point)
- Insert plastic spudger at 30° angle to avoid damage
- Work methodically around all edges, alternating sides
- Listen for distinct "click" release sounds
- Use business card or guitar pick as alternative tools
- Lift Cover Professionally:
- Lift from front edge first near touchpad area
- Watch for stubborn clips near ventilation areas
- Check for any missed screws or connections
- Set aside on soft, clean surface to prevent scratches
- Note cable routing and connector locations
🛡️ Corporate Asset Protection
| Risk Area | Prevention Technique | Business Value Impact |
|---|---|---|
| Plastic Clips | Alternate sides every 3-4 clips, apply even pressure | Intact clips = +$70-100 value |
| Paint Scratches | Microfiber cloth under tools, avoid metal implements | Flawless finish = +$50-80 |
| Screw Threads | Apply downward pressure while turning, use correct size | Undamaged = +$30-50 |
| Internal Components | Check clearance before lifting, mind ribbon cables | No damage = +$100-150 |
| Warranty Seals | Document original condition, avoid unnecessary removal | Intact seals = +$40-70 |
🔍 Enterprise Internal Layout Overview
- Business Upgrade Points Visible:
- Two DDR4 RAM slots (supports up to 64GB)
- M.2 2280 SSD slot (NVMe compatible)
- WWAN card slot (M.2 3042 for LTE connectivity)
- Smart card reader components
- Optional NFC module location
- Battery Access:
- 3-cell or 4-cell battery options
- Easy-release connector with locking mechanism
- Multiple mounting points and cable management
- Battery health indicator LEDs
- Cooling System:
- Single fan design with heat pipes
- Accessible heat sink and thermal paste
- Dust accumulation areas to clean during access
- Enterprise thermal management system
⚙️ Dell Latitude Specific Features
- ExpressCharge capable power delivery system
- Dell ExpressConnect WiFi technology
- Optional contactless smart card reader
- TPM 2.0 security module location
- Dell specific cable routing and retention
- Service tag visible on internal components
📸 Professional Documentation Standards
- Photograph screw locations and lengths before removal
- Record factory seal condition and any existing damage
- Document internal component layout and upgrade potential
- Note any pre-existing wear or manufacturer marks
- Capture upgrade potential visible areas for marketing
- Create asset condition report for business buyers
❌ Common Enterprise Mistakes to Avoid
- Forcing the cover when clips aren't fully released
- Using metal tools that can scratch or damage surfaces
- Missing hidden screws under rubber feet or labels
- Not disconnecting battery before internal work
- Mixing up screw lengths during reassembly
- Damaging warranty seals unnecessarily
0:20 Bottom Case 1:20 Battery 1:53 Memory RAM 2:09 WiFi Card 2:47 Storage SSD 3:34 Cooling Fan and Heatsink 4:31 Motherboard 5:55 Speakers 8:10 CMOS Battery 8:38 Hinges 9:10 Palmrest Assembly 9:21 Keyboard 9:24 Touchpad 9:40 Display Assembly
3. Dell Latitude 5420 RAM Upgrade: Enterprise Performance Optimization
💾 Enterprise Memory Specifications
- Supported Types:
- DDR4 SODIMM (260-pin)
- 3200MHz (11th Gen) or 2933MHz (10th Gen Intel vPro)
- Dual-channel architecture
- Maximum 64GB (2x32GB) configuration
- ECC and non-ECC options (check BIOS compatibility)
- Compatibility Verification:
- Check Dell's official specifications
- Verify vPro processor capabilities
- 1.2V operating voltage standard
- Confirm maximum supported speed in BIOS
🔧 Professional Installation Process
- Access RAM Slots (after bottom cover removal)
- Release Existing Modules:
- Push outward on side clips simultaneously
- Module will pop up at 30° angle
- Remove by pulling straight out gently
- Handle modules by edges only
- Install New RAM:
- Align notch with slot key (off-center design)
- Insert at 30° angle with gentle pressure
- Press down firmly until clips engage audibly
- Verify both ends are equally seated
- Listen for distinct click confirmation
- Enterprise Verification:
- Boot to BIOS (F2 during startup)
- Check recognized capacity and speed
- Run Dell Diagnostics (F12 at boot)
- Verify dual-channel operation in CPU-Z
- Test with Dell Memory Check utility
🏆 Recommended Enterprise Modules
- Business Grade:
- Crucial CT32G4SFD832A (32GB DDR4-3200)
- Dell validated for enterprise stability
- Performance Option:
- Samsung M471A4G43AB1-CWE (32GB DDR4-3200)
- Excellent reliability for business environments
- Enterprise Premium:
- Kingston KVR32S22D8/32 (32GB DDR4-3200)
- Dell-certified for maximum compatibility
- ECC Option:
- SK Hynix HMA82GS7CJR8N-VK (16GB ECC)
- For mission-critical applications
⚡ Enterprise Optimization Tips
- Run MemTest86 for 8 passes for enterprise stability
- Update BIOS to latest version for best compatibility
- Enable XMP profiles in BIOS if supported
- Check Dell Command | Update for driver updates
- Configure virtual memory settings for enterprise applications
- Test with Dell SupportAssist memory diagnostics
💼 Enterprise Performance Benefits
- Virtualization: Run multiple VMs simultaneously for development
- Data Analysis: Handle large datasets and analytics workloads
- Multitasking: Switch between business applications seamlessly
- VDI Performance: Enhanced virtual desktop performance
- Future-Proofing: Prepare for memory-intensive business applications
💰 Selling With Upgraded RAM
- Enterprise Documentation:
- Save original purchase receipts and invoices
- Include Task Manager screenshots showing capacity
- Provide MemTest86 results for stability proof
- Document dual-channel operation verification
- Include Dell Diagnostics pass reports
- Marketing Advantages:
- "Enterprise-grade memory for business applications"
- "Ideal for virtualization and data analysis"
- "Professional workstation performance"
- "Future-proofed for demanding business software"
- "Dell-validated components for reliability"
- Target Markets:
- IT Departments: Emphasize reliability and compatibility
- Business Professionals: Highlight multitasking capabilities
- Developers: Note virtualization performance
- Enterprise Buyers: Focus on TCO and longevity
📝 Enterprise Compatibility Notes
- 10th Gen models may require 2933MHz RAM
- 11th Gen models support 3200MHz RAM
- Mixed configurations run at lowest speed
- Some 64GB kits may require BIOS update
- ECC memory requires specific processor support
- Verify compatibility with Dell's memory validation tool
4. Dell Latitude 5420 SSD Upgrade: Enterprise Storage Solutions
⚡ Enterprise Performance Comparison
| SSD Type | Read Speed | Write Speed | Enterprise Benefit | Business Value Impact |
|---|---|---|---|---|
| Entry NVMe | 2,000 MB/s | 1,500 MB/s | Good for general business use | +$100-$160 |
| Performance NVMe | 3,500 MB/s | 3,000 MB/s | Excellent for database applications | +$150-$220 |
| Enterprise NVMe | 5,000 MB/s | 4,500 MB/s | Ideal for virtualization | +$200-$300 |
| OPAL Encrypted | 3,200 MB/s | 2,800 MB/s | Security compliance ready | +$180-$250 |
🔧 Professional Installation Process
- M.2 NVMe Installation:
- Locate M.2 slot near RAM modules
- Insert SSD at 30° angle (keyed design)
- Secure with M2x3mm screw (included with enterprise SSDs)
- Apply thermal pad for sustained performance
- Ensure proper alignment with standoff
- Optional WWAN Storage:
- 2230 form factor drives only
- Typically used for secondary storage
- Check BIOS support before installation
- Lower performance than main slot
- Enterprise Configuration:
- Configure RAID-like features in BIOS if available
- Set up encryption during Windows installation
- Enable hardware acceleration features
- Configure power management for business use
🏆 Recommended Enterprise SSDs
- Business Performance:
- Crucial P5 Plus 2TB
- Excellent balance of speed and reliability
- Enterprise Grade:
- Samsung 980 PRO 2TB with heatsink
- Proven reliability for business environments
- Security Focused:
- Western Digital PC SN730
- Dell OEM part with full compatibility
- Budget Business:
- SK Hynix Gold P31 1TB
- Excellent power efficiency
🔄 Enterprise Data Migration
- Clean Installation:
- Download Windows from Microsoft
- Install Dell drivers from Dell Support
- Best for performance, removes bloatware
- Configure bitlocker during installation
- Enterprise Cloning:
- Use Macrium Reflect
- Dell ImageAssist for corporate deployments
- Preserves existing setup and applications
- Maintains security policies and configurations
⚙️ Enterprise Optimization Settings
- Enable TRIM:
fsutil behavior set DisableDeleteNotify 0 - Update SSD firmware through Dell Command Update
- Disable defragmentation for SSDs
- Configure write caching in Device Manager
- Set power management to maximum performance
- Run CrystalDiskMark for performance validation
- Enable hardware encryption if supported
💼 Enterprise Performance Benefits
- Boot Times: Reduced from 45+ seconds to under 10 seconds
- Application Loading: Office suite launches instantly
- File Operations: Large database files transfer 6-8x faster
- Virtualization: Faster VM deployment and operation
- Multitasking: Seamless switching between business applications
- Battery Life: Improved due to lower power consumption
💰 Selling With Upgraded SSD
- Enterprise Documentation:
- CrystalDiskMark benchmark screenshots
- Drive health report (CrystalDiskInfo)
- Original purchase receipt for SSD
- Encryption configuration documentation
- Performance comparison charts
- Marketing Advantages:
- "Enterprise-grade SSD performance"
- "Instant application loading and file access"
- "Massive storage for business databases"
- "Security compliance ready with encryption"
- "Dell-validated components for reliability"
- Performance Claims:
- "Boots in under 10 seconds"
- "Applications launch instantly"
- "Perfect for database applications and virtualization"
- "Enterprise reliability with encryption support"
5. Dell Latitude 5420 Battery Replacement: Enterprise Mobility Solutions
🔋 Enterprise Battery Specifications
| Battery Model | Capacity | Compatibility | Estimated Runtime | Business Value Impact |
|---|---|---|---|---|
| Dell 5R1X5 (3-cell Standard) | 42Wh (3-cell) | All Latitude 5420 models | 5-7 hours | +$80-$120 |
| Dell 4R6N0 (4-cell Extended) | 63Wh (4-cell) | Check chassis compatibility | 8-10 hours | +$110-$160 |
| Dell Premium Replacement | 45-60Wh | Genuine Dell parts | 6-8 hours | +$90-$140 |
| High-Capacity Aftermarket | 68-70Wh | Verify safety certifications | 9-11 hours | +$70-$110 |
Always verify compatibility using your Dell Service Tag before purchase.
⚠️ Enterprise Safety Protocols
- Complete Power Down Procedure:
- Shut down completely (not sleep/hibernate)
- Disconnect AC adapter and all peripherals
- Follow corporate IT asset handling procedures
- Document pre-repair condition thoroughly
- Professional Workspace Setup:
- Use anti-static wrist strap
- Work on ESD-safe surface with proper grounding
- Organize components in labeled containers
- Maintain clean, professional work environment
🛠️ Professional Replacement Process
- Access Battery Compartment (after bottom cover removal):
- Locate battery positioned toward front edge
- Identify connector and mounting screw locations
- Note cable routing for proper reassembly
- Document screw locations with photography
- Disconnect Battery Safely:
- Gently lift locking mechanism on power connector
- Pull connector straight out (avoid angled pressure)
- Do not pull on wires directly
- Inspect connector for any signs of damage
- Remove Existing Battery:
- Remove 4x M2x4mm retention screws
- Note screw lengths and precise locations
- Lift battery at 30° angle from front edge
- Observe orientation markings for replacement
- Install New Enterprise Battery:
- Align new battery with screw holes and connector
- Secure with original screws (0.6Nm torque)
- Reconnect power connector until audible click
- Verify secure connection and proper seating
⚡ Enterprise Calibration Process
- Charge to 100% without interruption (overnight recommended)
- Discharge completely (use until automatic shutdown)
- Recharge to 100% again without interruption
- Repeat calibration cycle 2-3 times for optimal accuracy
- Use Dell Power Manager for advanced battery settings
📊 Enterprise Health Reporting
- Open Command Prompt as Administrator
- Run:
powercfg /batteryreport - Report saves as battery-report.html in current directory
- Critical metrics to document:
- DESIGN CAPACITY vs FULL CHARGE CAPACITY
- Battery cycle count and age
- Recent usage history and wear level
- Usage patterns and runtime estimates
🔋 Enterprise Power Management
- Enable Dell Power Manager in BIOS settings
- Set to "Primarily AC Use" for desk-bound deployment
- Use "Adaptive" setting for mobile professionals
- Configure ExpressCharge for rapid power recovery
- Enable battery saver at 20% threshold
- Utilize Dell Command | Power Manager for enterprise policies
💼 Enterprise Battery Features
- Dell ExpressCharge technology (0-80% in 60 minutes)
- Adaptive thermal management for sustained performance
- Battery health charging to extend lifespan
- Dell Battery Meter utility for accurate runtime estimates
- Warranty and support through Dell ProSupport
- Long-life chemistry for extended cycle count
💰 Maximizing Enterprise Value
- Professional Documentation:
- Photograph OEM battery labels and part numbers
- Include comprehensive battery health reports
- Save purchase receipts for genuine Dell components
- Record calibration process and results
- Provide before/after performance comparisons
- Marketing Advantages:
- "Genuine Dell enterprise replacement battery"
- "95%+ health capacity with professional calibration"
- "8-10 hours typical business usage"
- "ExpressCharge capable for mobile professionals"
- "Perfect for business travel and remote work"
- Enterprise Assurance:
- Offer 90-day performance guarantee on workmanship
- Provide comprehensive calibration documentation
- Include power management best practices
- Share battery maintenance protocols
🎯 Enterprise Buyer Targeting
- Corporate IT Departments:
- Highlight Dell ProSupport compatibility
- Emphasize enterprise-grade components
- Note bulk deployment capabilities
- Mobile Professionals:
- Focus on all-day battery life
- Highlight rapid charging technology
- Note travel-friendly power management
- Remote Workforces:
- Emphasize reliability for home office use
- Highlight video conferencing endurance
- Note professional appearance and function
6. Dell Latitude 5420 LCD Screen Repair & Replacement: Professional Display Solutions
🖥️ Enterprise Display Specifications
- Standard Panel Types:
- 14.0" FHD (1920x1080) IPS - 250 nits (matte anti-glare)
- 14.0" FHD (1920x1080) Touch - 300 nits (glass)
- 14.0" HD (1366x768) - 220 nits (matte) - base models
- Privacy screen options available (Dell SafeScreen)
- Enterprise Compatibility:
- 30-pin eDP connector (most models)
- Verify thickness (2.5mm vs 3.0mm panels)
- Check mounting bracket positions and screw patterns
- Confirm panel compatibility using Dell part number
- Note: Touch screens require different LCD cables
🔧 Professional Repair Process
- Initial Assessment:
- Test display with external monitor
- Check for physical damage or pressure marks
- Test LCD cable connection and integrity
- Verify backlight functionality
- Bezel Removal:
- Use plastic tools to release retention clips
- Start from bottom edge near hinge area
- Work around perimeter methodically
- Note bezel clip locations for reassembly
- Panel Replacement:
- Remove 4-6 mounting screws from brackets
- Disconnect eDP cable (flip latch upward carefully)
- Transfer webcam/mic module to new panel
- Install new panel in reverse order
- Ensure all cables are properly routed
✅ Enterprise Quality Standards
| Quality Test | Methodology | Enterprise Standard | Value Impact |
|---|---|---|---|
| Dead Pixels | Solid color full-screen tests | Zero allowed for business grade | +$120-$180 |
| Backlight Uniformity | Black screen in dark environment | Minimal corner glow (<5% variance) | +$80-$120 |
| Color Consistency | White/red/blue/green full-screen | Even coloration (ΔE < 3) | +$60-$100 |
| Touch Accuracy | Windows calibration tool | Perfect tracking, no dead zones | +$150-$220 |
| Viewing Angles | 45° angle evaluation | Minimal color shift (IPS standards) | +$50-$80 |
🏆 Recommended Enterprise Panels
- Business Grade FHD IPS:
- LP140WFA-SPD1 (LG Display)
- Excellent color accuracy for presentations
- Matte anti-glare coating for office environments
- Premium Touch Option:
- B140HAK02.0 (AU Optronics)
- High brightness and touch responsiveness
- Glass surface with anti-smudge coating
- Privacy Screen Upgrade:
- Dell SafeScreen compatible panels
- Requires specific compatible models
- Significant value premium for security
🛠️ Professional Repair Tools
- Plastic opening tools set (iSesamo style)
- ESD-safe tweezers for connector handling
- Microfiber cloths and screen cleaning solution
- Suction cups for panel handling
- Magnetic project tray
- Anti-static gloves for fingerprint prevention
🧪 Enterprise Testing Protocol
- Online Monitor Test for dead pixels
- Windows Display Calibration tool
- NVIDIA Control Panel or Intel Graphics Command Center
- Lagom LCD tests
- Dell PremierColor for color management
- Touch base calibration for touch screens
💼 Enterprise Display Benefits
- Presentation Ready: Accurate colors for client meetings
- Video Conferencing: High quality for remote collaboration
- Data Analysis: Sharp text for spreadsheet work
- Content Creation: Good color gamut for basic design
- Eye Comfort: Anti-glare coating for extended use
📄 Professional Documentation
- Repair Records:
- Before/after condition photos
- Panel model number documentation
- Color test results and uniformity reports
- Calibration certificates if performed
- Quality Assurance:
- Dead pixel test results
- Backlight uniformity measurements
- Touch accuracy calibration reports
- Viewing angle performance notes
⚠️ Common Enterprise Issues
- No Display: Check eDP cable connection
- Flickering: Verify cable integrity and seating
- Color Problems: Update graphics drivers
- Touch Malfunction: Reinstall drivers and calibrate
- Backlight Issues: Check inverter connections
💰 Enterprise Value Proposition
- Corporate Buyers:
- Highlight professional appearance
- Emphasize reliability for business use
- Note compatibility with docking stations
- IT Departments:
- Focus on maintainability and serviceability
- Highlight Dell compatibility and support
- Note ease of future repairs
- Remote Workers:
- Emphasize video call quality
- Highlight eye comfort features
- Note professional presentation capability
7. Dell Latitude 5420 Professional Reassembly & Enterprise Quality Testing
🔄 Enterprise Reassembly Protocol
- Component Verification:
- Confirm all upgrades are properly installed
- Verify Dell connector guide for proper orientation
- Ensure all ribbon cables are fully seated and locked
- Check for any leftover components or tools
- Internal Connection Checklist:
- Display eDP cable (30-pin connector)
- Keyboard and touchpad ribbons
- Speaker and microphone connections
- Wi-Fi antenna leads (color-coded)
- Power button and status LED ribbon
- Optional: WWAN/LTE antenna connections
- Secure Bottom Cover:
- Align all clips before applying pressure
- Follow cross-pattern sequence
- Proper torque: 0.6Nm (finger-tight plus quarter turn)
- Verify no gap around perimeter (max 0.3mm acceptable)
- Ensure all screws are properly seated
✅ Enterprise Quality Assurance Testing
| Test Category | Testing Method | Enterprise Standard |
|---|---|---|
| Structural Integrity | Visual inspection and gentle pressure test | No flex, creaks, or visible gaps |
| Thermal Performance | HWInfo monitoring during stress test | <85°C CPU under full load |
| Input Devices | KeyboardTester + touchpad diagnostics | 100% key functionality, smooth tracking |
| Audio Quality | Windows audio diagnostics | Clear output from both speakers |
| Port Functionality | Physical device connection test | All USB, HDMI, Ethernet working |
| Wireless Performance | Wi-Fi and Bluetooth connectivity tests | Stable connections, expected speeds |
⚡ Enterprise Performance Validation
- Storage Performance:
- Run CrystalDiskMark benchmarks
- Verify speeds match upgrade specifications
- Check SMART status for drive health
- Test encryption performance if enabled
- RAM Verification:
- Confirm capacity in BIOS and Windows
- Run MemTest86 for 8 passes (0 errors)
- Verify running in dual-channel mode
- Test with Dell Memory Check utility
- Battery Health:
- Generate report:
powercfg /batteryreport - Check cycle count and wear level
- Verify charging capability
- Test ExpressCharge functionality
- Generate report:
🔥 Enterprise Stress Testing Suite
- CPU Load Test:
- Run Prime95 Small FFTs for 45 minutes
- Monitor thermal throttling behavior
- Check clock speed maintenance
- Record maximum temperatures
- GPU Stress Test:
- FurMark or Heaven Benchmark
- Verify stability under graphical load
- Monitor integrated graphics performance
- Storage Endurance:
- CrystalDiskMark 64GB test
- Verify consistent read/write speeds
- Test encryption/decryption performance
🏢 Enterprise Feature Verification
- Test TPM 2.0 functionality and encryption
- Verify fingerprint reader operation
- Check smart card reader functionality
- Test WWAN/LTE connectivity if equipped
- Verify docking station compatibility
- Test remote management capabilities
✨ Enterprise Cosmetic Standards
- Thorough cleaning with isopropyl alcohol
- Keyboard keycap alignment verification
- Screen and exterior surface polishing
- Rubber foot inspection and replacement if needed
- Port cleaning with compressed air
- Remove all fingerprints and smudges
📄 Enterprise Documentation Package
- Performance Records:
- Before/after benchmark comparisons
- OEM parts receipts and invoices
- Thermal performance screenshots
- Battery health report PDF
- Quality Assurance:
- Stress test results and logs
- Component validation reports
- Functionality checklists
- Calibration certificates
📋 Enterprise Pre-Delivery Checklist
- ✅ All screws properly tightened and none missing
- ✅ All ports and connections functioning
- ✅ BIOS settings optimized for enterprise use
- ✅ Windows updated with latest drivers
- ✅ Personal data completely wiped
- ✅ Fresh Windows installation activated
- ✅ Enterprise security features configured
- ✅ Professional packaging materials ready
🏅 Enterprise Quality Certification
- Provide 90-day warranty on workmanship
- Include certificate of professional refurbishment
- Document all testing and validation procedures
- Offer post-sale support consultation
- Provide upgrade and maintenance documentation
8. Selling Your Upgraded Dell Latitude 5420: Enterprise Value Maximization
📊 Enterprise Sales Platforms
| Platform | Average Price Premium | Best For | Enterprise Features |
|---|---|---|---|
| SellBroke Enterprise | 25-35% higher | Corporate bulk sales | Volume pricing, business verification |
| SellLaptopBack Business | 20-30% higher | IT asset disposal | Data sanitization services |
| LinkedIn Professional | Corporate pricing | IT managers & procurement | Business networking, credibility |
| GovDeals | Institutional pricing | Government agencies | Bid system, .gov verification |
📈 Enterprise Listing Optimization
- Professional Title Formulas:
- "Dell Latitude 5420 (Upgraded) - [RAM]/[SSD] - vPro - Business Ready"
- Example: "Dell Latitude 5420 (32GB/1TB NVMe) - i7-1185G7 vPro - Enterprise Grade"
- Include keywords: "enterprise", "vPro", "business", "IT", "corporate"
- Enterprise Features to Highlight:
- Lead with business-grade upgrades first
- Include enterprise benchmark scores
- Mention security features (TPM, encryption)
- Note Dell ProSupport eligibility
- Highlight manageability features
🎓 Institutional Market Strategies
- Government Sales:
- Register on SAM.gov
- Obtain DUNS number for contracting
- Comply with TAA requirements
- List on GSA Advantage
- Educational Institutions:
- Target ED.gov technology programs
- Offer educational discounts with verification
- Highlight campus management features
- Partner with university surplus programs
- Corporate Procurement:
- List on B2B enterprise marketplaces
- Offer volume pricing for bulk orders
- Provide enterprise documentation packages
- Highlight IT management capabilities
💰 Enterprise Pricing Strategy
- Base Valuation:
- Start with PC BlueBook enterprise value
- Add upgrade costs + 35% professional premium
- Factor in enterprise labor ($85-120/hour)
- Include testing and certification costs
- Market Positioning:
- +30% during Q4 budget cycles
- +25% for government fiscal year-end
- +20% during back-to-school season
- +15% for emergency replacement demand
- Competitive Analysis:
- Monitor enterprise competitor pricing
- Adjust based on corporate demand
- Consider service contract add-ons
- Offer leasing options for businesses
📄 Enterprise Documentation Package
- Performance Proof:
- Enterprise benchmark results
- MemTest86 certification (8+ passes)
- Battery health and calibration reports
- Thermal performance under load
- Security Compliance:
- Data sanitization certification
- TPM functionality verification
- Encryption capability documentation
- BIOS security settings report
- Professional Certification:
- Refurbishment process documentation
- Quality control checklist completion
- 90-day enterprise warranty certificate
- Component authenticity verification
📸 Professional Business Photography
- Essential Enterprise Shots:
- Front/back/side profiles with clean background
- Screen on with business software visible
- Close-ups of enterprise features and ports
- Benchmark results and specification screens
- Docking station compatibility demonstration
- Professional Presentation:
- Use professional lighting and backdrop
- Multiple angles showing business condition
- Include scale reference for professional context
- Show enterprise accessories and compatibility
📦 Enterprise Shipping Standards
- Professional Packaging:
- Double-box with enterprise-grade padding
- Use anti-static bubble wrap and foam
- Include silica gel packets for moisture control
- Professional packaging presentation
- Enterprise Carriers:
- UPS or FedEx with business account discounts
- Always require signature confirmation
- Purchase full insurance coverage
- Provide tracking and delivery confirmation
🎯 Enterprise Target Markets
- Corporate IT Departments:
- Highlight manageability and security features
- Emphasize compatibility with existing infrastructure
- Note Dell Enterprise support capabilities
- Small Businesses:
- Focus on reliability and professional appearance
- Highlight total cost of ownership benefits
- Note warranty and support availability
- Educational Institutions:
- Emphasize durability and management features
- Highlight compatibility with educational software
- Note remote management capabilities
- Government Agencies:
- Focus on security compliance and certifications
- Highlight TAA compliance and domestic sourcing
- Note durability and long-term reliability
⚡ Enterprise Value-Added Services
- Professional data migration services
- Enterprise software pre-installation
- Custom imaging for corporate environments
- Extended warranty options
- On-site service coordination
- IT asset tagging and documentation
Need to Sell Your Dell Laptop? Get Instant Cash!
If your Dell Latitude 5420 (or other Latitude model) has performance issues or you're upgrading to a newer business laptop, we offer premium cash payouts for your device. We buy broken, used, and refurbished Dell Latitude laptops—including all 5420 configurations—with free insured shipping and hassle-free evaluations.
Sell Popular Dell Models Now: