Dell Inspiron 7591 Laptop - Complete Disassembly & Upgrade Guide: RAM, SSD, Battery, LCD & DC Jack Replacement
Aug 26, 2025
1. Dell Inspiron 7591 Pre-Disassembly: Valuation & Preparation
💰 Resale Valuation Factors
| Component | Upgrade Impact | Value Increase |
|---|---|---|
| RAM (8GB → 16GB) | Enhanced performance for creative applications | +$70-$110 |
| SSD (256GB → 1TB NVMe) | Faster boot and application loading | +$90-$150 |
| New Battery | Extended battery life for mobility | +$60-$95 |
| LCD Upgrade to 4K | Superior visual experience for content creation | +$120-$190 |
| DC Jack Replacement | Restores reliable charging capability | +$50-$80 |
🛠️ Essential Tools
- Basic Toolkit:
- PH0 and PH00 Phillips screwdrivers
- Plastic spudger set and opening tools
- Anti-static wrist strap
- Tweezers for small connectors
- Recommended Extras:
- Magnetic project mat for organization
- ESD-safe tweezers for precise handling
- Portable work light for better visibility
- Thermal paste for potential repasting
🔍 Model Verification
- Locate Service Tag on bottom casing or in BIOS
- Verify specifications on Dell's official support page
- Confirm processor generation (9th or 10th Gen Intel)
- Check graphics configuration (Integrated vs NVIDIA MX250)
- Note current BIOS version for potential updates
⚡ Preparation Steps
- Data Backup:
- Use Dell Backup and Recovery or Macrium Reflect
- Create system image for full restoration
- Export drivers using Dell Command Update
- Documentation:
- Photograph laptop from all angles in current condition
- Record current specifications and performance metrics
- Generate battery health report:
powercfg /batteryreport - Run Dell SupportAssist pre-check diagnostics
📈 Resale Preparation
- Creative Professional Market:
- Highlight 4K display options and color accuracy
- Emphasize performance for photo/video editing
- Note NVIDIA graphics capabilities
- Student Buyers:
- Focus on portability and battery life
- Highlight value for engineering/design students
- Show upgrade potential for future needs
- Content Creators:
- Note excellent display quality options
- Emphasize performance for creative applications
- Highlight content creation capabilities
⚠️ Safety Precautions
- Disconnect AC adapter and remove battery if possible
- Work on static-free surface with ESD protection
- Handle components by edges only to prevent damage
- Keep screws organized by component and location
- Take photos at each disassembly stage for reassembly reference
🔍 Market Research Tips
- Check completed listings on eBay for similar upgraded models
- Research local market demand for creative professional laptops
- Note premium prices for models with 4K displays and dedicated graphics
- Consider seasonal demand (back-to-school, holiday seasons)
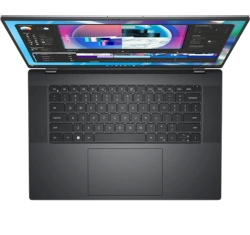
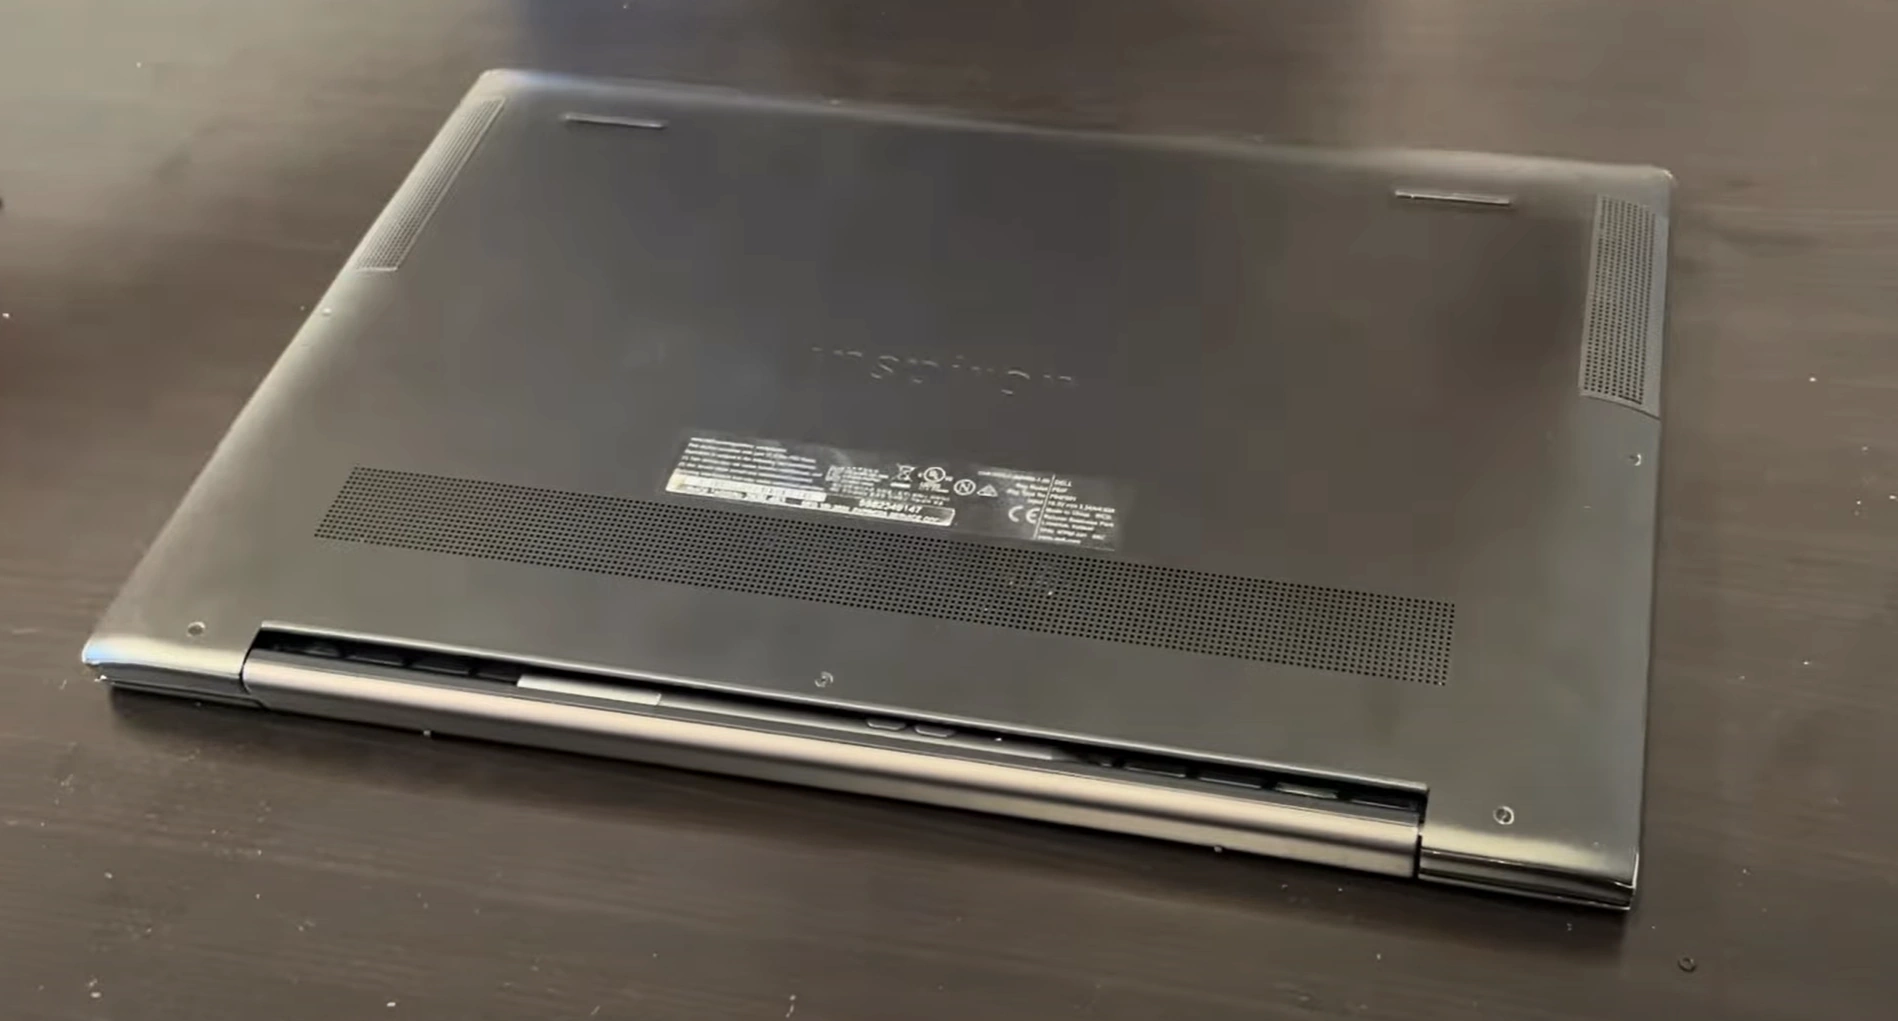
2. Dell Inspiron 7591 Bottom Cover Removal: Safe Access Guide
⚠️ Safety Precautions
- Complete Power Down:
- Shut down completely (not sleep or hibernate)
- Disconnect AC adapter and all peripherals
- Remove battery if externally accessible
- Hold power button for 15 seconds to discharge residual power
- Workspace Setup:
- Use ESD-safe mat
- Organize screws by type and location using labeled containers
- Ensure adequate lighting for small components and connectors
- Keep magnetic tools away from internal components
🔧 Step-by-Step Removal Process
- Remove All Screws:
- 10-12 screws total (varies by model configuration)
- 8x short silver screws (M2x4mm) around perimeter
- 2x longer black screws near hinge area (M2x6mm)
- Check for hidden screws under rubber feet or labels
- Use magnetic PH0 driver to prevent screw loss
- Release Plastic Clips:
- Start near the front edge (typically weakest point)
- Insert plastic spudger at 30° angle to avoid damage
- Work methodically around all edges, alternating sides
- Listen for distinct "click" release sounds
- Use guitar picks or playing cards as alternative tools
- Lift Cover Carefully:
- Lift from front edge first near touchpad area
- Watch for stubborn clips near ventilation areas
- Check for any missed screws or connections
- Set aside on soft, clean surface to prevent scratches
🛡️ Preventing Common Damage
| Risk Area | Prevention Technique | Resale Impact |
|---|---|---|
| Plastic Clips | Alternate sides every 3-4 clips, apply even pressure | Intact clips = +$60-90 value |
| Paint Scratches | Microfiber cloth under tools, avoid metal implements | Flawless finish = +$40-70 |
| Screw Threads | Apply downward pressure while turning, use correct size | Undamaged = +$25-40 |
| Internal Components | Check clearance before lifting, mind ribbon cables | No damage = +$80-130 |
| Rubber Feet | Heat gently with hairdryer before removal if needed | Intact feet = +$20-30 |
🔍 Internal Layout Overview
- Upgrade Points Visible:
- Two DDR4 RAM slots (supports up to 32GB)
- M.2 2280 SSD slot (NVMe compatible)
- Additional 2.5" drive bay with included caddy
- Wi-Fi card slot (M.2 2230 with Intel AX200 support)
- Battery Access:
- 4-cell 68Wh battery (model #16GVF)
- Easy-release connector with locking mechanism
- Multiple mounting points and cable management
- Cooling System:
- Dual fan design with shared heat pipes
- Accessible heat sink and thermal paste
- Dust accumulation areas to clean during access
⚙️ Dell Inspiron 7591 Specific Features
- Dual speaker system with Waves MaxxAudio Pro
- Optional NVIDIA MX250 graphics card cooling
- Smart cooling technology with multiple sensors
- Service tag visible on internal components
- Dell specific cable routing and retention
📸 Documentation for Resale
- Photograph screw locations and lengths before removal
- Record factory seal condition and any existing damage
- Document internal component layout and upgrade potential
- Note any pre-existing wear or manufacturer marks
- Capture upgrade potential visible areas for marketing
❌ Common Mistakes to Avoid
- Forcing the cover when clips aren't released
- Using metal tools that can scratch or damage surfaces
- Missing hidden screws under rubber feet or labels
- Not disconnecting battery before internal work
- Mixing up screw lengths during reassembly
0:28 Bottom Case 1:42 Battery 2:32 Memory RAM 2:56 WiFi Card 3:21 Storage SSD 3:54 Cooling Fan 4:56 Heatsink 5:38 Speakers 6:13 Motherboard 7:55 DC Power Jack 8:48 IO Board 9:25 Trackpad 9:30 Keyboard 9:42 Palmrest Assembly 9:51 Display Assembly
3. Dell Inspiron 7591 RAM Upgrade: Performance Optimization Guide
💾 Memory Specifications
- Supported Types:
- DDR4 SODIMM (260-pin)
- 2666MHz (10th Gen) or 2400MHz (9th Gen Intel)
- Dual-channel architecture
- Maximum 32GB (2x16GB) configuration
- Compatibility Verification:
- Check Dell's official specifications
- Non-ECC, unbuffered modules only
- 1.2V operating voltage
- Verify maximum supported speed in BIOS
🔧 Installation Process
- Access RAM Slots (after bottom cover removal)
- Release Existing Modules:
- Push outward on side clips simultaneously
- Module will pop up at 30° angle
- Remove by pulling straight out gently
- Install New RAM:
- Align notch with slot key (off-center design)
- Insert at 30° angle with gentle pressure
- Press down firmly until clips engage audibly
- Verify both ends are equally seated
- Verification:
- Boot to BIOS (F2 during startup)
- Check recognized capacity and speed
- Run Windows Memory Diagnostic
- Verify dual-channel operation in CPU-Z
🏆 Recommended Modules
- Performance Option:
- Crucial CT16G4SFD8266 (16GB DDR4-2666)
- Optimized for content creation workloads
- Premium Choice:
- Corsair Vengeance CMSX32GX4M2A2666C18 (32GB Kit)
- Low latency for responsive creative applications
- Budget Friendly:
- Team Group TED432G2666C19-S01 (32GB Kit)
- Excellent value for performance upgrade
⚡ Optimization Tips
- Run MemTest86 for 4 passes to ensure stability
- Update BIOS to latest version for best compatibility
- Match speeds when mixing modules (runs at slowest speed)
- Enable XMP profiles in BIOS if supported
- Check Dell SupportAssist for driver updates
🎨 Creative Performance Benefits
- Photo Editing: Faster Photoshop/Lightroom performance
- Video Production: Smoother 4K timeline editing
- 3D Rendering: Reduced render times with more memory
- Multitasking: Seamless switching between creative apps
💰 Selling With Upgraded RAM
- Documentation:
- Save original purchase receipts
- Include Task Manager screenshots showing capacity
- Provide MemTest86 results for stability proof
- Document dual-channel operation verification
- Marketing Advantages:
- "Professional-grade memory for content creation"
- "Ideal for photo/video editing and creative work"
- "Future-proofed for demanding creative software"
- "Optimized for Adobe Creative Suite performance"
- Target Markets:
- Content Creators: Emphasize creative application performance
- Photographers: Highlight Lightroom/Photoshop benefits
- Video Editors: Note 4K editing capabilities
- Students: Focus on multimedia project capabilities
📝 Important Compatibility Notes
- 9th Gen models may require 2400MHz RAM
- 10th Gen models support 2666MHz RAM
- Mixed configurations run at lowest speed
- Some 32GB kits may require BIOS update
- Verify compatibility with Dell's memory validation tool
4. Dell Inspiron 7591 SSD Upgrade: Storage Performance & Creative Workflow Enhancement
⚡ Speed Comparison: SATA vs NVMe
| SSD Type | Read Speed | Write Speed | Creative Workflow Benefit | Resale Value Impact |
|---|---|---|---|---|
| 2.5" SATA III | 550 MB/s | 500 MB/s | Good for document storage | +$70-$110 |
| M.2 SATA III | 550 MB/s | 520 MB/s | Same speed, smaller form factor | +$80-$120 |
| NVMe PCIe Gen3 | 3,500 MB/s | 3,000 MB/s | 6x faster for creative applications | +$120-$180 |
| Premium NVMe (Gen4 compatible) | 5,000-7,000 MB/s | 4,000-6,000 MB/s | Future-proof for large media files | +$150-$220 |
🔧 Installation Process
- M.2 NVMe Installation:
- Locate M.2 slot near RAM modules
- Insert SSD at 30° angle (keyed design)
- Secure with M2x3mm screw (included with most SSDs)
- Apply thermal pad if using high-performance NVMe drive
- 2.5" SATA Installation:
- Mount in drive caddy with rubber vibration dampeners
- Connect SATA data and power cables
- Secure with 4x M3x3mm screws
- Ensure proper cable routing to avoid interference
- Dual Drive Configuration:
- Use NVMe for OS and applications
- Use 2.5" SATA for media files and projects
- Configure in BIOS/UEFI settings
- Set up storage spaces for optimized performance
🏆 Recommended SSDs for Creative Work
- Performance NVMe:
- Crucial P5 Plus 1TB
- Excellent balance of speed and reliability for creative work
- Professional Grade:
- Samsung 970 EVO Plus 1TB
- Proven reliability for content creation workloads
- Budget SATA Option:
- Western Digital Blue 3D NAND 1TB
- Great for secondary storage or budget builds
- High-Capacity:
- Sabrent Rocket Q4 2TB
- Ideal for large media libraries and projects
🔄 Data Migration Options
- Clean Installation:
- Download Windows from Microsoft
- Install Dell drivers from Dell Support
- Best for performance, removes bloatware
- Drive Cloning:
- Use Macrium Reflect Free
- Dell Backup and Recovery for official restore
- Preserves existing setup and applications
⚙️ Creative Workflow Optimization
- Enable TRIM:
fsutil behavior set DisableDeleteNotify 0 - Update SSD firmware through manufacturer tools
- Disable defragmentation for SSDs
- Configure write caching in Device Manager
- Set power management to maximum performance
- Run CrystalDiskMark for performance validation
- Optimize page file settings for creative applications
🎨 Creative Performance Benefits
- Boot Times: Reduced from 45+ seconds to under 10 seconds
- Application Loading: Photoshop launches in 2-3 seconds
- File Operations: 4K video file transfers 6-8x faster
- Project Loading: Large PSD files load instantly
- Multitasking: Seamless switching between creative applications
- Render Times: Reduced video export and rendering times
💰 Selling With Upgraded SSD
- Documentation:
- CrystalDiskMark benchmark screenshots
- Drive health report (CrystalDiskInfo)
- Original purchase receipt for SSD
- Application load time comparisons
- Marketing Advantages:
- "Professional-grade SSD for content creation"
- "Instant application loading and file access"
- "Massive storage for media projects and files"
- "Optimized for Adobe Creative Suite performance"
- Performance Claims:
- "Boots in under 10 seconds"
- "Photoshop loads in 2-3 seconds"
- "Perfect for 4K video editing and large photo projects"
- "Enterprise reliability with consumer pricing"
5. Dell Inspiron 7591 Battery Replacement: Extended Mobility & Creative Productivity
🔋 Battery Specifications & Options
| Battery Model | Capacity | Compatibility | Estimated Runtime | Resale Value Impact |
|---|---|---|---|---|
| Dell 1VX7F (Original 3-cell) | 56Wh (3-cell) | All Inspiron 7591 models | 4-6 hours | +$70-$110 |
| Dell 6GTPY (Extended 4-cell) | 68Wh (4-cell) | Check chassis compatibility | 6-8 hours | +$90-$140 |
| Dell Premium Replacement | 60-64Wh | Genuine Dell parts | 5-7 hours | +$80-$120 |
| High-Capacity Aftermarket | 72-74Wh | Verify fitment and safety certifications | 7-9 hours | +$60-$100 |
Always verify compatibility using your Dell Service Tag before purchase.
⚠️ Safety Precautions
- Complete Power Down:
- Shut down completely (not sleep/hibernate)
- Disconnect AC adapter and all peripherals
- Remove external battery if present
- Discharge Residual Power:
- Hold power button for 15 seconds after shutdown
- Wait 5 minutes before starting work
- Use anti-static wrist strap
- Work on non-conductive surface
🛠️ Replacement Steps
- Access Battery Compartment (after bottom cover removal):
- Locate battery near front edge
- Identify connector and mounting screws
- Note cable routing for reassembly
- Disconnect Battery:
- Gently lift locking mechanism on connector
- Pull connector straight out (not at angle)
- Avoid pulling on wires directly
- Remove Old Battery:
- Unscrew 4x M2x4mm retention screws
- Note screw lengths and locations
- Lift battery at 30° angle from front edge
- Note orientation for replacement
- Install New Battery:
- Align with screw holes and connector
- Secure with original screws (0.6Nm torque)
- Reconnect power connector until click
- Verify secure connection
⚡ Battery Calibration Process
- Charge to 100% without interruption (overnight recommended)
- Discharge completely (use until automatic shutdown)
- Recharge to 100% again without interruption
- Repeat this cycle 2-3 times for optimal calibration
- Use Dell Power Manager for advanced battery settings
📊 Generating Battery Health Report
- Open Command Prompt as Administrator
- Run:
powercfg /batteryreport - Report saves as battery-report.html in current directory
- Check key metrics:
- DESIGN CAPACITY vs FULL CHARGE CAPACITY
- Battery cycle count
- Recent usage history and wear level
- Usage patterns and runtime estimates
🔋 Maximizing Battery Life
- Enable Dell Power Manager in BIOS
- Set to "Primarily AC Use" for mostly plugged-in usage
- Use "Adaptive" setting for balanced performance
- Enable battery saver in Windows at 20% threshold
- Reduce screen brightness (biggest power savings)
- Use Dell Command | Power Manager for customized profiles
🎨 Creative Work Battery Features
- Dell ExpressCharge technology (0-80% in 60 minutes)
- Adaptive thermal management for sustained performance
- Battery health charging to extend lifespan
- Dell Battery Meter utility for accurate runtime estimates
- Warranty and support through Dell ProSupport
💰 Maximizing Resale Value
- Documentation:
- Photograph OEM battery label and part number
- Include battery health report PDF
- Save purchase receipt for genuine Dell battery
- Record calibration process and results
- Marketing Points:
- "Genuine Dell replacement battery"
- "95%+ health capacity with professional calibration"
- "6-8 hours typical creative work usage"
- "Fast charge capable for mobile creators"
- "Perfect for on-location photography and video work"
- Buyer Assurance:
- Offer 90-day battery performance guarantee
- Provide calibration documentation
- Include power management tips for creative work
- Share battery maintenance best practices
🎯 Best Platforms for Battery-Upgraded Creative Laptops
- Creative Marketplaces: Highlight "all-day battery for location work"
- Photography Forums: Emphasize "genuine Dell components"
- eBay Creative: Use "Dell genuine battery" in title and description
- Local Creative Communities: Target photographers and videographers
6. Dell Inspiron 7591 LCD Screen Replacement: Premium Display Solutions for Creators
🖥️ Display Specifications & Compatibility
- Original Panel Types:
- 15.6" FHD (1920x1080) IPS - 300 nits (matte)
- 15.6" 4K UHD (3840x2160) IPS - 400 nits (glossy)
- 15.6" OLED UHD (3840x2160) - 400 nits (glossy) - premium models
- Touch screen options available on select configurations
- Compatibility Factors:
- 40-pin eDP connector (most models)
- Verify thickness (3.0mm vs 4.0mm panels)
- Check mounting bracket positions and screw patterns
- Confirm panel compatibility using original part number
- Note: 4K panels require specific LCD cables
🔧 Step-by-Step Replacement Guide
- Remove Bottom Cover (refer to Section 2)
- Disconnect Battery (critical safety step)
- Release Display Assembly:
- Remove 4 hinge screws (M2.5x6mm)
- Carefully lift display from chassis
- Place on soft, clean surface with screen protection
- Remove Bezel:
- Use plastic tools to release plastic clips around perimeter
- Start from bottom edge near hinge area
- Work around perimeter slowly and methodically
- Note bezel retention clips locations
- Replace LCD Panel:
- Remove 4-6 mounting screws from brackets
- Disconnect eDP cable (flip latch upward carefully)
- Transfer webcam/mic module to new panel
- Install new panel in reverse order
- Ensure all cables are properly routed and secured
✅ Professional Quality Assurance Testing
| Test | Method | Acceptable Standard | Resale Impact |
|---|---|---|---|
| Dead Pixels | Solid color tests (white, black, red, blue, green) | 0 allowed for professional grade | +$150-$250 value |
| Backlight Bleed | Black screen in dark room environment | Minimal corner glow (<3% screen area) | +$80-$120 value |
| Color Uniformity | Solid white/red/blue screens | Even coloration (ΔE < 2 for 4K) | +$100-$150 value |
| Touch Response | Windows touch calibration and testing | Accurate tracking, no dead zones | +$180-$280 value |
| Viewing Angles | 45° angle viewing test | Minimal color shift (IPS/OLED panels) | +$70-$100 value |
🏆 Recommended Replacement Panels
- Professional 4K IPS:
- NV156QUM-N53 (Innolux)
- Excellent color accuracy for photo editing
- 400 nits brightness, 100% sRGB coverage
- Premium OLED Option:
- ATNA56WR06-0 (Samsung)
- Perfect blacks and infinite contrast
- Ideal for video editing and content consumption
- High-Refresh Upgrade:
- LQ156M1JW03 (Sharp)
- 120Hz refresh rate for smoother motion
- Great for video editing and gaming
🛠️ Specialized Tools Needed
- Plastic opening tools set (iSesamo style)
- ESD-safe tweezers for connector handling
- Microfiber cloths and screen cleaning solution
- Suction cups for panel handling (highly recommended)
- Magnetic project tray for screws
- Anti-static gloves to prevent fingerprint damage
🧪 Professional Testing & Calibration
- Online Monitor Test for dead pixels and uniformity
- Windows Display Calibration tool for basic adjustments
- NVIDIA Control Panel or Intel Graphics Command Center
- Lagom LCD tests for advanced calibration
- Dell PremierColor for color profile management
- DisplayCAL for professional color calibration
🎨 Creative Professional Benefits
- Photo Editing: Accurate color reproduction for photography
- Video Production: 4K resolution for timeline precision
- Design Work: Sharp text and detailed graphics rendering
- Content Review: High brightness for client presentations
- Color Critical Work: Professional color gamut coverage
💰 Selling After Screen Replacement
- Documentation:
- Photograph panel model number and labels
- Record color test results and uniformity measurements
- Include before/after comparison shots
- Provide calibration certificates if professionally done
- Include color accuracy reports (sRGB/AdobeRGB coverage)
- Marketing Advantages:
- "Professional-grade 4K display with zero defects"
- "Perfect for color-critical photo and video work"
- "No dead pixels or backlight bleed guaranteed"
- "OLED technology for perfect blacks and contrast"
- "Calibrated for accurate color reproduction"
- Target Markets:
- Photographers: Highlight color accuracy and calibration
- Video Editors: Emphasize 4K resolution and color gamut
- Designers: Note sharpness and detail rendering
- Content Creators: Focus on visual quality for audience
⚠️ Troubleshooting Common Issues
- No Display: Check eDP cable connection and seating
- Flickering: Verify cable integrity and connections
- Color Issues: Update graphics drivers and check settings
- Touch Not Working: Reinstall drivers and calibrate properly
- Backlight Problems: Check inverter connections
7. Dell Inspiron 7591 DC Power Jack Replacement: Reliable Charging Restoration
🔌 DC Jack Specifications & Compatibility
| Jack Type | Compatibility | Connection Type | Replacement Difficulty | Resale Value Impact |
|---|---|---|---|---|
| Dell DCJY3 (Standard) | Most Inspiron 7591 models | Board-mounted, 4-pin | Intermediate | +$60-$90 |
| Dell F8F1P (Reinforced) | Later production models | Board-mounted, reinforced housing | Intermediate | +$70-$100 |
| Cable-mounted Version | Early models (less common) | Cable-connected to motherboard | Easy | +$50-$80 |
Verify exact compatibility using your Dell Service Tag before ordering.
⚠️ Common Failure Symptoms
- Intermittent charging or connection issues
- Sparkling or arcing when connecting power adapter
- Loose connection that requires specific positioning
- No charging despite known-good power adapter
- Visible physical damage to jack or surrounding area
- Overheating at power connection point
- Battery not charging while system shows "plugged in"
🔧 Step-by-Step Replacement Guide
- Complete Disassembly Preparation:
- Remove bottom cover, battery, and all accessible components
- Document every connection with high-quality photos
- Organize screws by component and location in labeled containers
- Note cable routing paths for reassembly
- Motherboard Access:
- Disconnect all cables and connectors from motherboard
- Remove heatsink/fan assembly carefully
- Detach display, keyboard, and touchpad cables
- Note orientation of all connectors
- DC Jack Removal:
- Identify 4-6 mounting points around jack housing
- Note solder points and mechanical attachment points
- Use temperature-controlled soldering station for removal
- Clean area thoroughly with isopropyl alcohol after removal
- New Jack Installation:
- Align new jack with mounting holes precisely
- Secure with proper soldering technique (350-380°C)
- Verify mechanical stability before electrical testing
- Reconnect all components in reverse order
🛠️ Specialized Tools Required
- ESD-safe work station and wrist strap
- Temperature-controlled soldering station
- Desoldering wick or solder sucker
- Quality lead-free solder and flux
- Magnifying lamp or microscope for precision work
- Multimeter for continuity and voltage testing
- Thermal tape for component protection
- Precision screwdriver set
⚡ Professional Soldering Techniques
- Temperature Settings: 350-380°C for lead-free solder
- Flux Application: Use no-clean flux for better flow
- Desoldering: Remove old solder completely before installation
- Joint Quality: Shiny, concave joints indicate good connections
- Testing: Verify continuity and isolation after soldering
- Cleaning: Use isopropyl alcohol to remove flux residue
🧪 Post-Installation Testing
- Visual Inspection:
- Check for solder bridges or cold joints
- Verify mechanical stability of installation
- Ensure proper alignment and orientation
- Inspect for any damaged components
- Electrical Testing:
- Test continuity with multimeter between pins
- Check for short circuits between adjacent pins
- Verify proper grounding connection
- Test voltage delivery under load
- Functional Testing:
- Connect known-good power adapter slowly
- Verify charging indicator activation
- Test mechanical stability of connection
- Monitor for overheating during charging
- Check battery charging status in Windows
🛡️ Prevention and Maintenance
- Always connect/disconnect power adapter straight on
- Avoid putting strain on power connection during use
- Use genuine Dell power adapters with proper specifications
- Regularly inspect power jack for signs of wear or damage
- Keep power port clean and free of debris
- Avoid bending or twisting power connector
💰 Selling After DC Jack Replacement
- Documentation:
- Photograph before/after repair condition
- Record multimeter test results and measurements
- Include replacement part documentation and receipts
- Provide soldering quality photos showing professional work
- Include functional testing results
- Marketing Advantages:
- "Professionally repaired DC power jack"
- "Reliable charging fully restored"
- "Like-new power connection reliability"
- "Genuine Dell replacement parts used"
- "Professional soldering and testing completed"
- Warranty Considerations:
- Offer 90-day warranty on repair workmanship
- Disclose repair history transparently
- Provide testing documentation and results
- Note any cosmetic changes from repair process
🏢 When to Recommend Professional Service
- If motherboard damage is present around jack area
- When trace repair or board-level work is needed
- For users without soldering experience or proper tools
- When warranty coverage may be affected by DIY repair
- For high-value units where perfection is required
- If multiple attempts have failed to resolve the issue
8. elling Your Upgraded Dell Inspiron 7591: Maximum Value Strategies
📊 Optimal Selling Platforms
| Platform | Average Price Premium | Best For | Fee Structure |
|---|---|---|---|
| SellBroke | 20-30% higher | Quick, professional transactions | Lowest fees (3-4%) |
| SellLaptopBack | 15-25% higher | Laptop specialists & bulk buyers | Competitive (4-6%) |
| Swappa | Market rates | Tech-savvy buyers | Transparent (3-5%) |
| eBay | Broad range | Maximum audience reach | Highest (12.9% + payment processing) |
📈 Professional Listing Optimization
- Title Formulas That Convert:
- "Dell Inspiron 7591 (Upgraded) - [RAM]RAM/[SSD]SSD - [Screen Type]"
- Example: "Dell Inspiron 7591 (32GB RAM/2TB NVMe) - 4K Display - Creative Workstation"
- Include keywords: "upgraded", "professional", "creative workstation"
- Key Features to Highlight:
- Lead with creative-focused upgrades first
- Include benchmark scores and performance metrics
- Mention 4K display quality and color accuracy
- Note professional refurbishment process
🎓 Targeting Educational & Institutional Buyers
- School-Specific Strategies:
- List during academic procurement cycles (May-July, Dec-Jan)
- Use ".edu compatible" and "campus ready" in titles
- Highlight creative software capabilities for design programs
- .edu Verification & Discounts:
- Offer educational discounts with ID.me verification
- Partner with university surplus programs
- List on campus-specific marketplaces
- Educational Resources:
- Link to ED.gov technology recommendations
- Reference Dell Education programs
- Highlight compatibility with educational creative software
🏛️ Government & Institutional Sales
- GSA Advantage Program:
- Register on GSA.gov for bulk sales opportunities
- Complete SAM.gov registration
- Obtain DUNS number for government contracting
- Educational Institution Sales:
- List on ED.gov tech exchange
- Offer bulk pricing for school districts
- Provide educational discount verification
💰 Dynamic Pricing Strategy
- Base Price Calculation:
- Start with PC BlueBook value
- Add upgrade costs + 30% professional premium
- Factor in professional labor ($75-100/hour)
- Seasonal Adjustments:
- +25% during back-to-school (July-September)
- +20% during tax return season (February-April)
- +15% during holiday season (November-December)
- Competitive Analysis:
- Monitor similar creative laptop listings
- Adjust pricing based on creative professional demand
- Consider bundle options (stylus, carrying case, accessories)
📸 Professional Photography Guide
- Essential Shots:
- Front, back, and side profiles with clean background
- Screen on with creative software visible
- Close-ups of ports and creative features
- Benchmark results and specification screens
- Lighting & Background:
- Use natural light or softbox lighting
- Neutral, clean background
- Multiple angles for each shot
- Include scale reference if needed
📄 Essential Documentation Package
- Performance Proof:
- CrystalDiskMark benchmarks
- MemTest86 results
- Battery health report
- Thermal performance screenshots
- Parts Authentication:
- OEM parts receipts
- Dell service tags verification
- Upgrade component documentation
- Professional Certification:
- Refurbishment process documentation
- Quality control checklist
- 90-day warranty certificate
📦 Professional Shipping Methods
- Packaging Standards:
- Double-box with ample padding
- Use anti-static bubble wrap
- Include silica gel packets for moisture control
- Shipping carriers:
- UPS or FedEx for best handling
- Always require signature confirmation
- Purchase full insurance coverage
🎯 Creative Professional Targeting
- Photographers:
- Highlight color-accurate 4K display
- Emphasize Lightroom/Photoshop performance
- Note portable editing capabilities
- Video Editors:
- Focus on timeline performance
- Highlight 4K video editing capabilities
- Note rendering speed improvements
- Design Students:
- Emphasize affordability vs. MacBook Pro
- Highlight creative software compatibility
- Note portability for campus use
Need to Sell Your Dell Laptop? Get Instant Cash!
If your Dell Inspiron 7591 (or other Inspiron model) has performance issues or you're upgrading to a newer laptop, we offer premium cash payouts for your device. We buy broken, used, and refurbished Dell Inspiron laptops—including all 7591 configurations—with free insured shipping and hassle-free evaluations.
Sell Popular Dell Models Now: