Discharge residual power (hold power button 15 sec)
4. Pre-Repair Documentation
Visual Records:
Photograph HP product label
Capture original screen part number
Functional Test:
Run HP Display Test
Note any dead pixels or backlight issues
5. Compatible Replacement Screens
Original Specifications:
14.0" HD (1366×768) TN
30-pin eDP connector
Upgrade Options:
14.0" FHD (1920×1080) IPS
Matte anti-glare panels
2. HP 14-dq Screen Removal: Safe Step-by-Step Process
1. Safety Preparation
Power off and disconnect AC adapter
Remove battery (slide release latch)
Ground yourself with anti-static wrist strap
2. Bezel Removal Technique
Area
Tool
Technique
Warning
Bottom Edge
Plastic spudger
Insert at 45° angle near hinges
Avoid LCD surface
Side Edges
Guitar pick
Work from bottom to top
Don't force clips
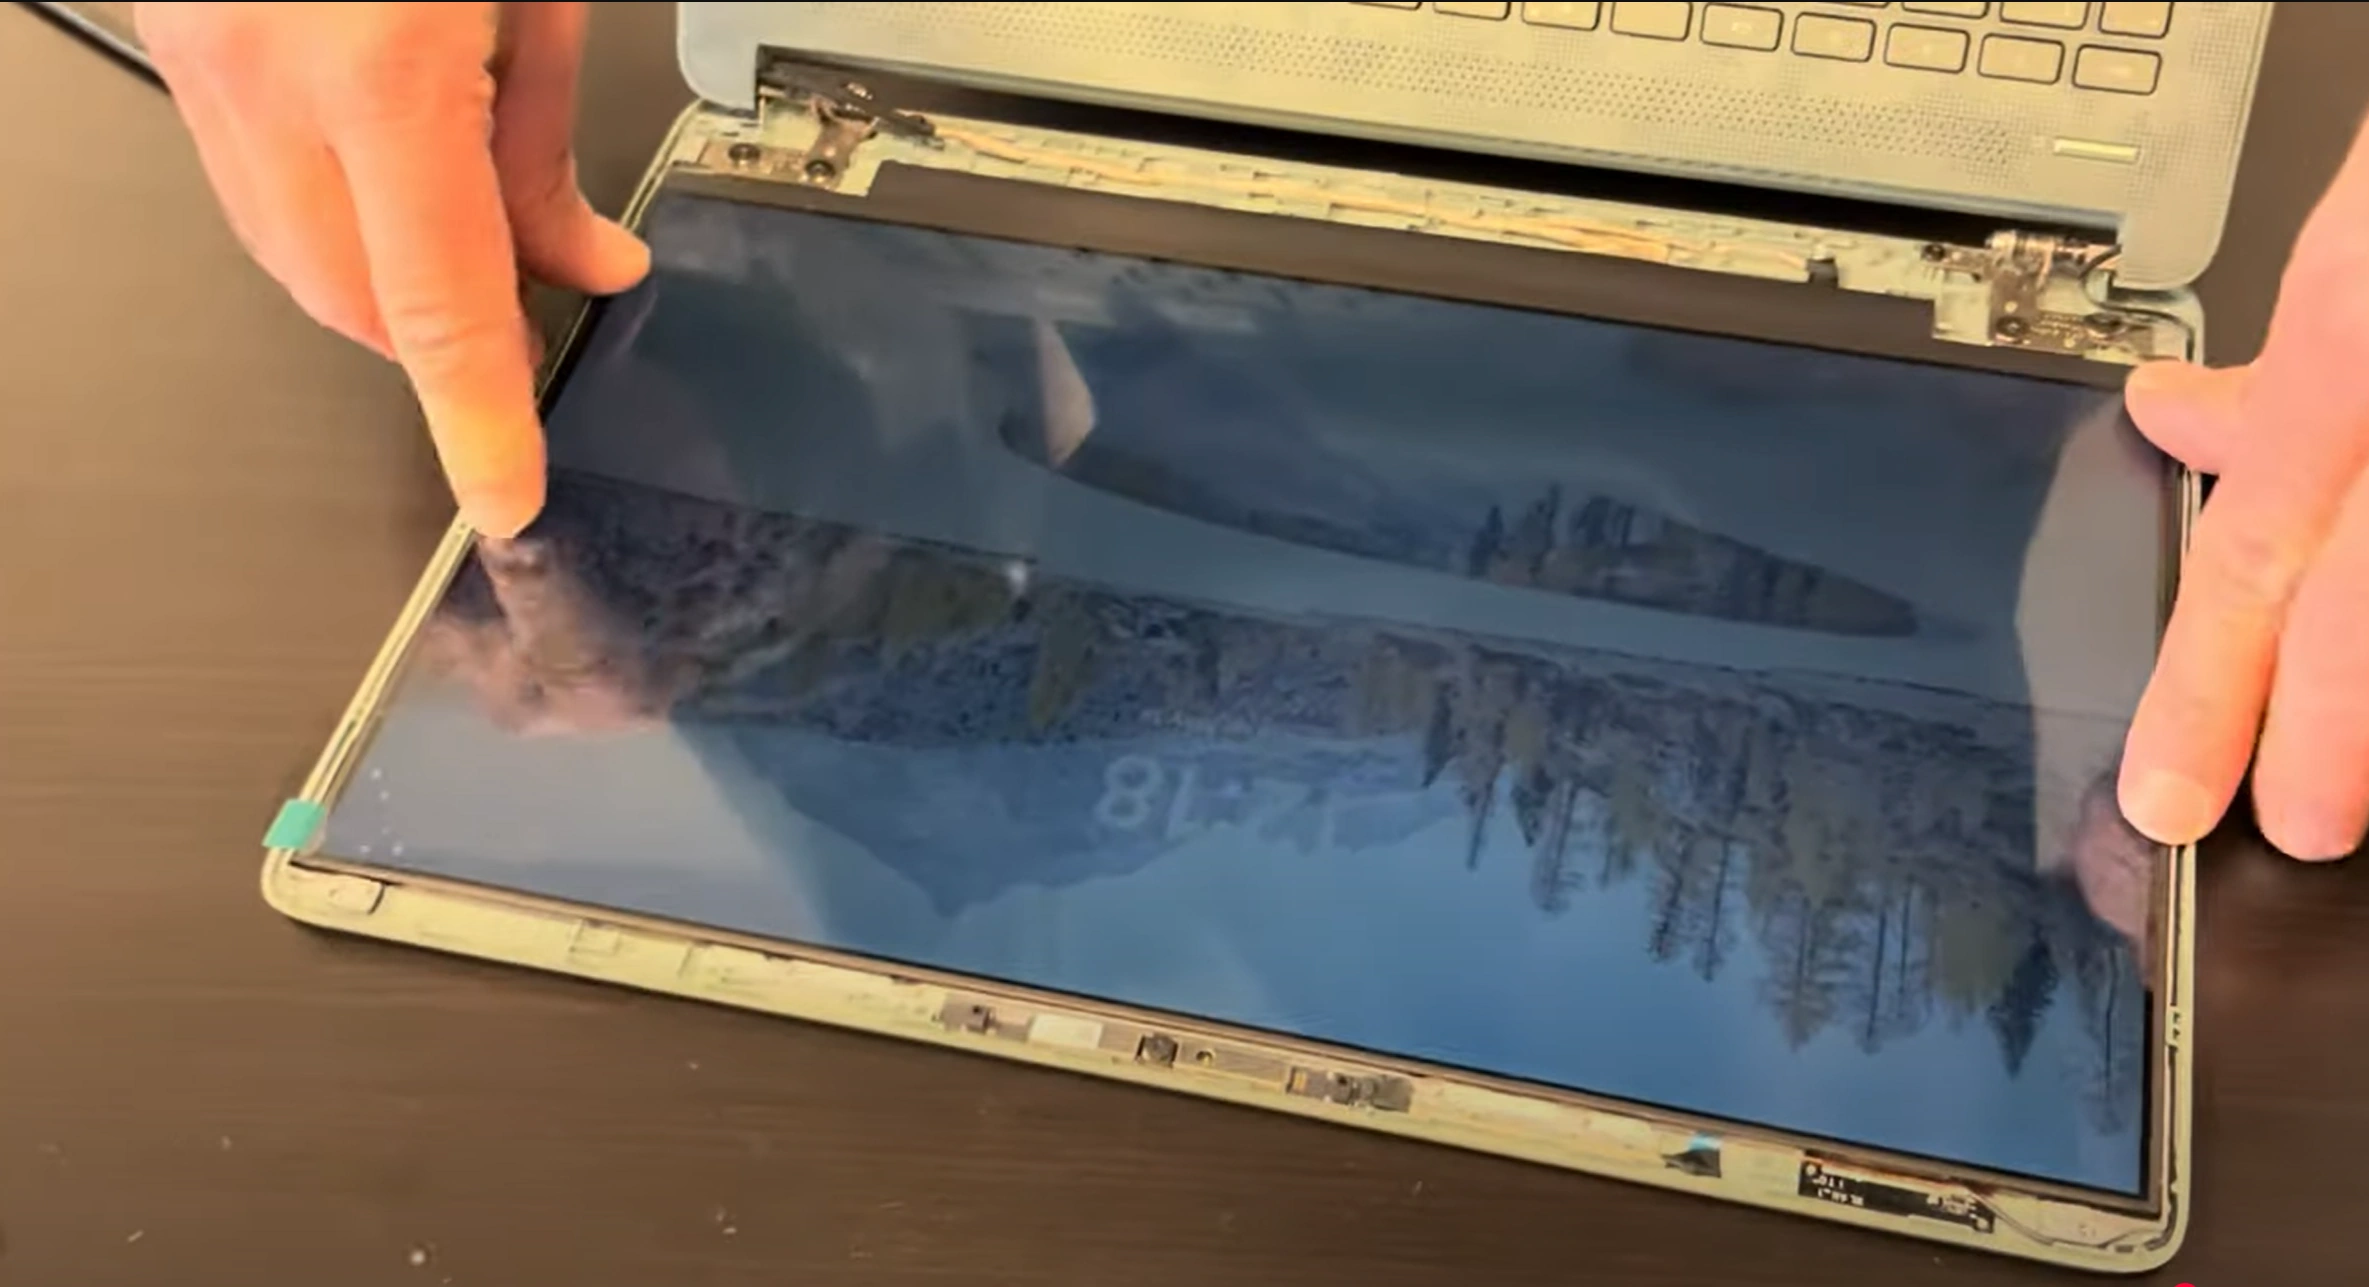
3. Display Cable Removal
Locate eDP Connector:
30-pin connector behind panel
Secured with brown adhesive tape
Safe Disconnection:
Peel tape gently with tweezers
Flip black latch upward
Pull cable straight out
4. Avoiding Costly Errors
Fragile Components:
Webcam flex cable tears easily
LCD tabs break if forced
Resale Impact:
Damaged bezel clips: 25% value loss
Torn cables: 50% value loss
5. Preserving Resale Value
Keep all original screws organized
Store removed screen in anti-static bag
Photograph undamaged connectors
0:20 Take out LCD front bezel 1:29 Unscrew Hinge brackets 2:20 Pull our adhesive strips 3:00 Detach the screen from the back 3:07 Unplug Video Cable 3:40 Plug in New Screen 4:00 Test 4:18 Install new Adhesive Strips 4:51 Screw Hinges Back 6:50 Install New Screen 7:15 Install Front Bezel 8:20 Install Hinge Cover
3. HP 14-dq New Screen Installation: Professional Upgrade Guide
If your HP 14-dq (or other HP 14 series model) has technical issues or you're upgrading to a newer device, we offer quick, competitive payouts for your laptop. We buy broken, used, and refurbished HP 14-dq laptops—including all configurations—with free shipping and no-hassle quotes.