How to take apart Samsung DP700A7K AIO Desktop PC
Disassembly Guide: Samsung DP700A7K All-in-One Desktop Computer
The Samsung DP700A7K ATIV One 7 is a business-class All-in-One computer fitted with a 2.2ghz Intel i5 processor and 8gb of RAM. The beautiful 27 inch concave LCD is perfect for watching movies or doing light business work.
This device is relatively unique in that it has all integrated chips, including on-board RAM. Unfortunately this means that the 8GB RAM included is the maximum, it cannot be upgraded. This is one of the major complaints of this device, as the hardware is quite minimal for the size of the LCD.
Samsung DP700A7K All-in-One Desktop PC Disassembly Guide
Tools you will need
Opener tool
#1 and #2 phillips screwdriver
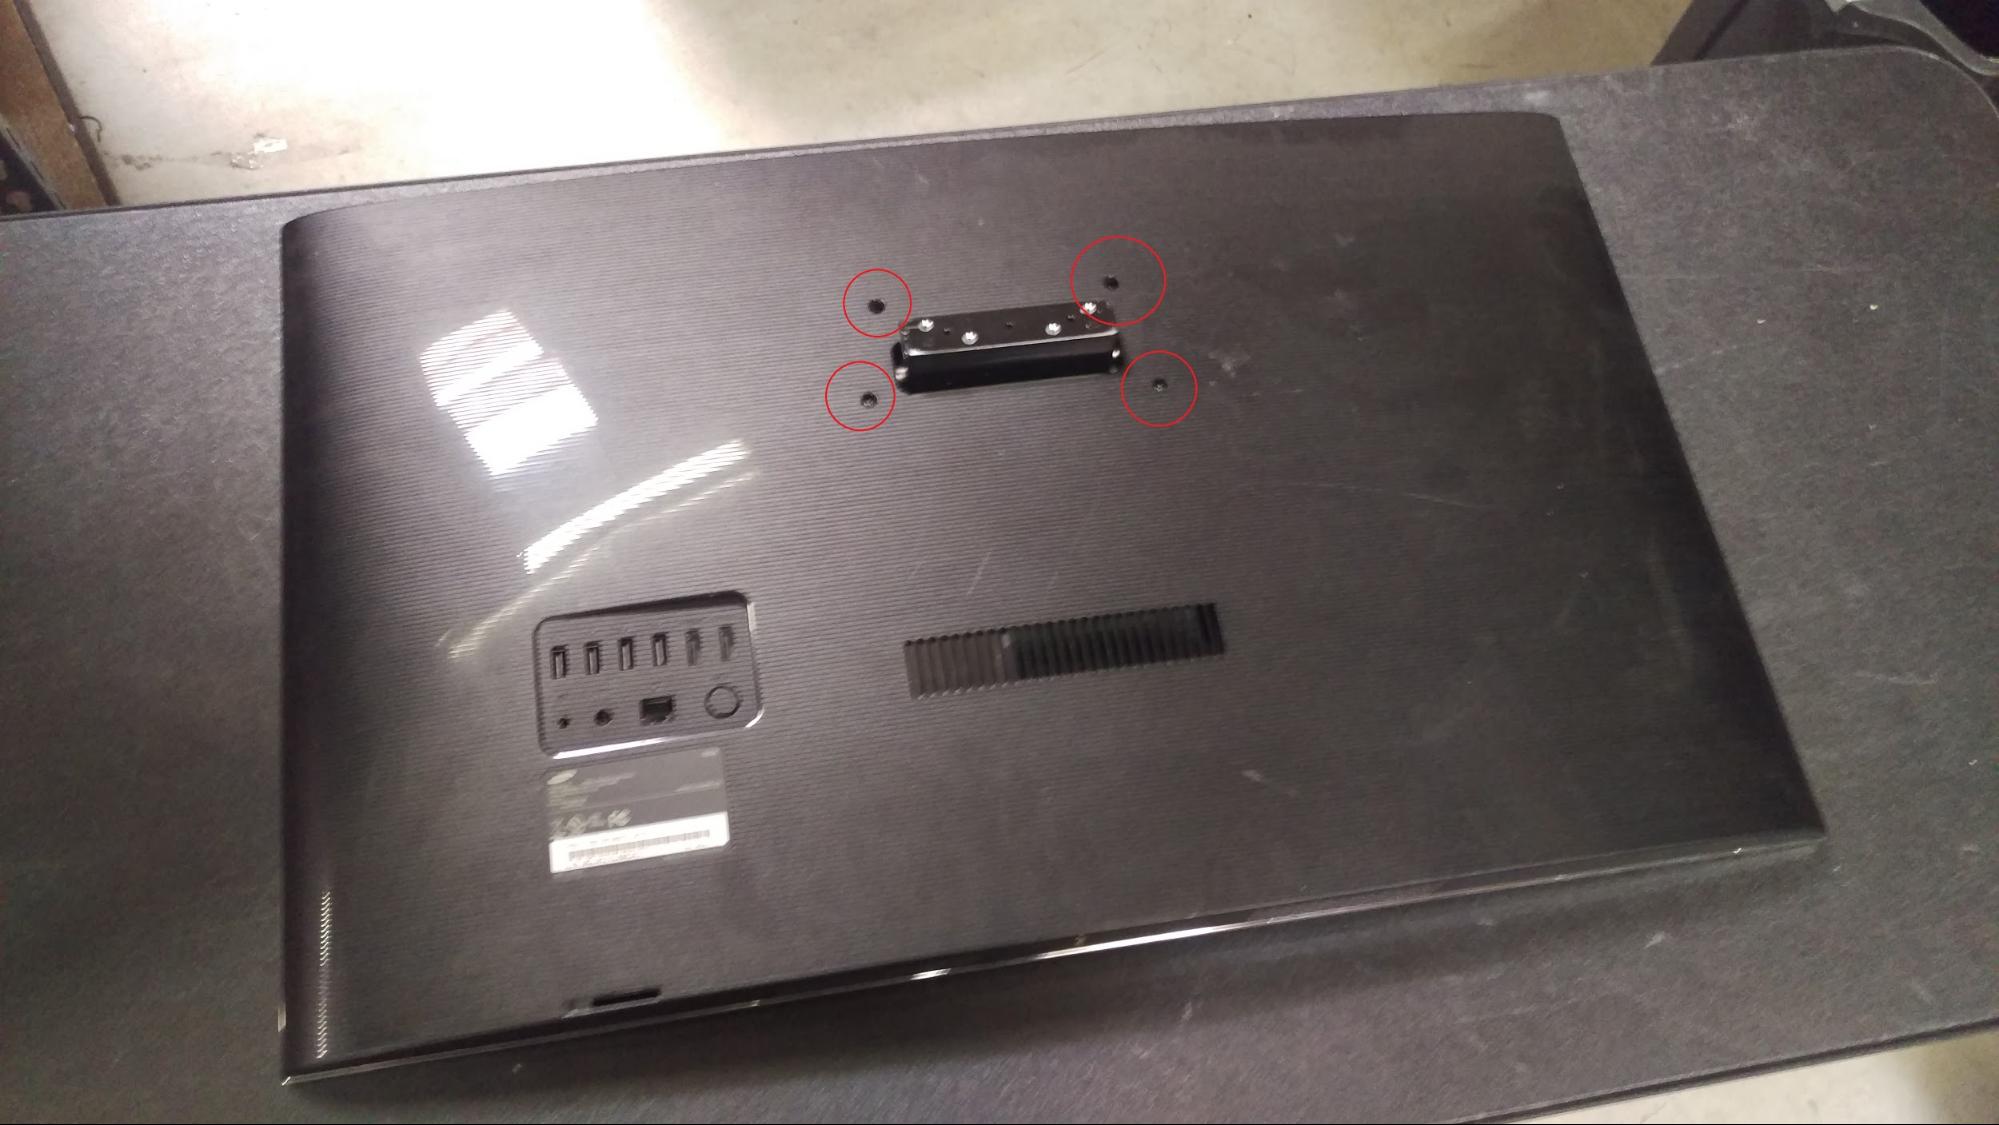
After removing the stand/mount, start the disassembly process by removing the four phillips screws on the back panel.
Using your opener tool, stick the tip between the rear plastic cover and the plastic front cover. Gently pry out until you hear a click. Do this incrementally, every 1 to 2 inches along the entire device, until the back panel is loose.Once all the tabs have been unfastened the back panel can be removed by gently pulling up with your hands.
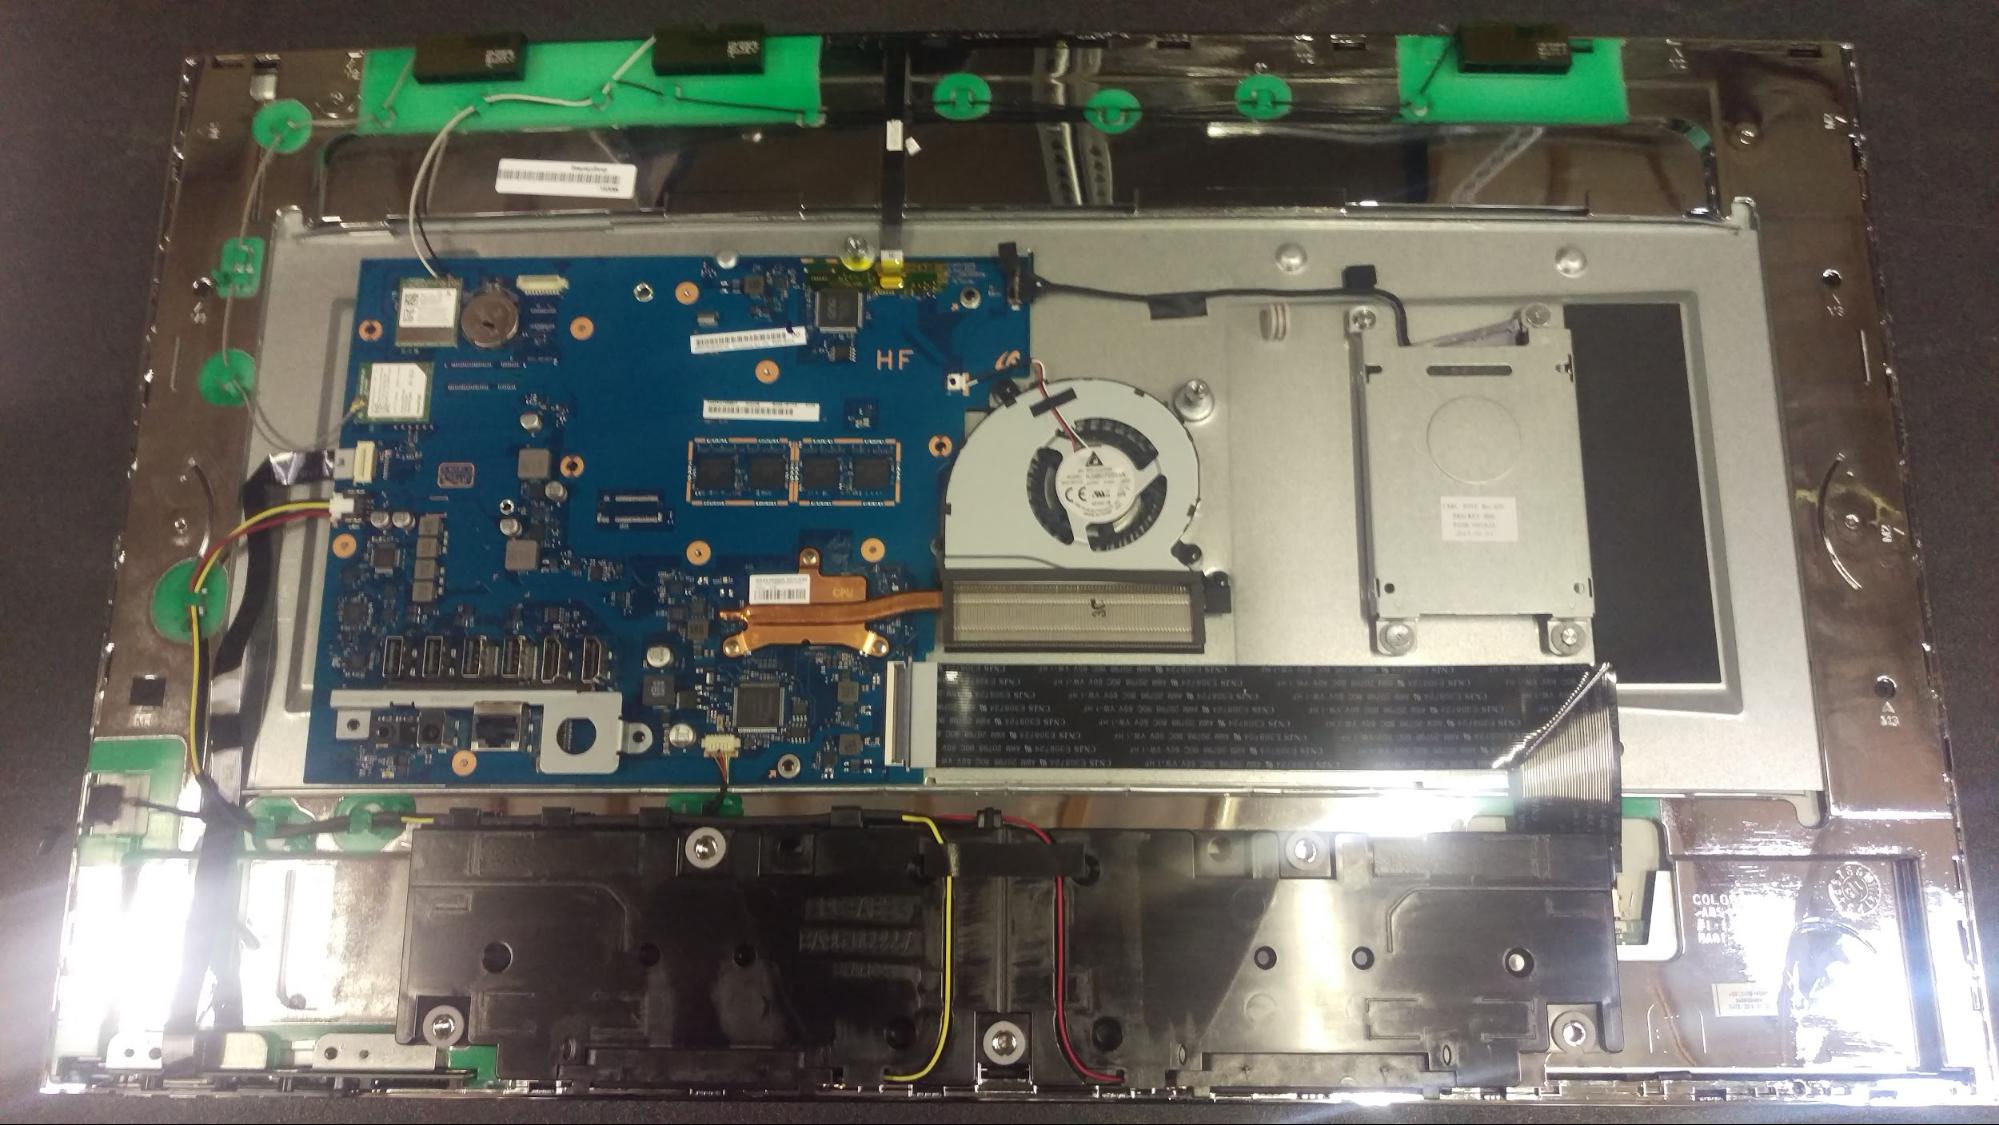
Once you have the internals exposed, start by removing the tape covering several connectors, ports and cables. The speaker can be easily removed by lifting straight up. Be careful to disconnect the wires from the motherboard before completely removing.
There are multiple #1 screws on the motherboard, fan/cooler assembly, and hard drive caddy. Remove them all, and start carefully removing the cables attached to the motherboard.
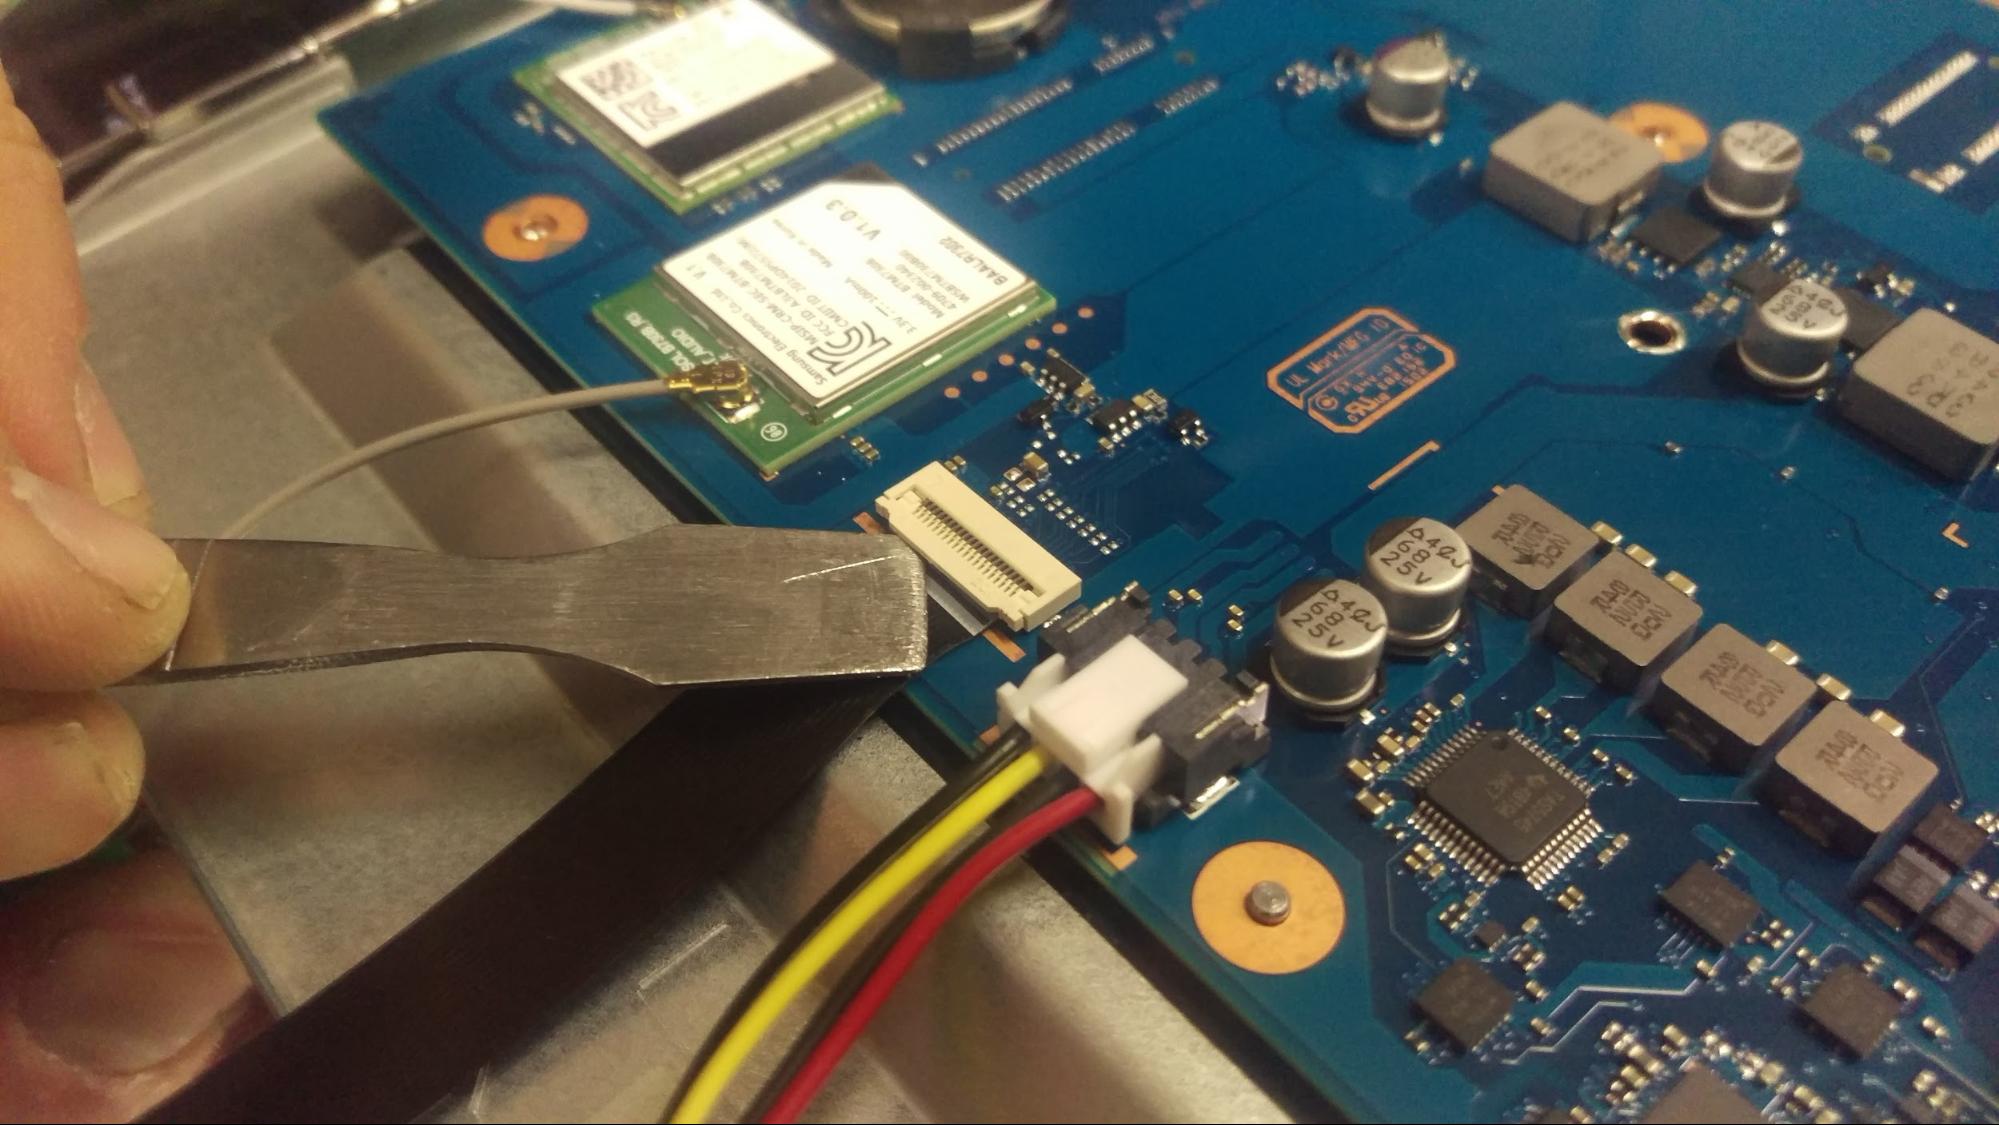
Connectors are easily destroyed by being too rough or by using the wrong tool. For example, connector #1 as labeled below is removed by prying up gently on the small piece my tool is underneath. While connector #2 has a clip, that you must stick your pry tool between the cable connector (white part) and motherboard connector (black part) between the notch. Doing this while gently pulling the cable back should dislodge it easily.
This cable leads to the power/menu button assembly. This has 2 screws as well, remove them and gently pull the assembly out of the motherboard.
Remove the CPU heatsink using your #1 phillips screwdriver, taking care not to damage the thin, copper tubing. Disconnect the fan power cable from the motherboard and pull up evenly to dislodge the heatsink from the CPU. The thermal paste applied between the two parts will act as an adhesive, so it might take a bit of force to be dislodged.
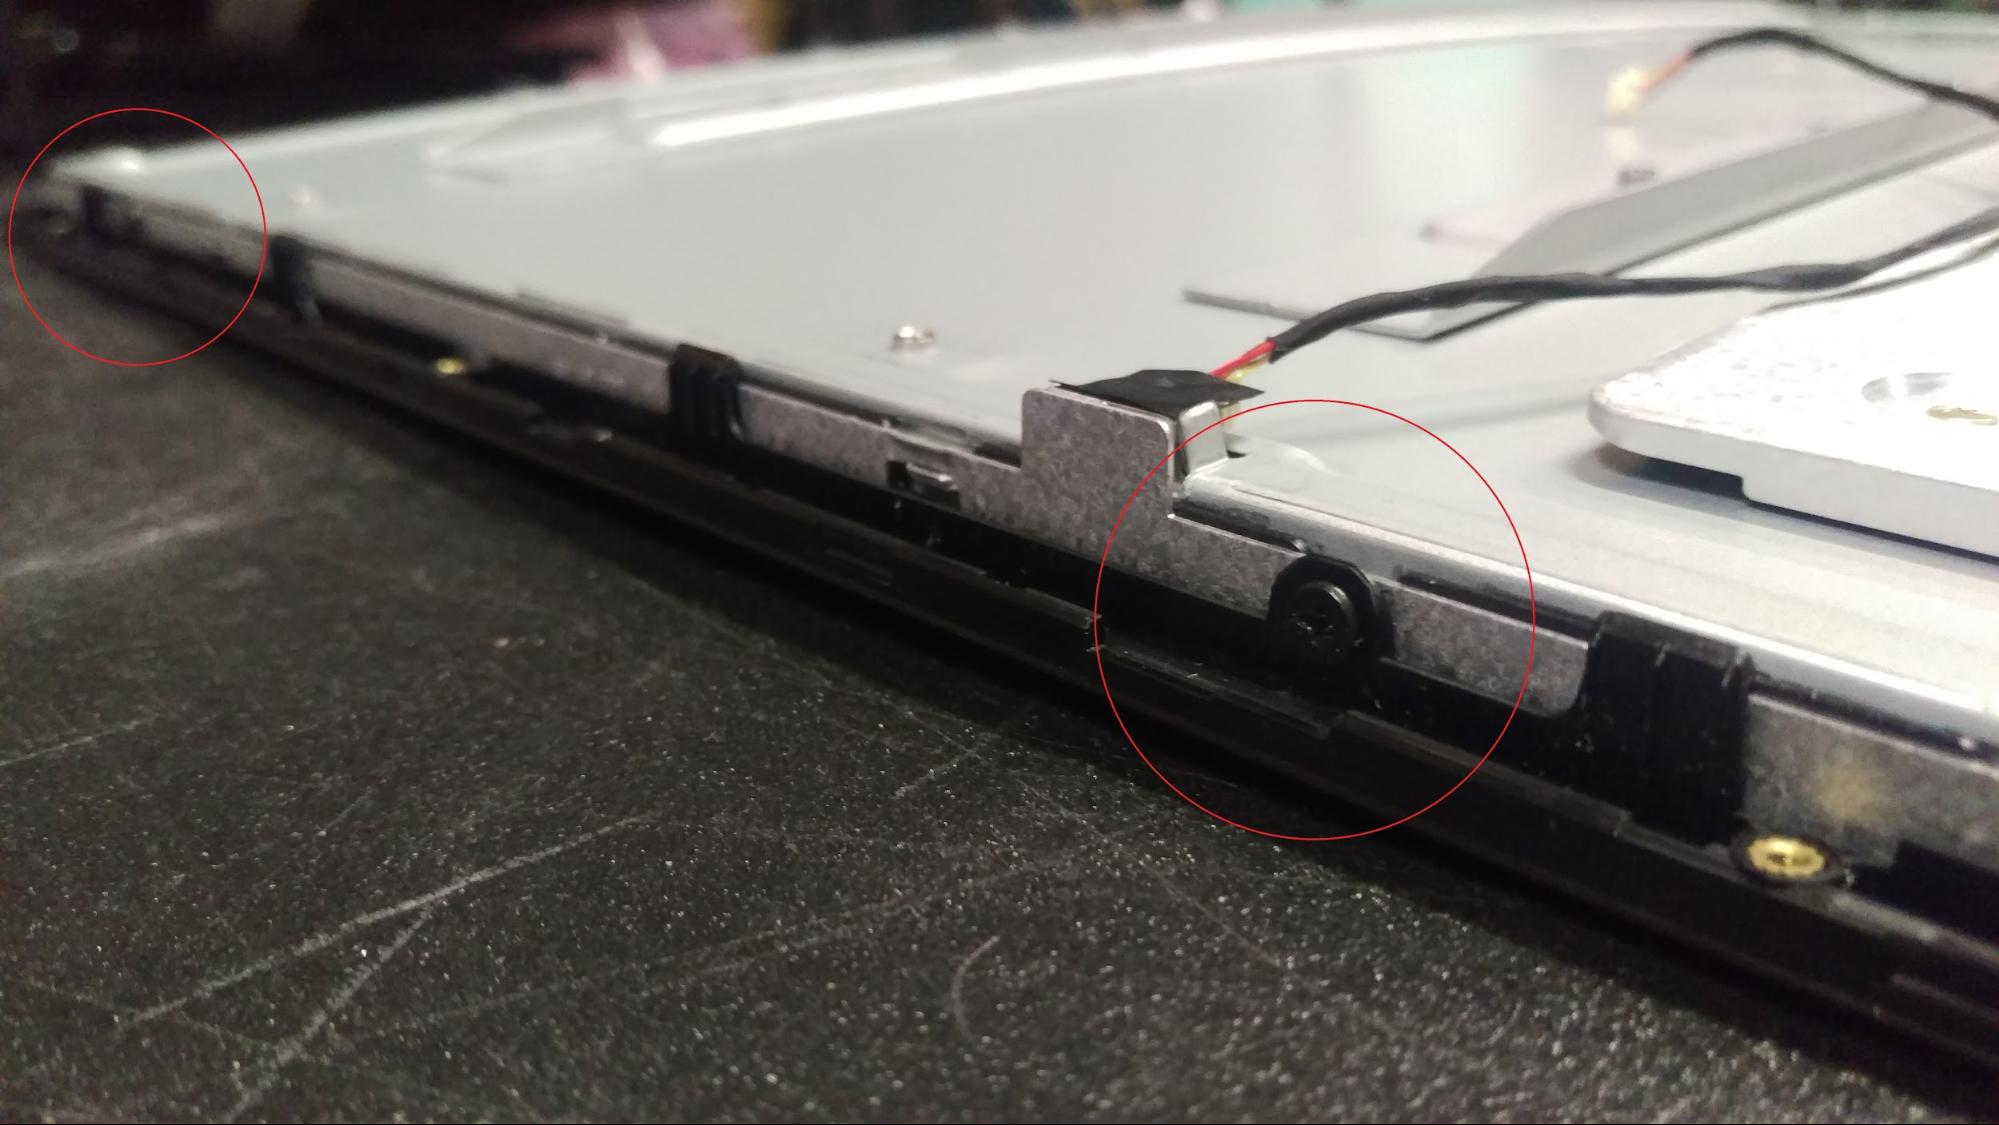
The wireless radio (Bluetooth and Wi-Fi) antennas are easily removed, but have excess adhesive and it might feel like they’re unremovable. Gentle application of heat via heat gun will help loosen the adhesive, but you will need to use a pry tool between the antenna and the plastic frame to remove the parts completely.

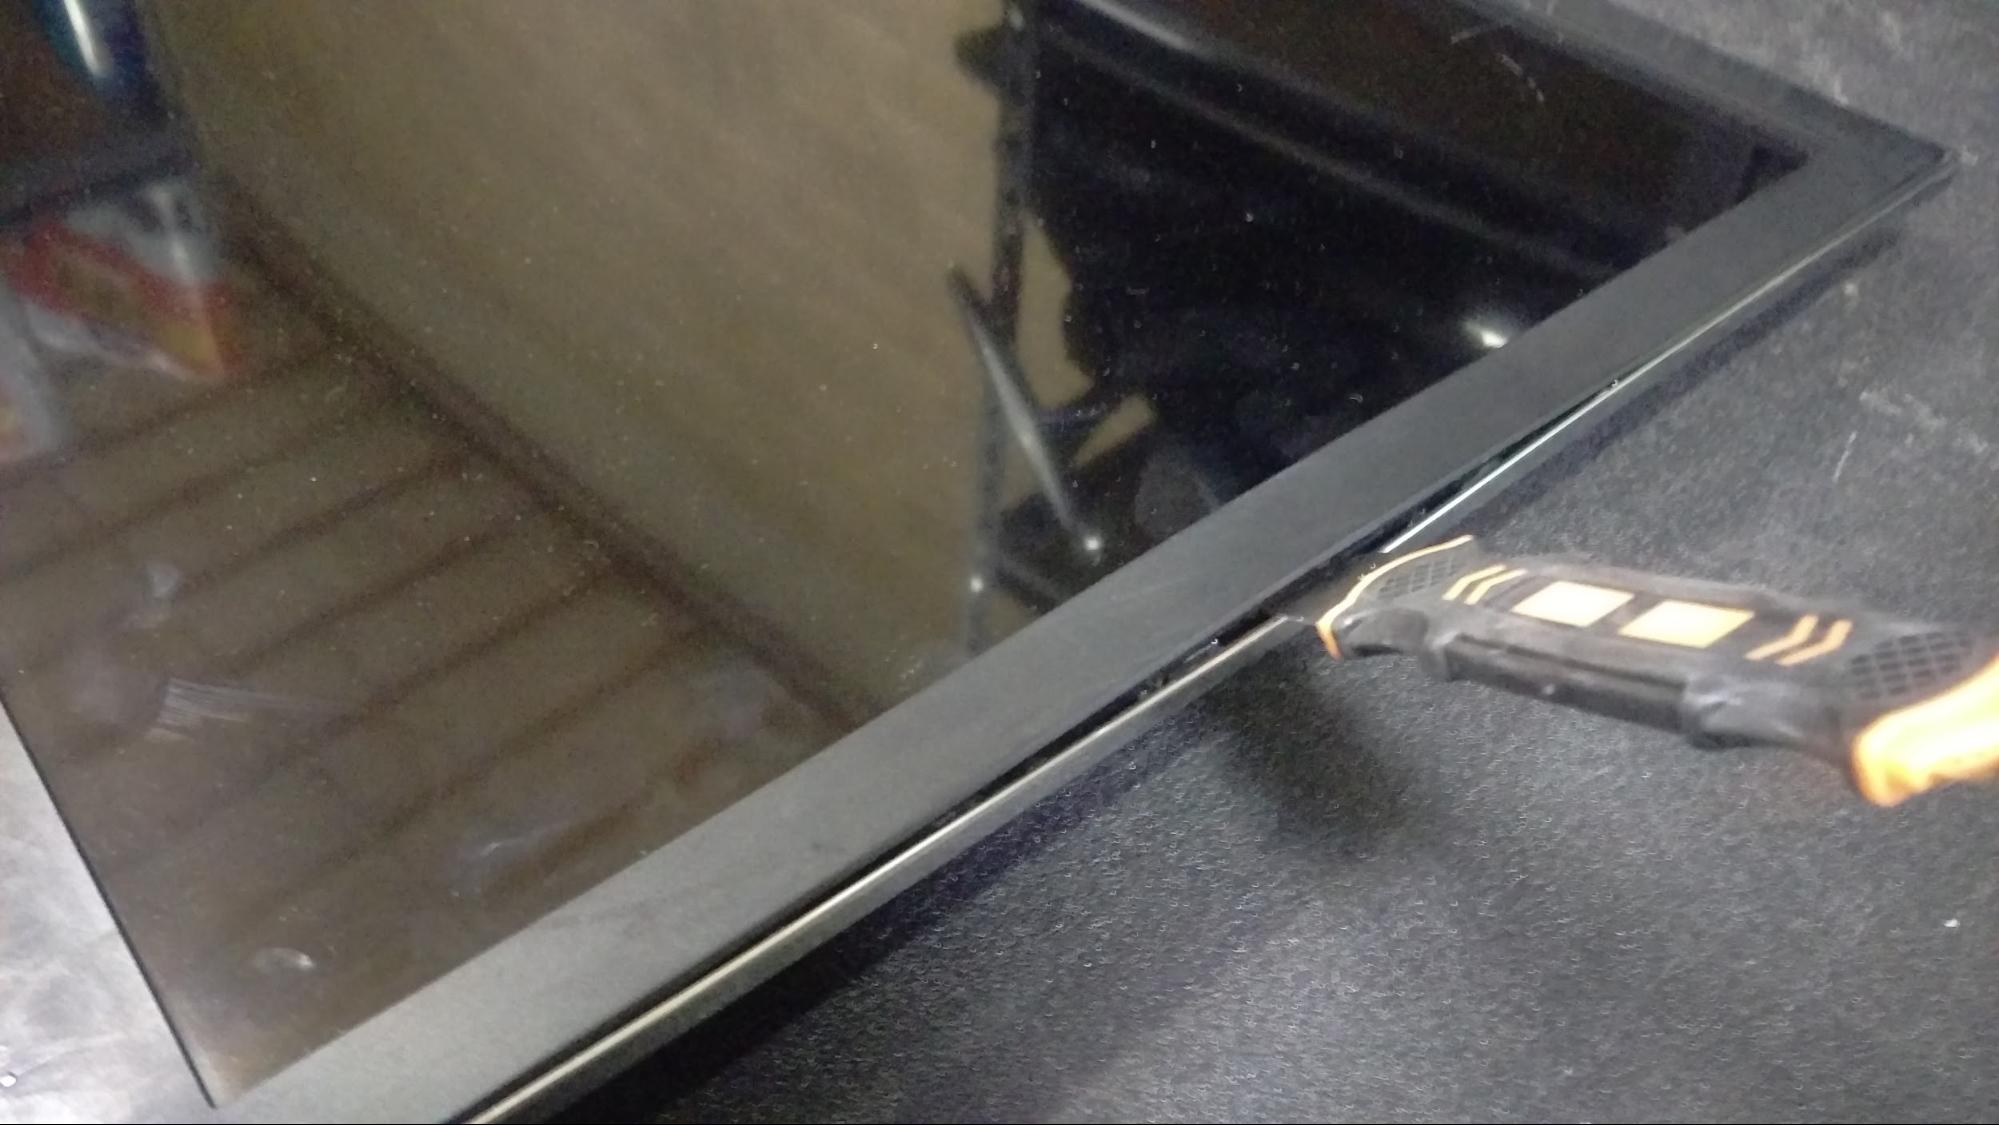
Flip the screen around, and stick the opener tool between the front panel and the middle panel. Like with the rear panel, you must move incrementally along the panel, prying gently up (being careful not to scratch or crack the screen -- plastic tools are best for this) until all the tabs have been undone.
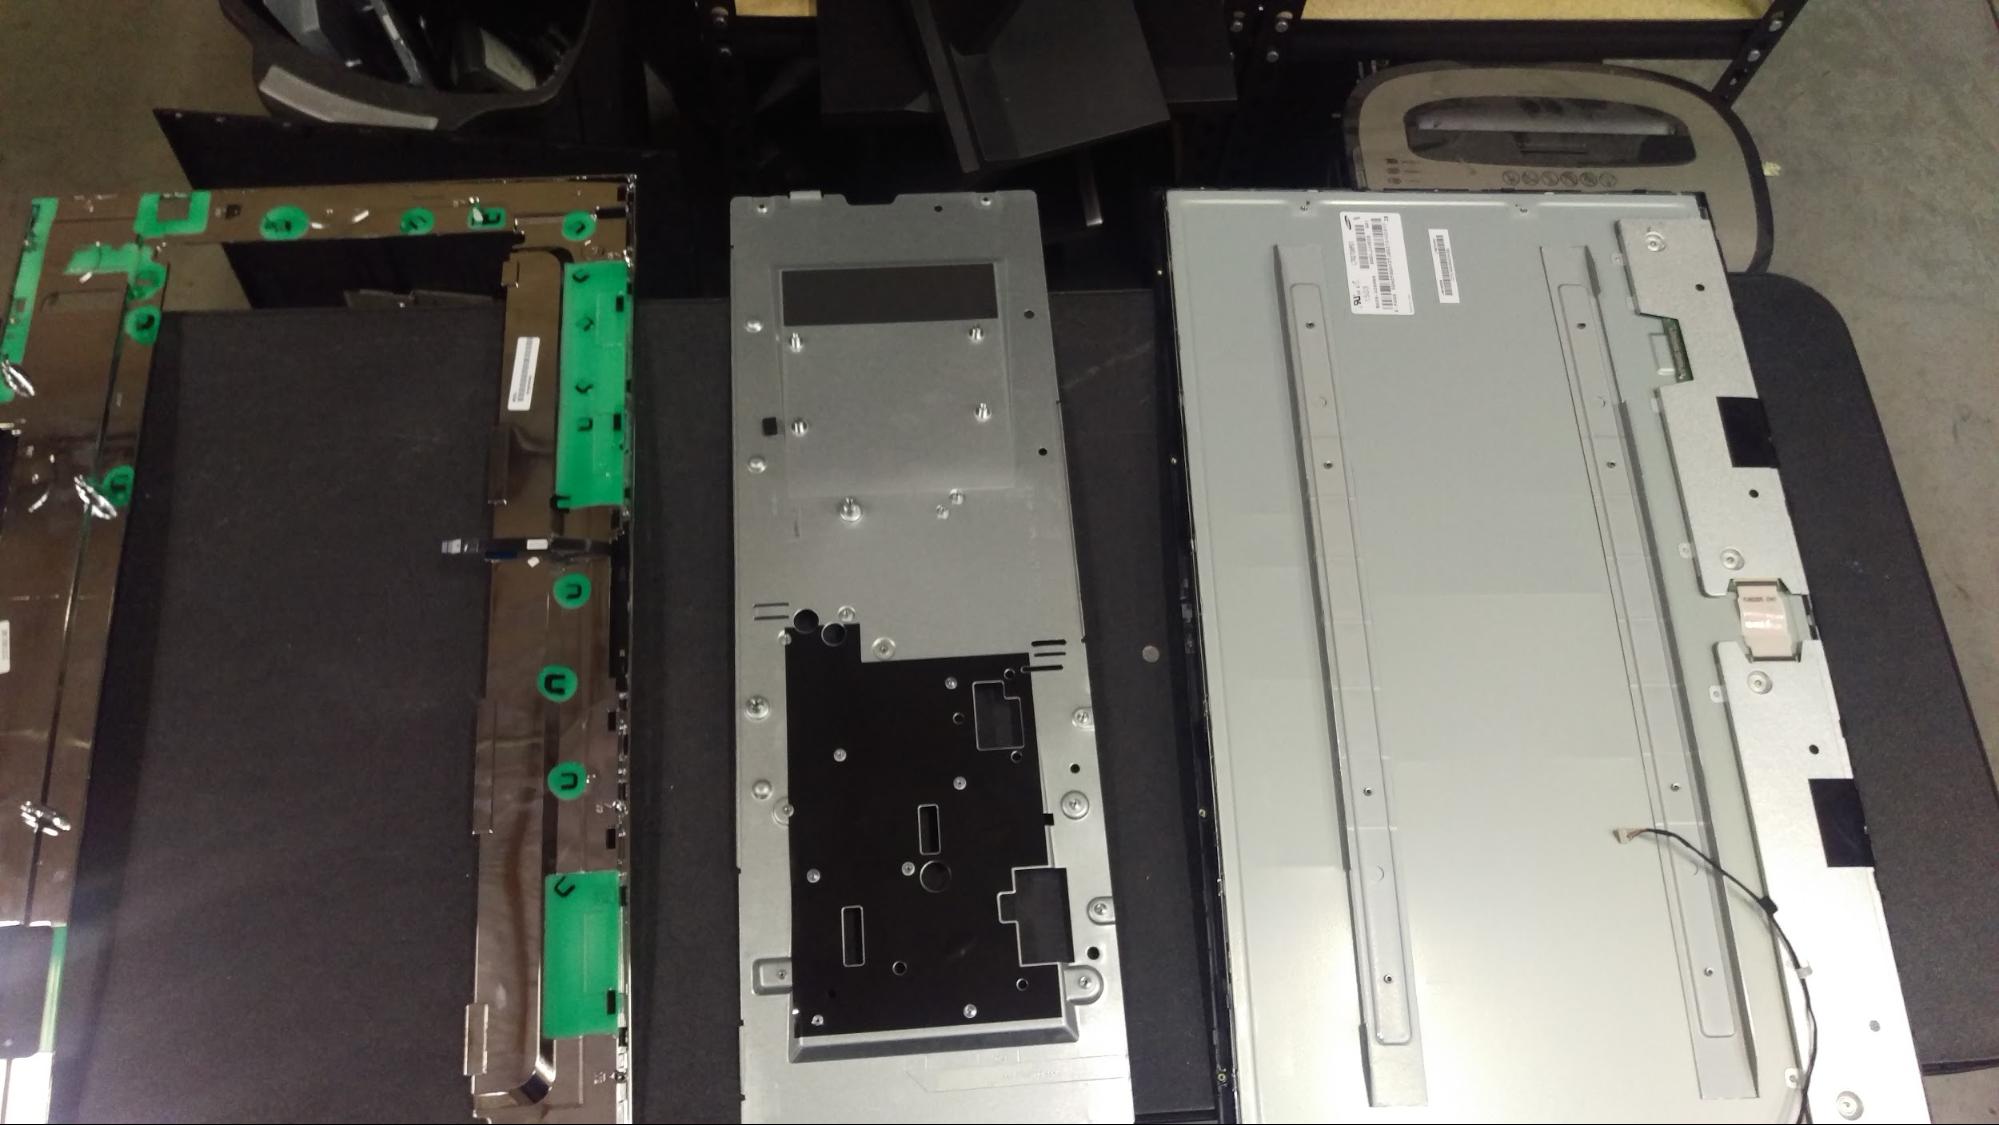
The back panel assembly should now easily come apart
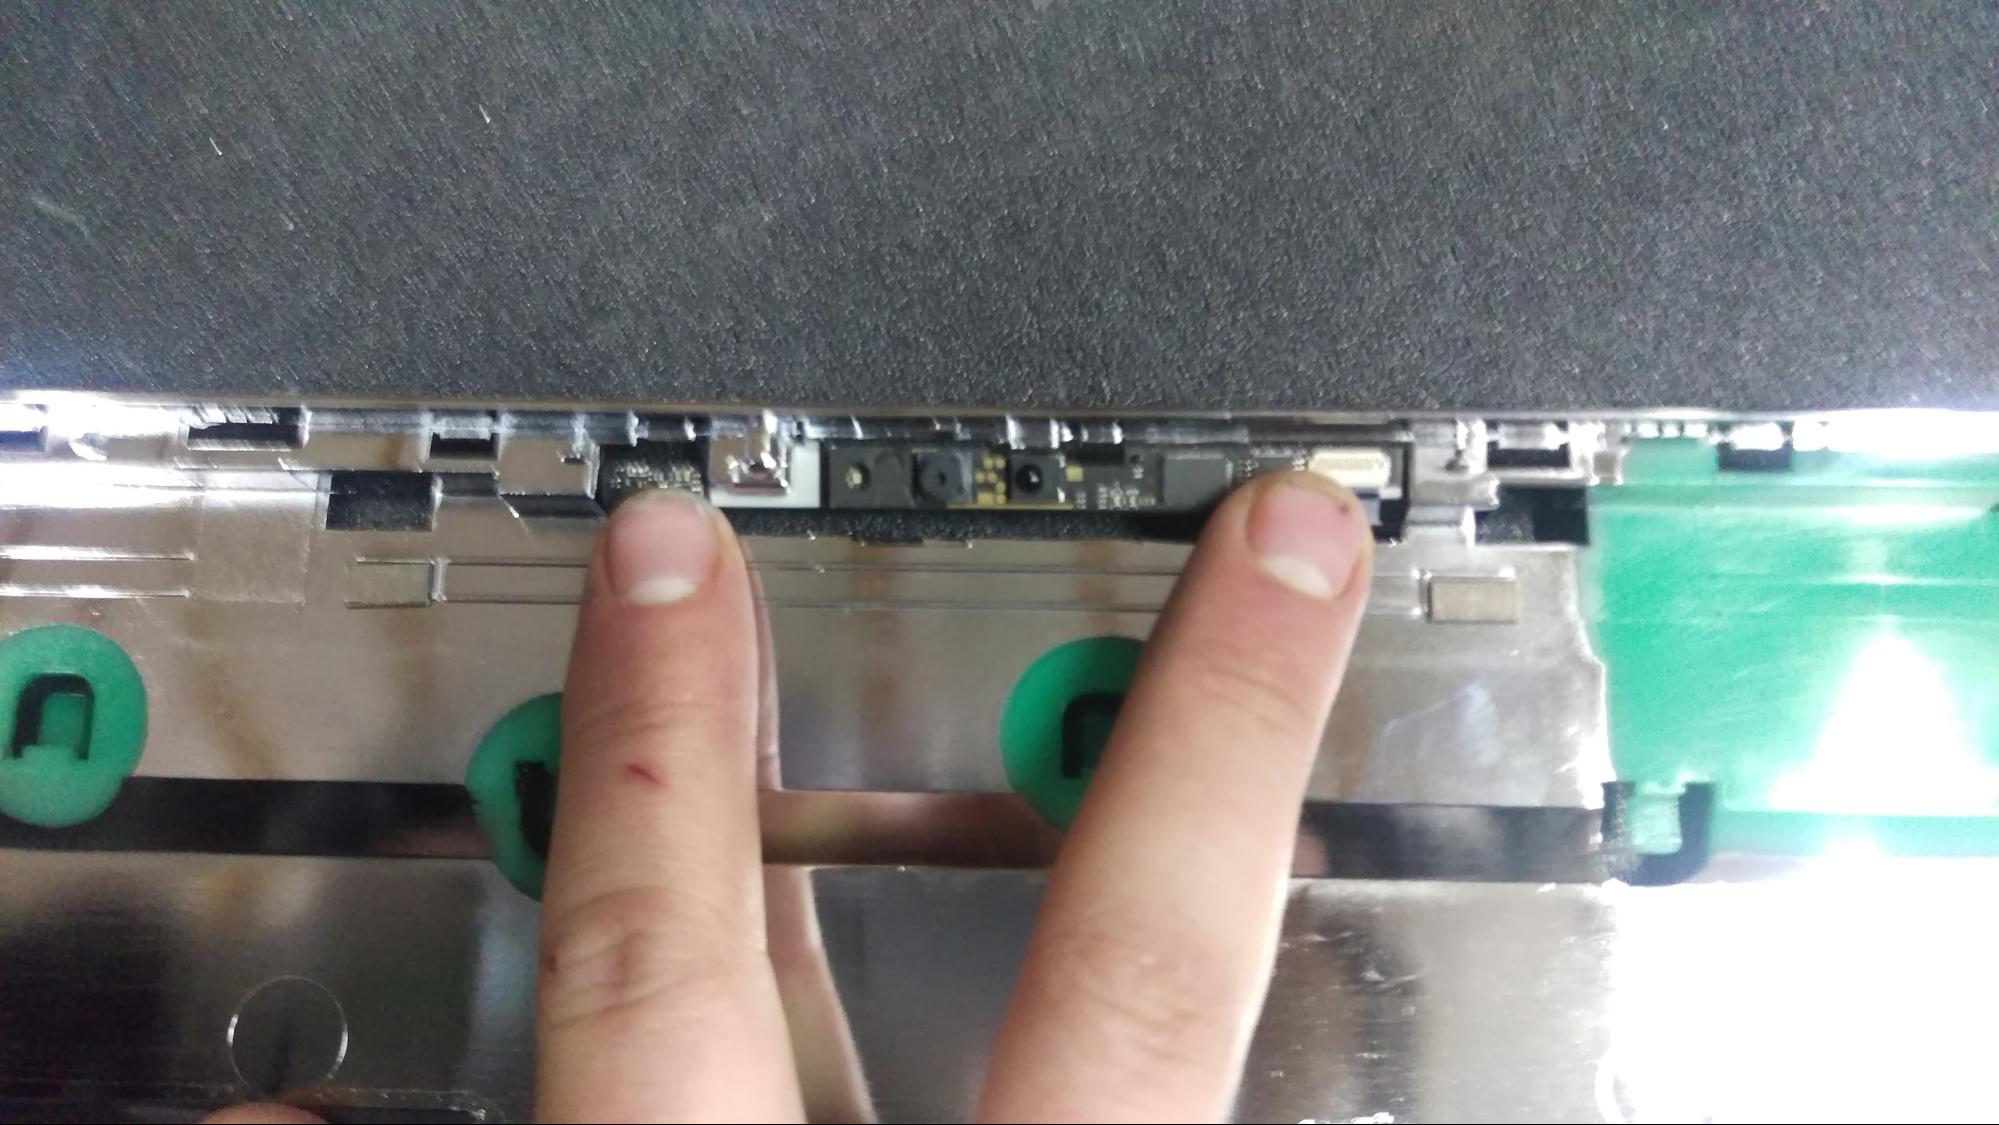
To remove the camera, place the silver frame so that the camera is pointing at you like in the picture below. Using even pressure, gently press on either side forward, until the camera assembly pops out. There are no screws, only minimal adhesive.
Now all that should be left is the front panel and LCD screen. The front panel is attached to the LCD with 4 screws on the right and left sides, so remove those and the panel should come right off.
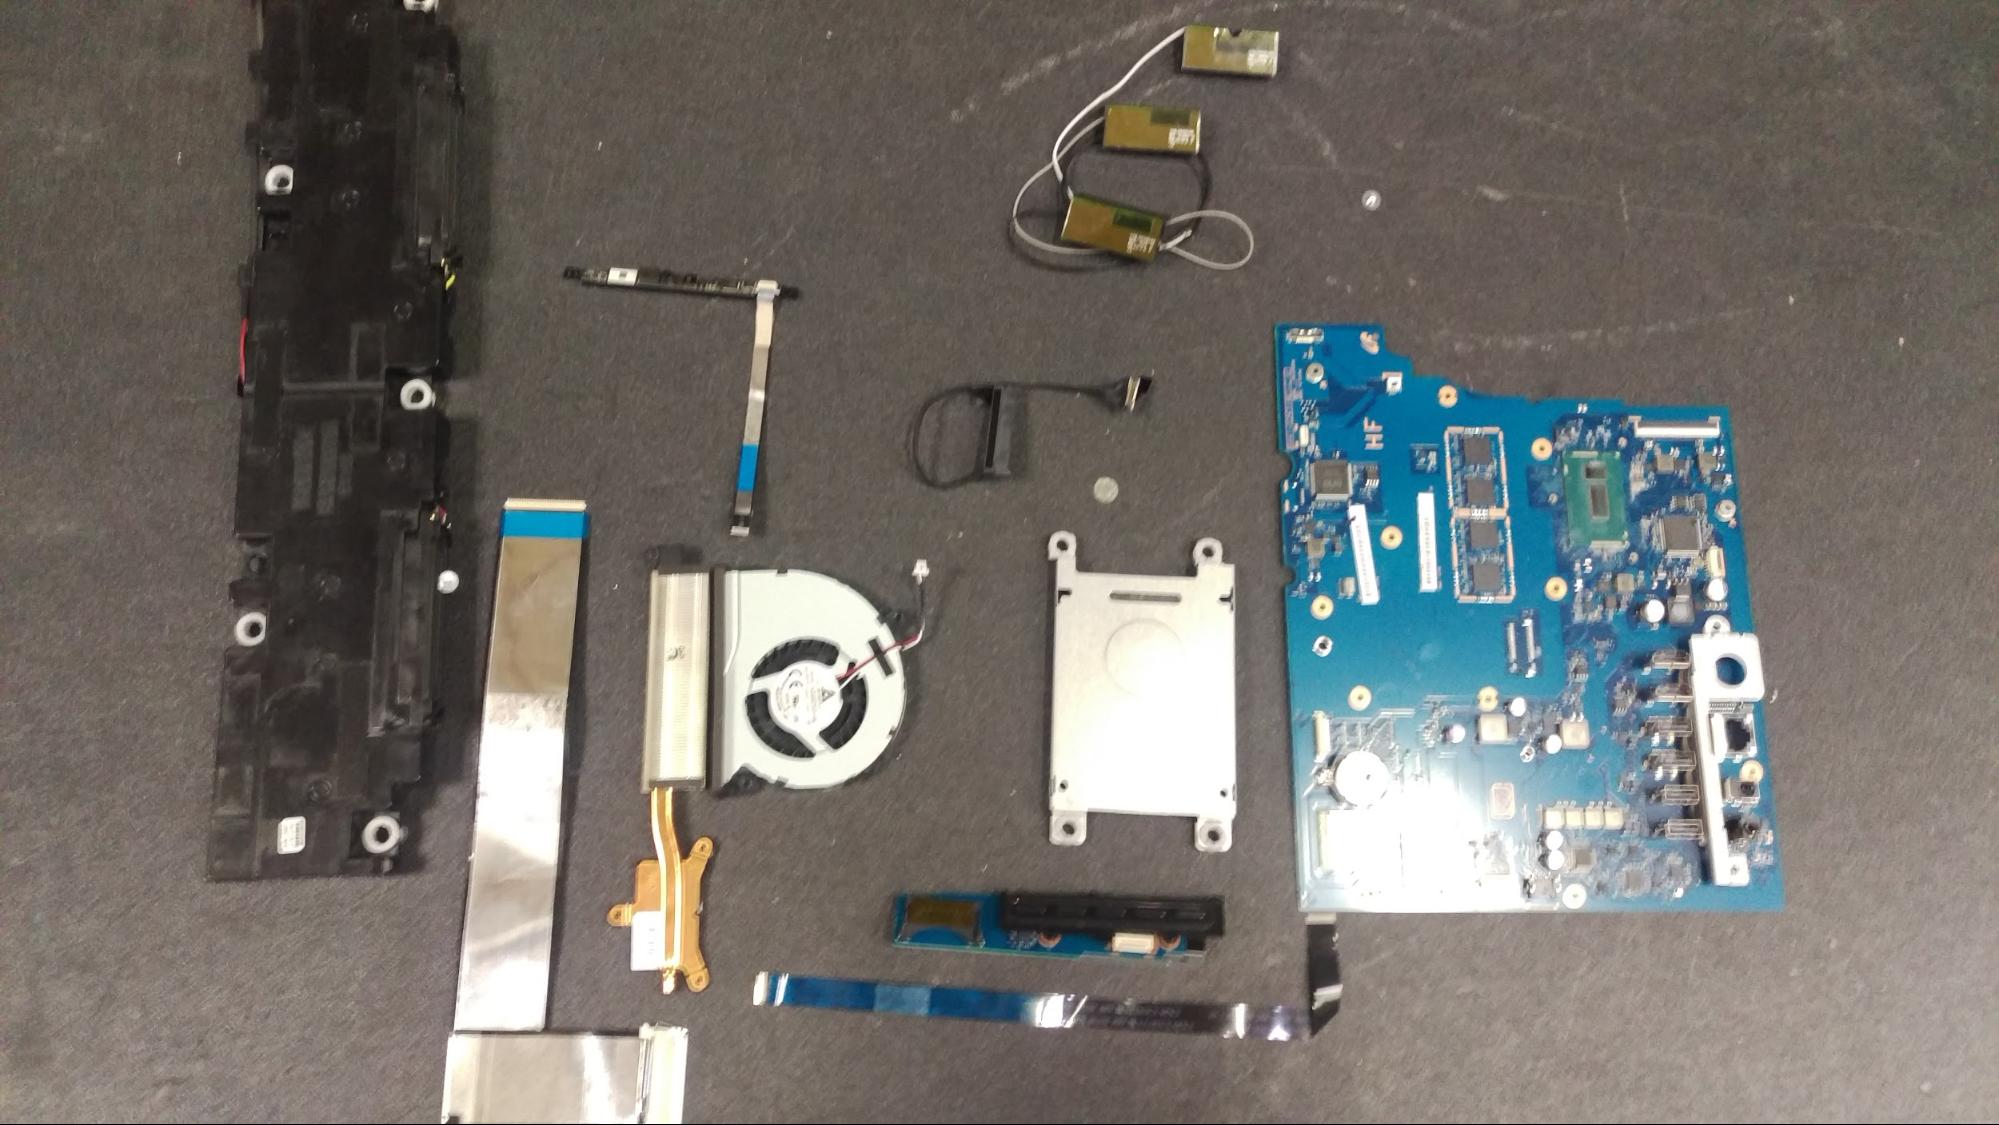
Finished disassembly, all internal parts
This device is overall very simple, almost anyone with a minimal level of handyman/repair experience could do it. This is one of the least involved and simplest computers to disassemble because almost everything is integrated, and it is very streamlined/minimalistic. There is no external power supply, DVD drive, CPU, RAM,or battery to remove. The parts it does have to remove are generally just a few screws away. In addition, the parts are all very high quality and nothing feels fragile or sketchy while disassembly.
Unfortunately what makes this device easy to disassemble also makes it not practical for disassembly. Since there are almost no parts to replace, very few people will be needing individual parts.
By Aden Webster